How to Set Up Corporate Regions
Connect your projects and contacts to regions for their easier grouping by location.
- Regions can be accessed in your settings under Corporate Regions.
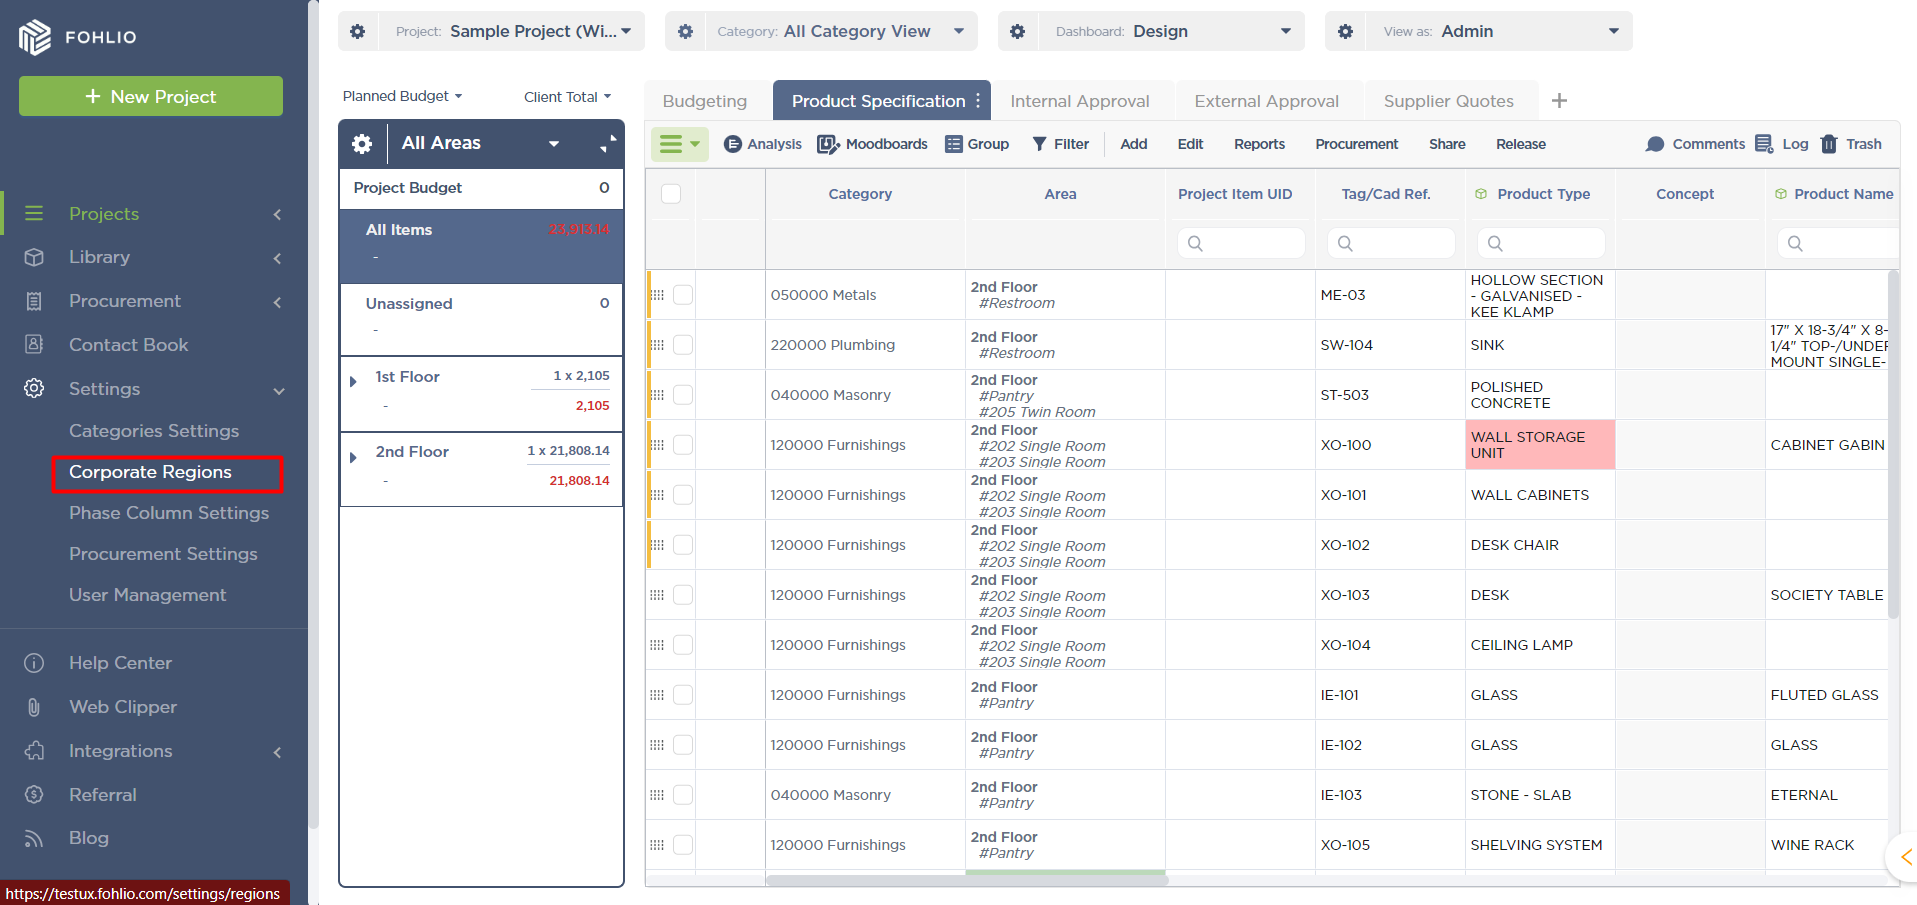
- Here you will see the list of existing regions, by pressing “+ Add Region” you can add new regions, or by clicking on the edit icon, you can edit already existing.
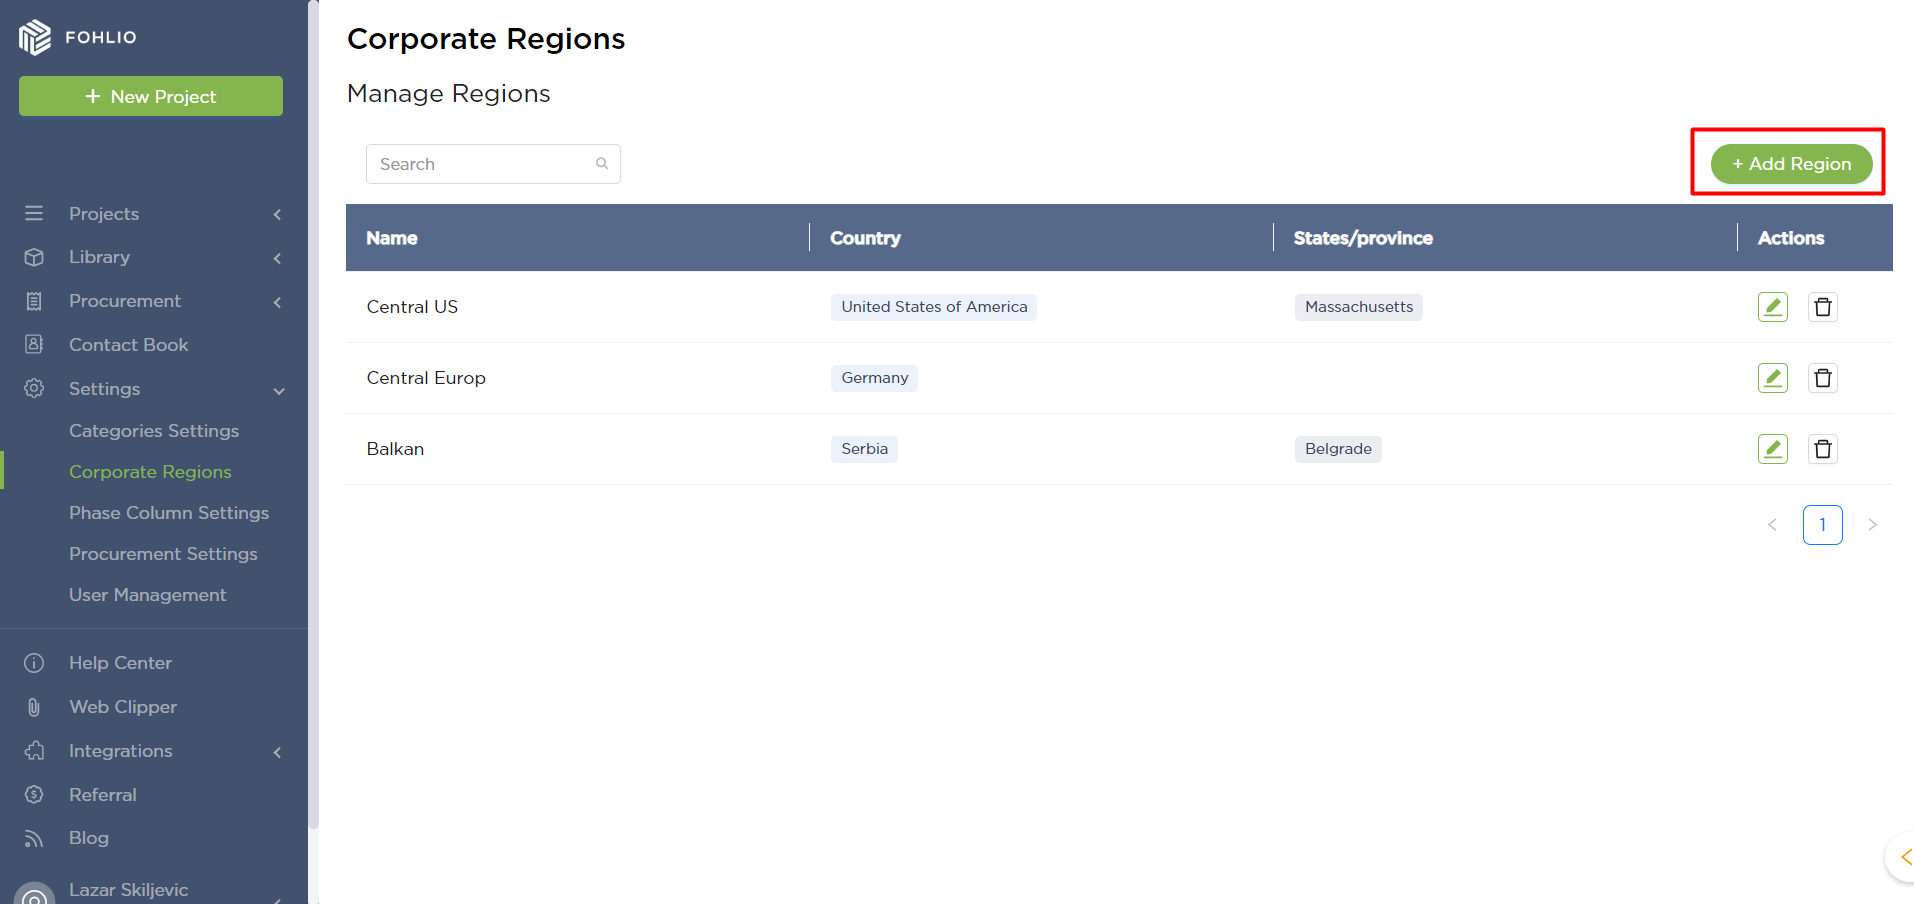
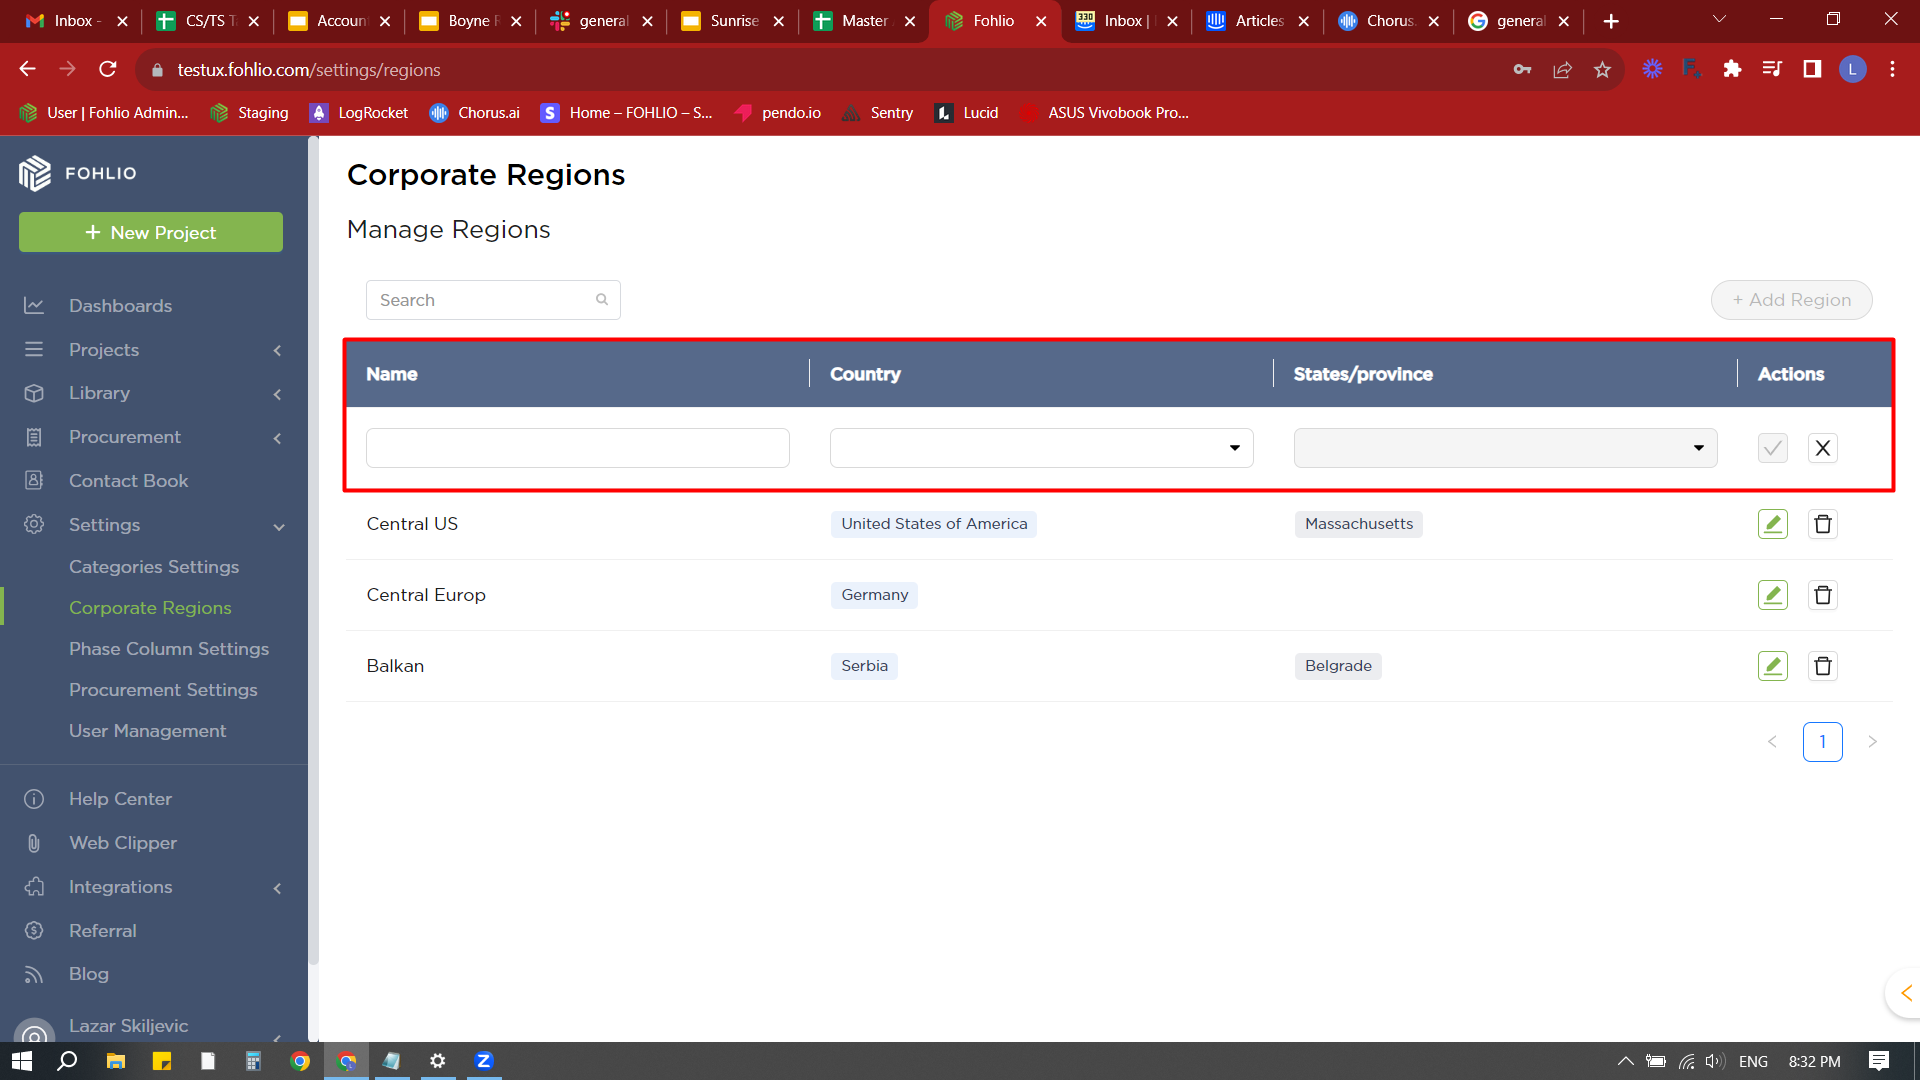
- When “+ Add Region” is clicked new row will appear where you can enter the region’s name, country, and state/province.
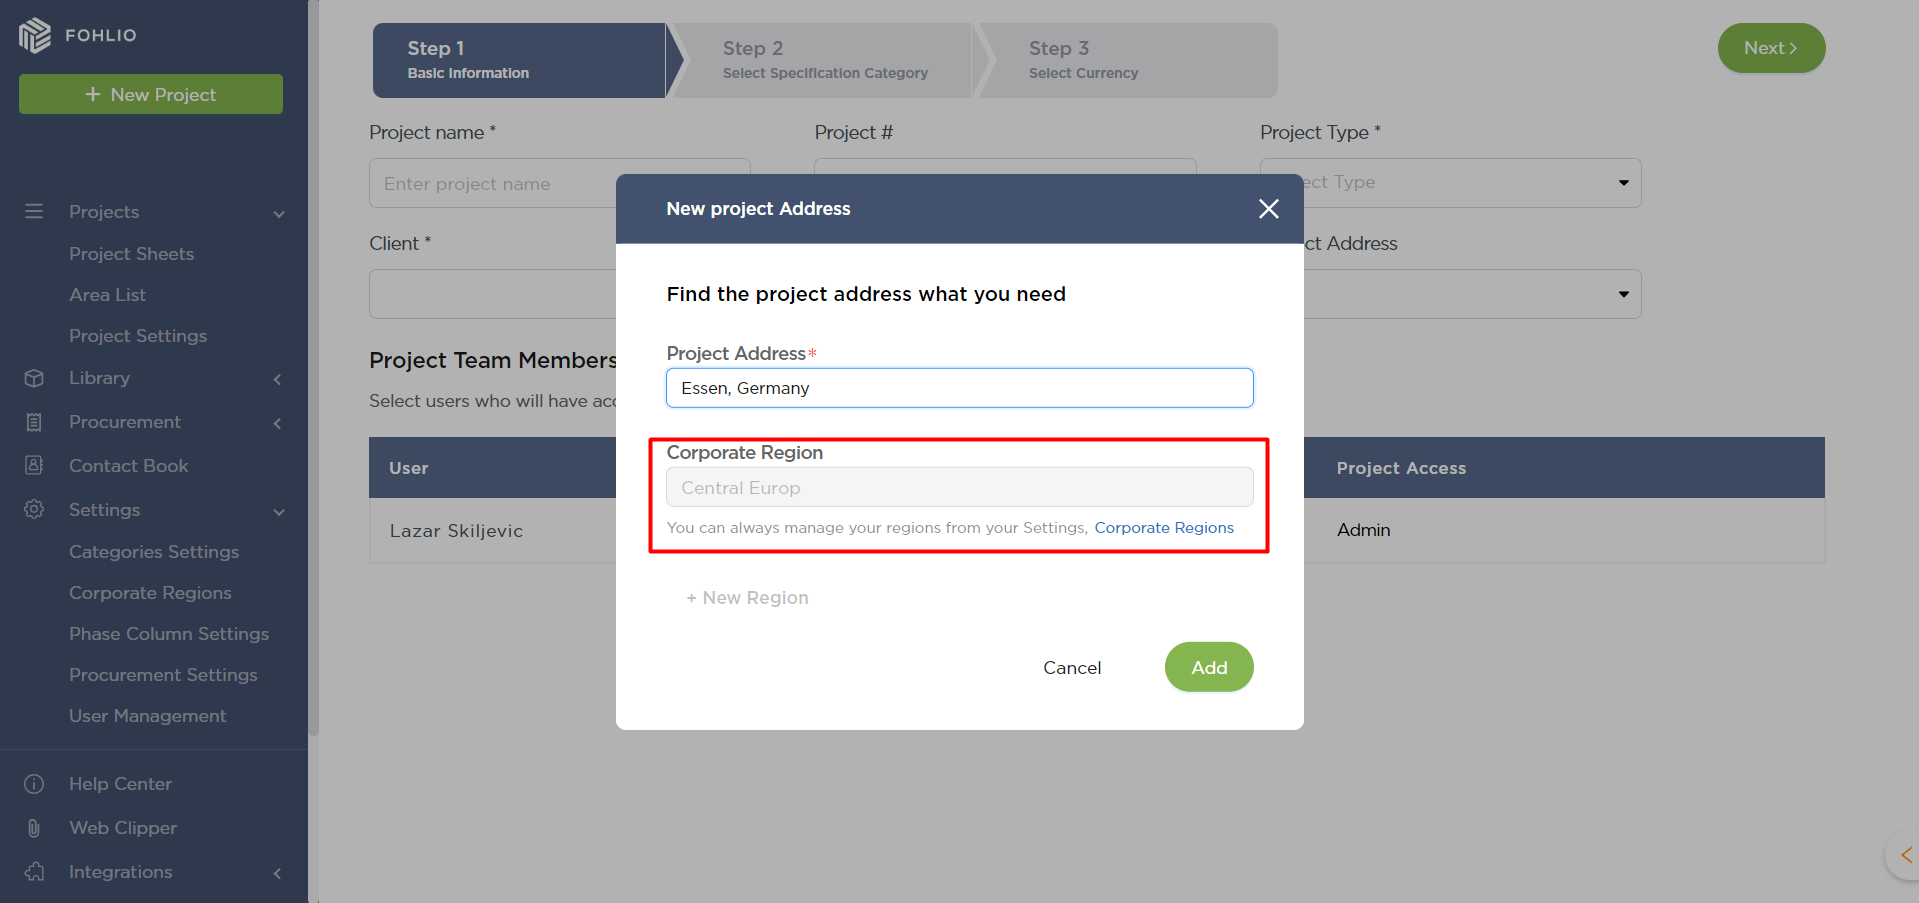
- Regions are connected to projects, when you are creating a new project there is a new field called “Project Address”. Here you can add where the project is situated:
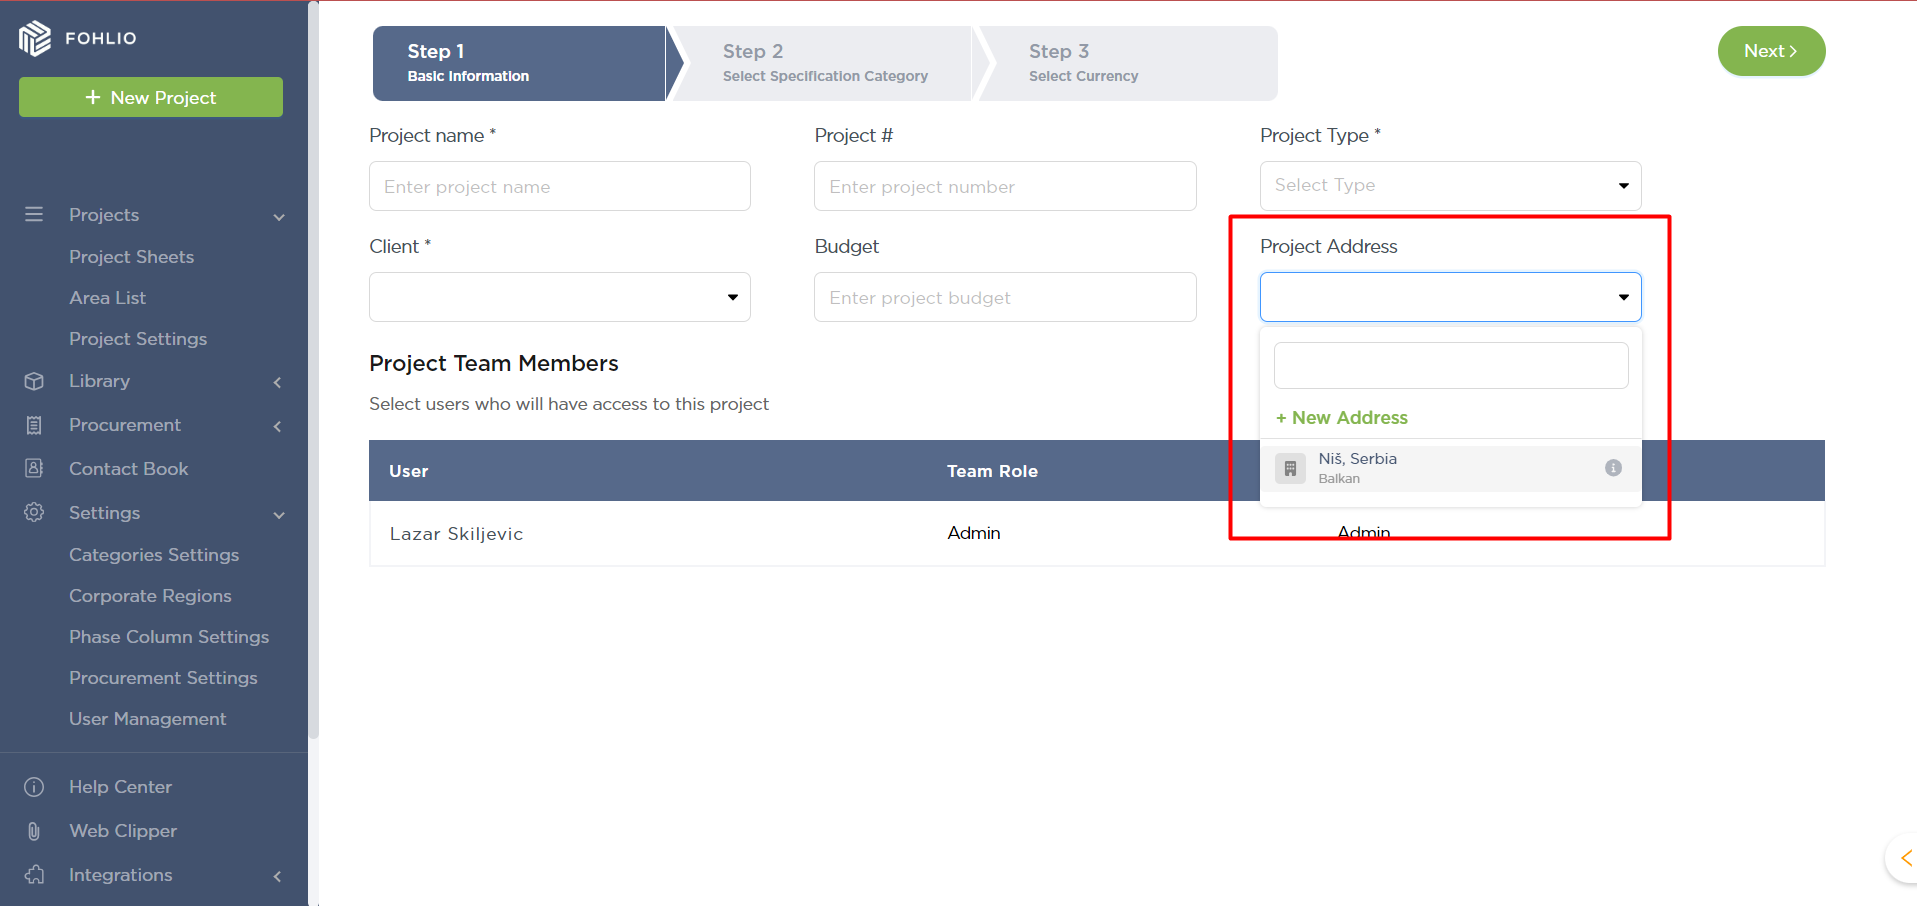
- By pressing on “+ New Address”, a pop-up will show where you can add the project’s address. The corporate region in this window will auto-fill from the already created corporate region in your settings.
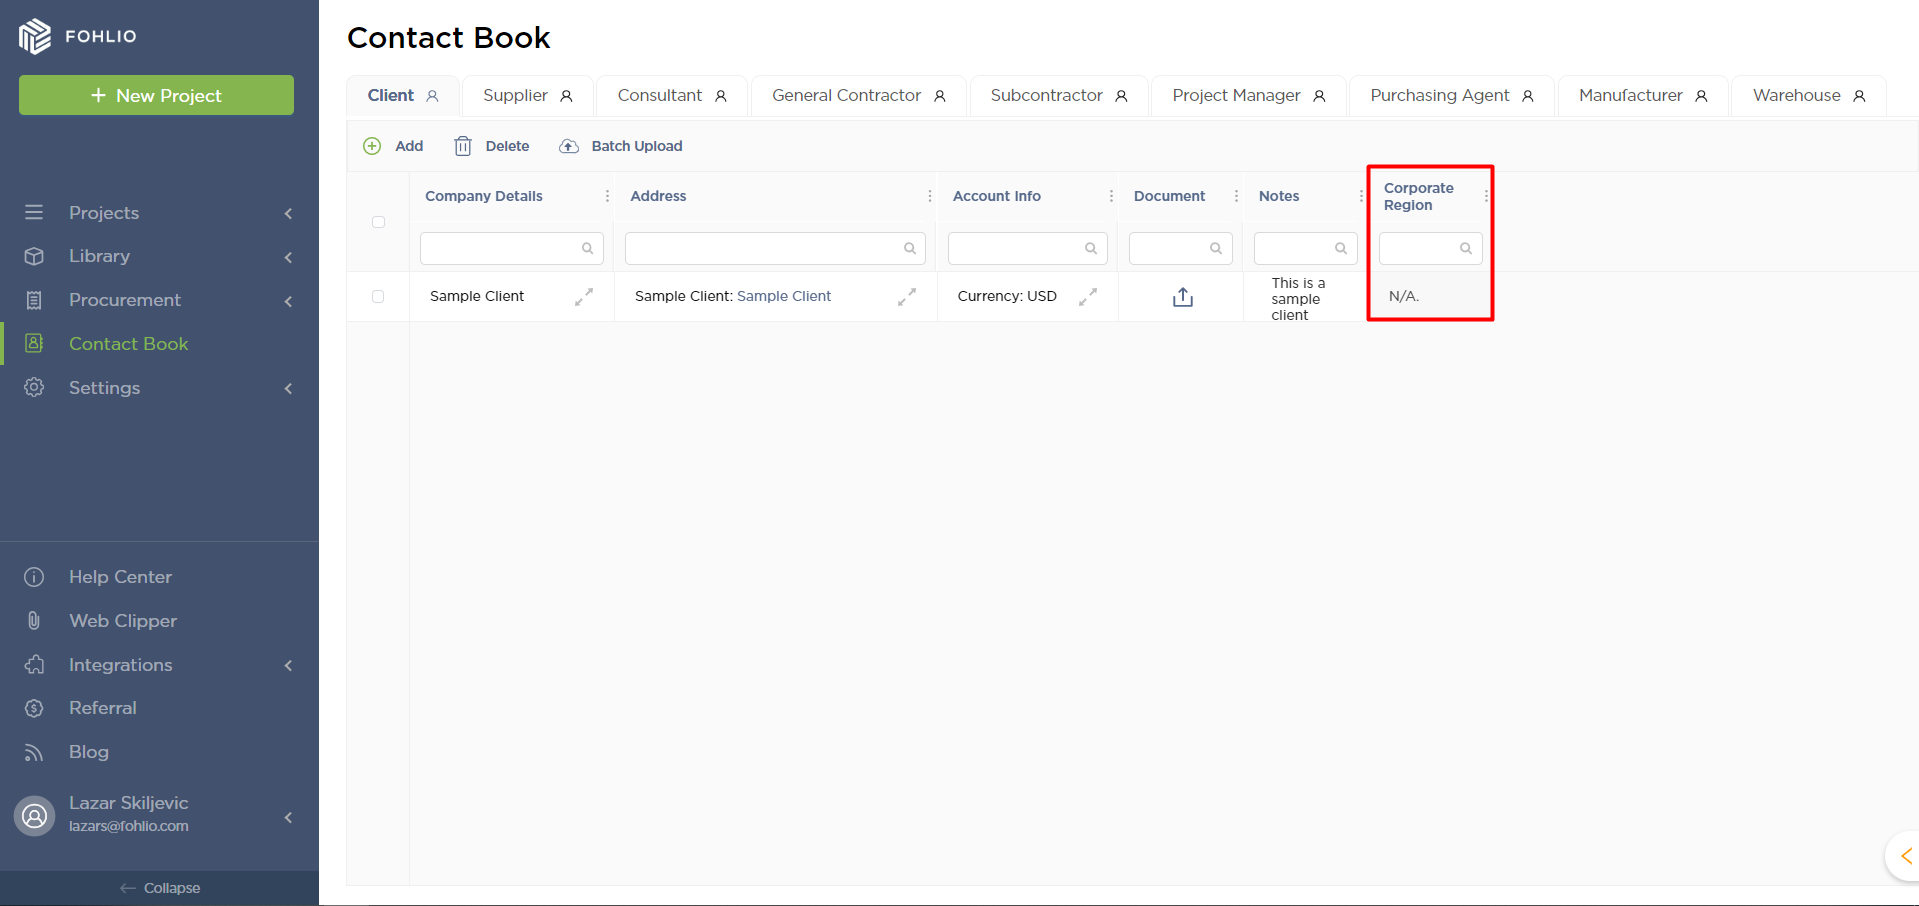
- Another area that is connected to regions is Contact Book. Here you can see that contacts will have corporate regions corresponding to them.
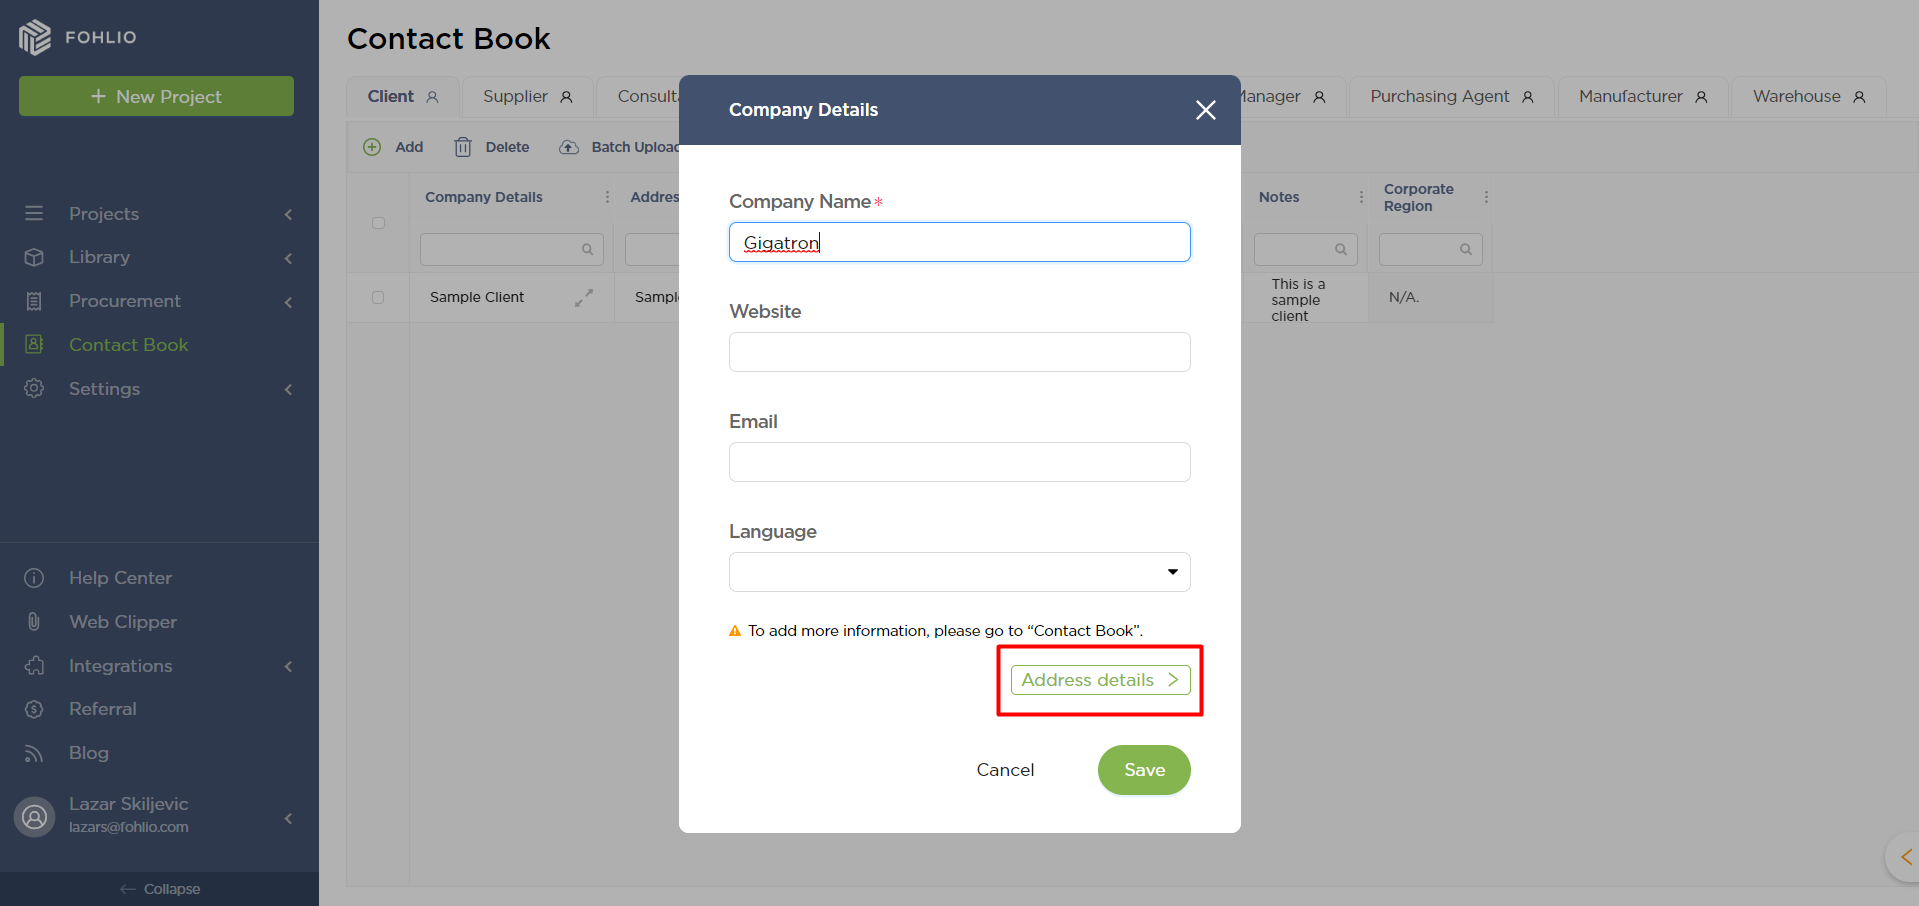
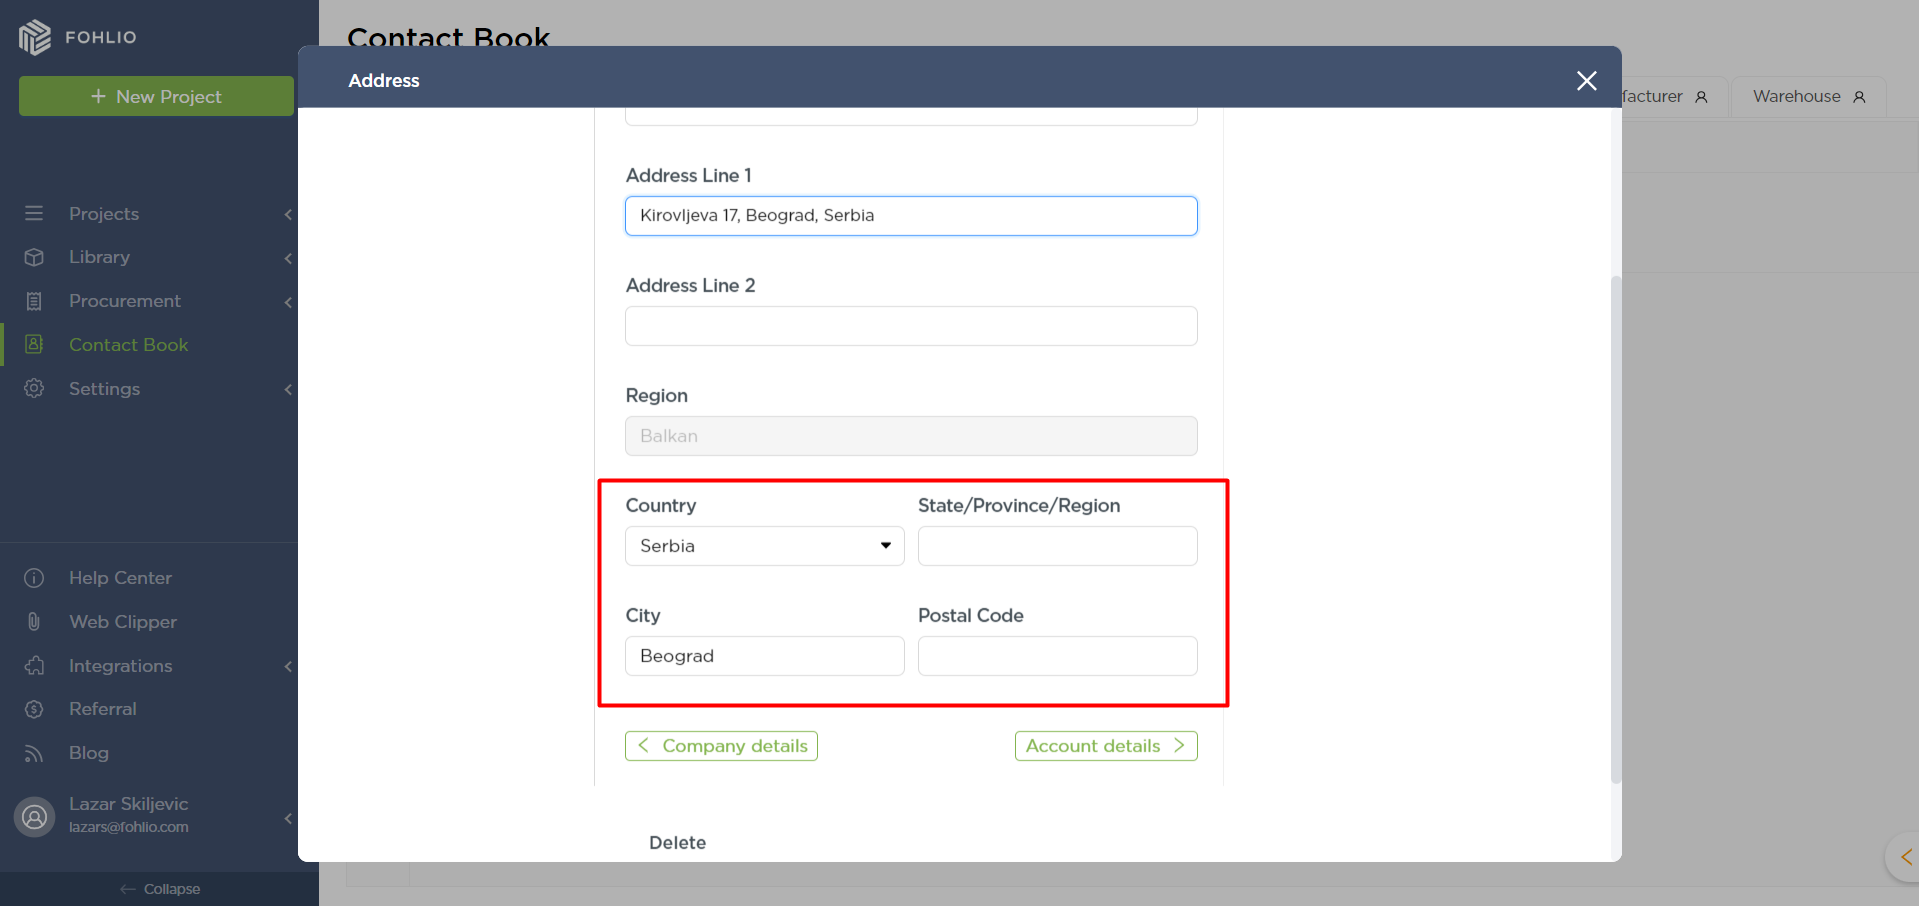
- When creating a new contact you can go to “Address details” to add the address of the contact.
- When you type the contact address you can press enter or click on the suggested address.
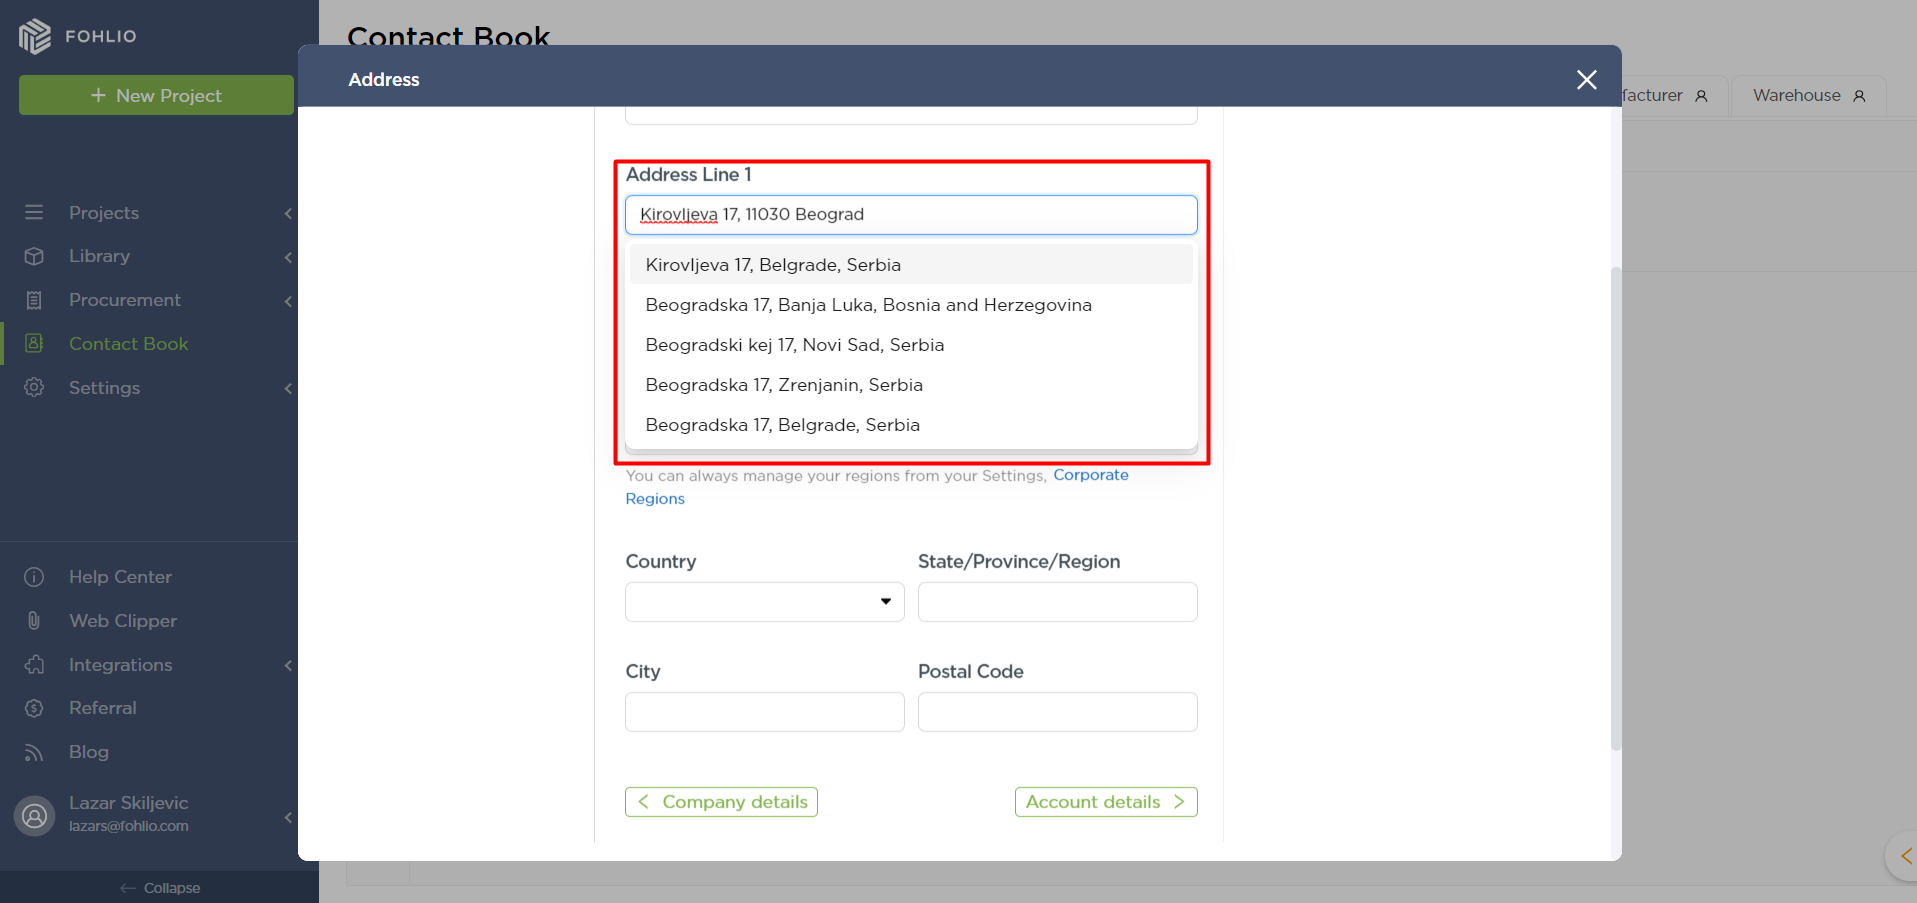
- Pressing enter or clicking on the suggested address will automatically fill in the rest of the contact’s details (Country, State/Province/Region, City, and Postal Code if available).
We hope this article was helpful, please rate the article, and reach us via Live Help if you still need assistance.
