Highlight and Color coding!
Unlocking the power of data visualization and analysis for easier processing
In this tutorial, you will learn how to master the art of Highlighting Cells or a row, tips, and techniques.
1. Single Cell Highlighting:
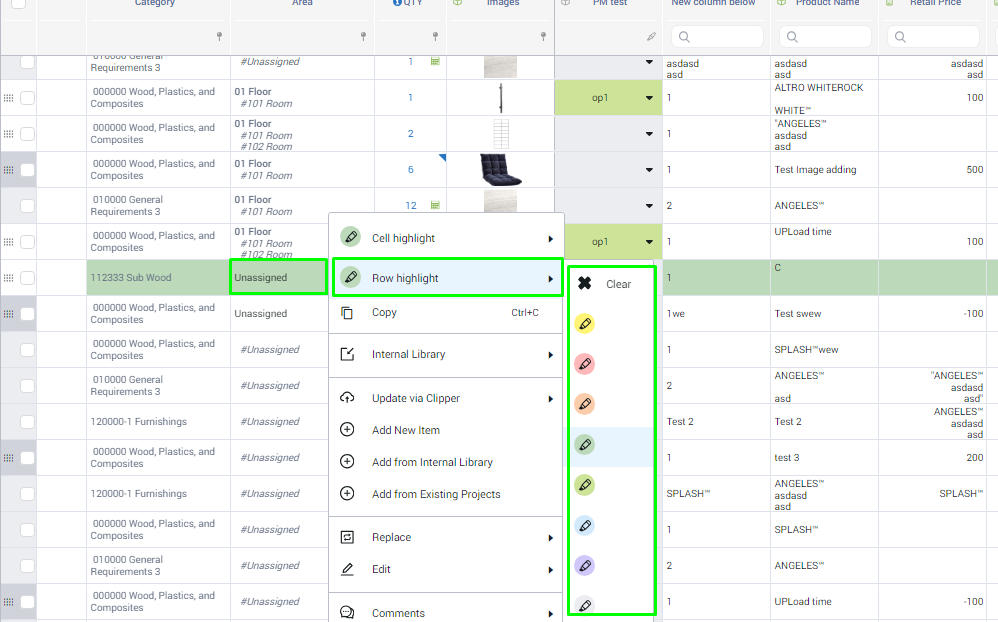
- Begin by right-clicking on any cell in your folio.
- You will see two options: "Cell Highlight" and "Row Highlight."
- Choose "Cell Highlight" to apply color directly to the selected cell.
- Select a color of your choice. You can change colors easily by selecting a different one.
- To remove the highlight, simply right-click and choose "Clear"

2. Row Highlighting:
- To highlight an entire row, right-click on any row.
- Select a color, and the entire row will be highlighted in that color.
Note: that this highlighting applies only within the current Phase view and not across all views.

3. Handling List Type Columns:
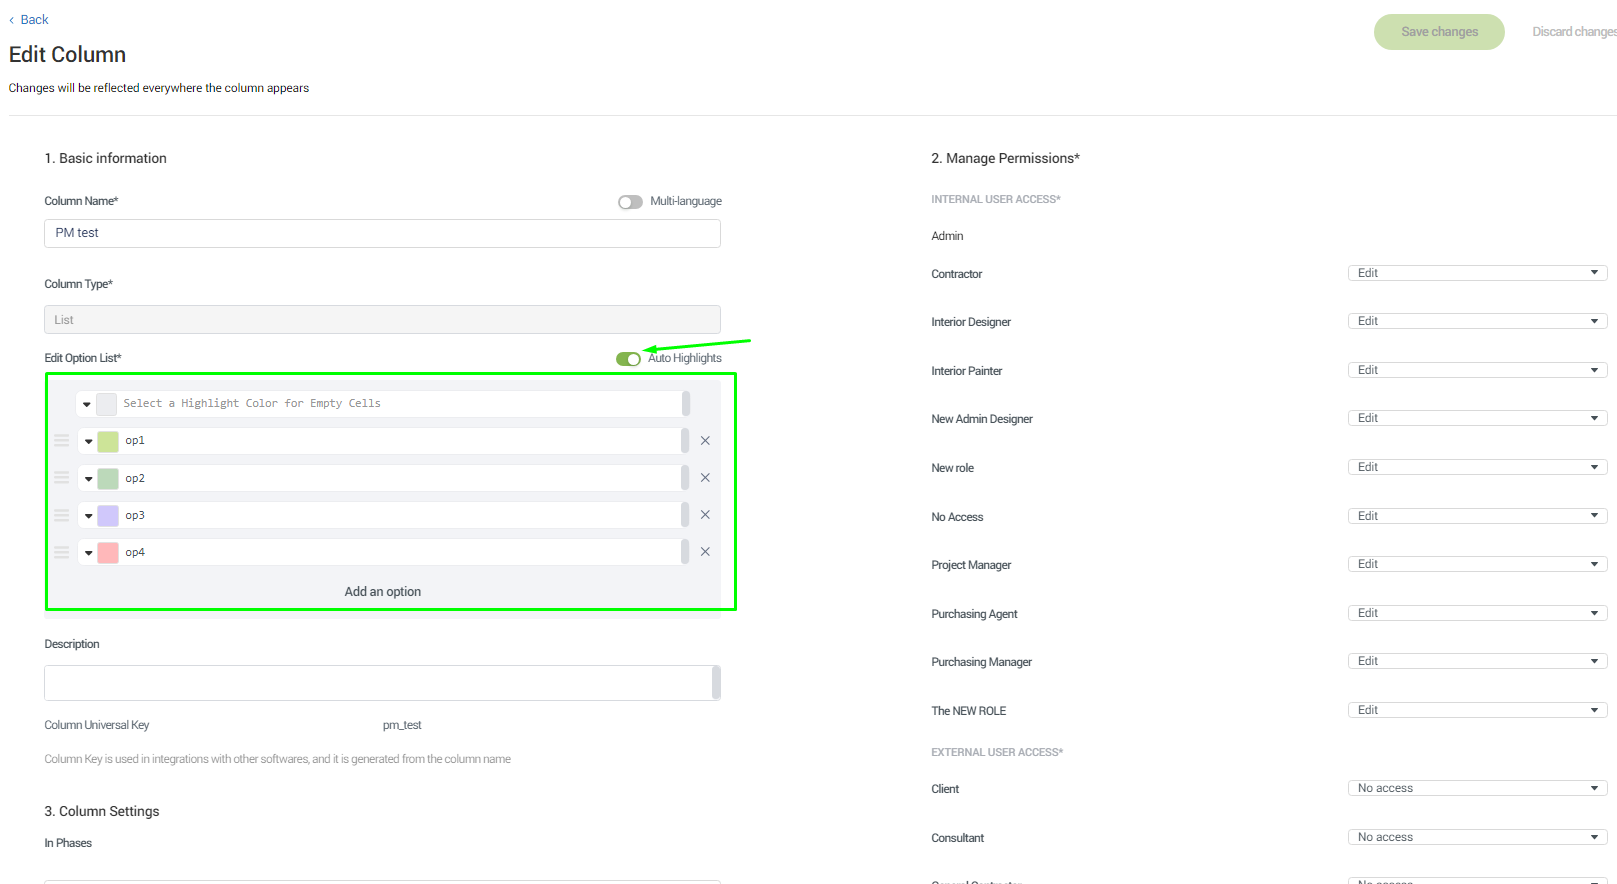
- List type columns might already have automatic highlighting applied.
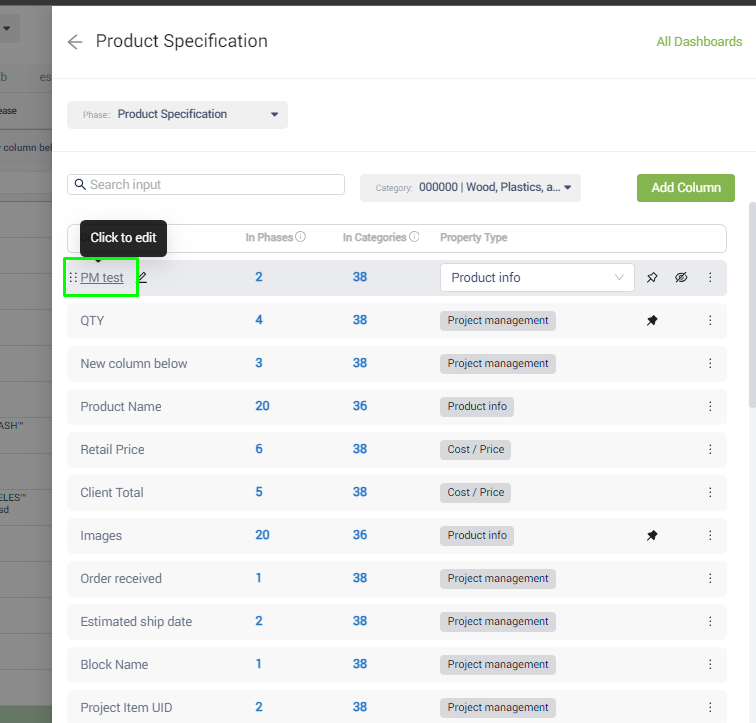
- You can adjust this behavior by going to the "Column Settings."


- Here, you can enable or disable auto-highlighting and customize colors as needed.

4. Edit Highlight Mode:
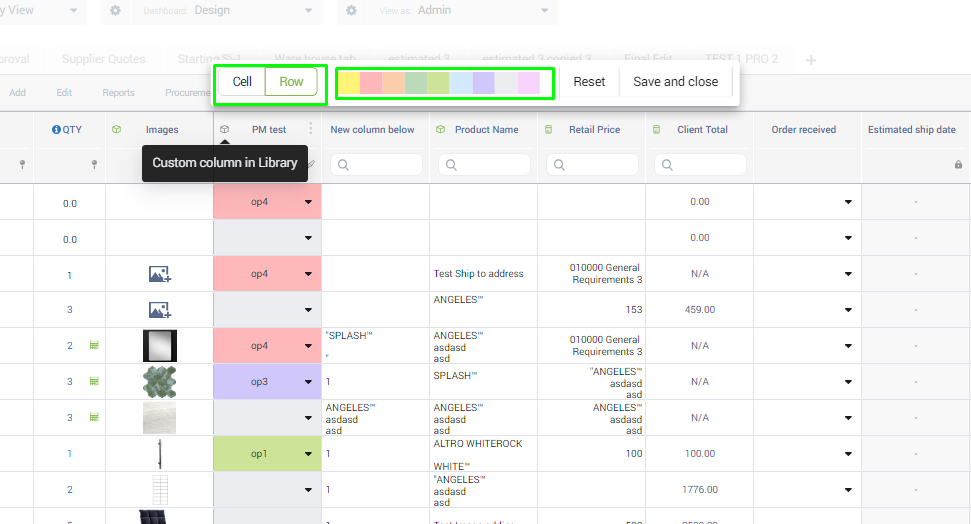
- For faster highlighting, go to "Edit" > "Highlight".
- From here, you can choose whether to highlight Rows or Cells.
- Select a color and start highlighting directly in the folio.
- To remove highlights, simply click again on the highlighted element.

5. Resetting Highlights:
- If you need to reset all highlights in your project, Click the Reset option to reset highlights on the Whole project.
- Be cautious, as this action will affect all users and products within the project.
Summery:
- Depending on your workflow, choose between auto-highlighting for list columns, highlighting specific Cells, or highlighting entire Rows.
- Highlights can serve as visual indicators for clients or team members regarding items that need attention.
---
Please rate this article or let us know about other ways we can improve the tutorial for other users. We hope you find this article useful.
