
Batch Upload with
-
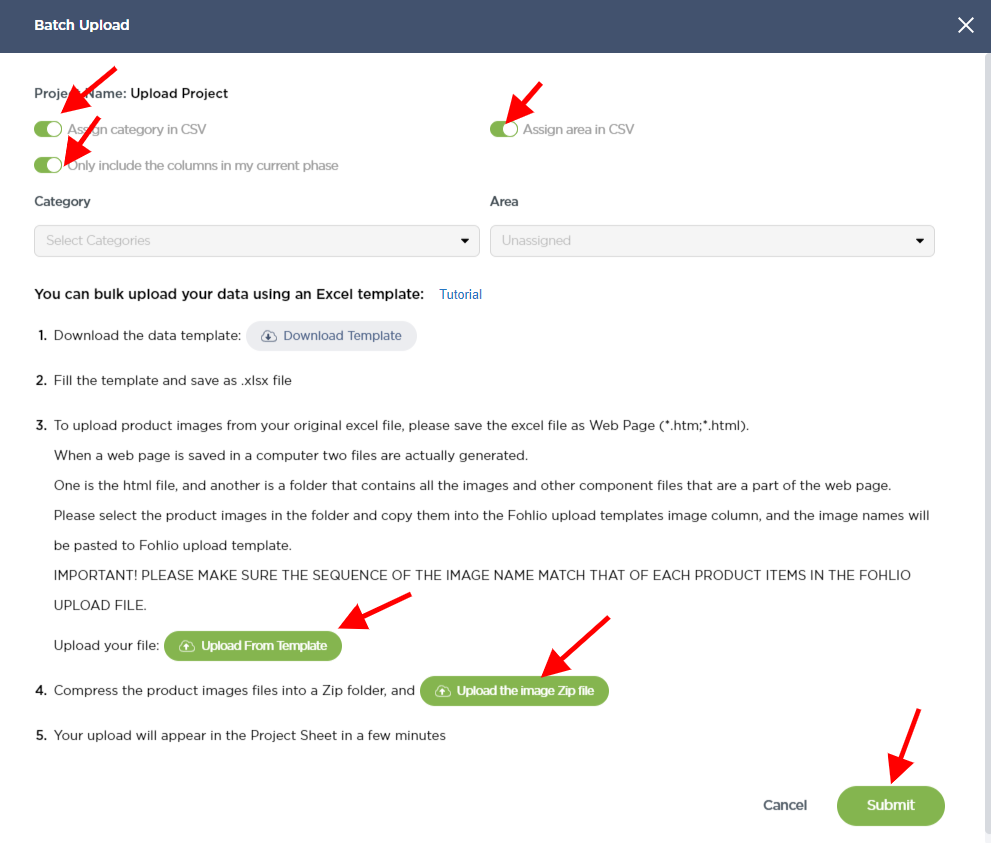
Go to Add and click Upload

Toggle ON:
-Assign category in CSV
-Assign area in CSV
-Only include the columns in my current phase
Select: Download Template.

Understanding Area Layers and Area Names
- Area Layers "Floor" and "Room" are highlighted as Green and Red respectively
- Area Names "First Floor" and "Second Floor" are under the Area Layer "Floor"


Choosing Categories
-
Go to "Categories Settings" or click on the Settings Icon in the upper corner of the screen
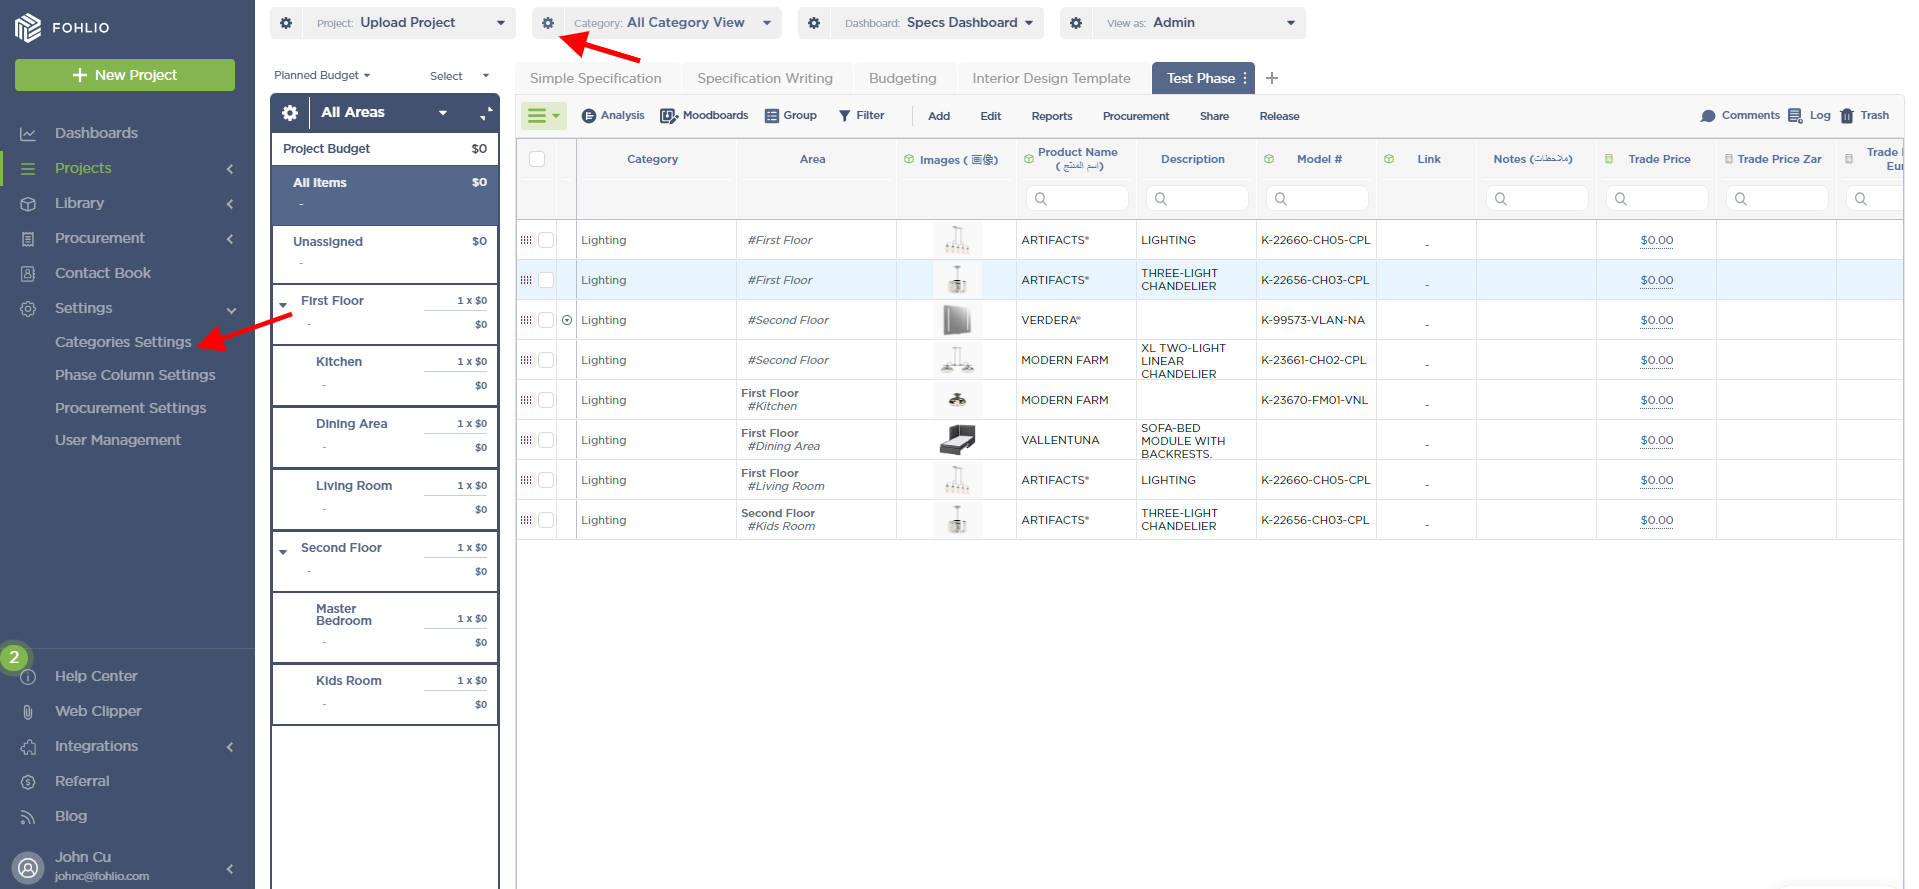
- Choose the corresponding Category:
Category Name = Green
Sub Category Name = Red


Adding items to the CSV file
-
Add the corresponding data into the proper column and Click "Save as a Web Page(*.htm,*.html)"

NOTE: The Images won't have a steady position. It can be moved around.
-
Your Excel file should create a folder that contains all the images you pasted.

-
Double Check the images. It should be the same sequence base from your original file

NOTE: Original File comparison. Refer to the images as they should have the same sequence. Be careful if you have cells with blank images.

*Original Excel File (Source)
-
Highlight all the Images you need from the folder
-
Press "CTRL + SHIFT + Right Click on the First Images"

-
Click "Copy as path"
IMPORTANT: Click/Choose the first image

-
Go Back to your Main Template (Excel File/WEB PAGE). Click on the first cell of the Image Column and Paste

-
The items would be sequential and would be paste as a path

NOTE: We only need the Image Name the same as the folder Example "image001.png"

-
Highlight the whole path and copy.

NOTE: Leave the image name
- Click Find & Select < Replace
- Copy the path and paste it into "Find What". Make sure the "Replace with:" is blank. Click "Replace All"

NOTE: You can also press CTRL + H in order for the "Find and Replace" menu to appear.
-
Now all items only have the image name.

- Save as an "EXCEL FILE" *.xlsx
- Go Back to your Image Folder and make a Zip File of all your images

-
Go back to Fohlio and Go to Add and click Upload.
Finaly upload the template, with the correct toggels:
- Assign category in CSV
- Assign area in CSV
- Only include the columns in my current phase
Click on Upload from Template > upload the finalized template
Click on Upload the image Zip File > Upload the Images zipped file
Click on "Submit"
Thanks for following along!
We hope this article was helpful, please rate the article, and reach us via Live Help if you still need assistance.