How to create Client Invoices
Create Invoices for your client to approve, track payments, and link all your procurement documents for easier workflow management.
Learn how to efficiently create and manage client invoices, track payments, and customize invoice details with ease using Fohlio's intuitive features.
Create the Client Invoice From Project sheet:
- Open Fohlio and navigate to the Project Sheets.
- Select the desired items for the invoice.
- From the upper bar Click on Procurement and choose "Create Client Invoice" option from the drop-down menu.
Setting Invoice Details
- After Clicking on Create invoice a new Client invoice will be created
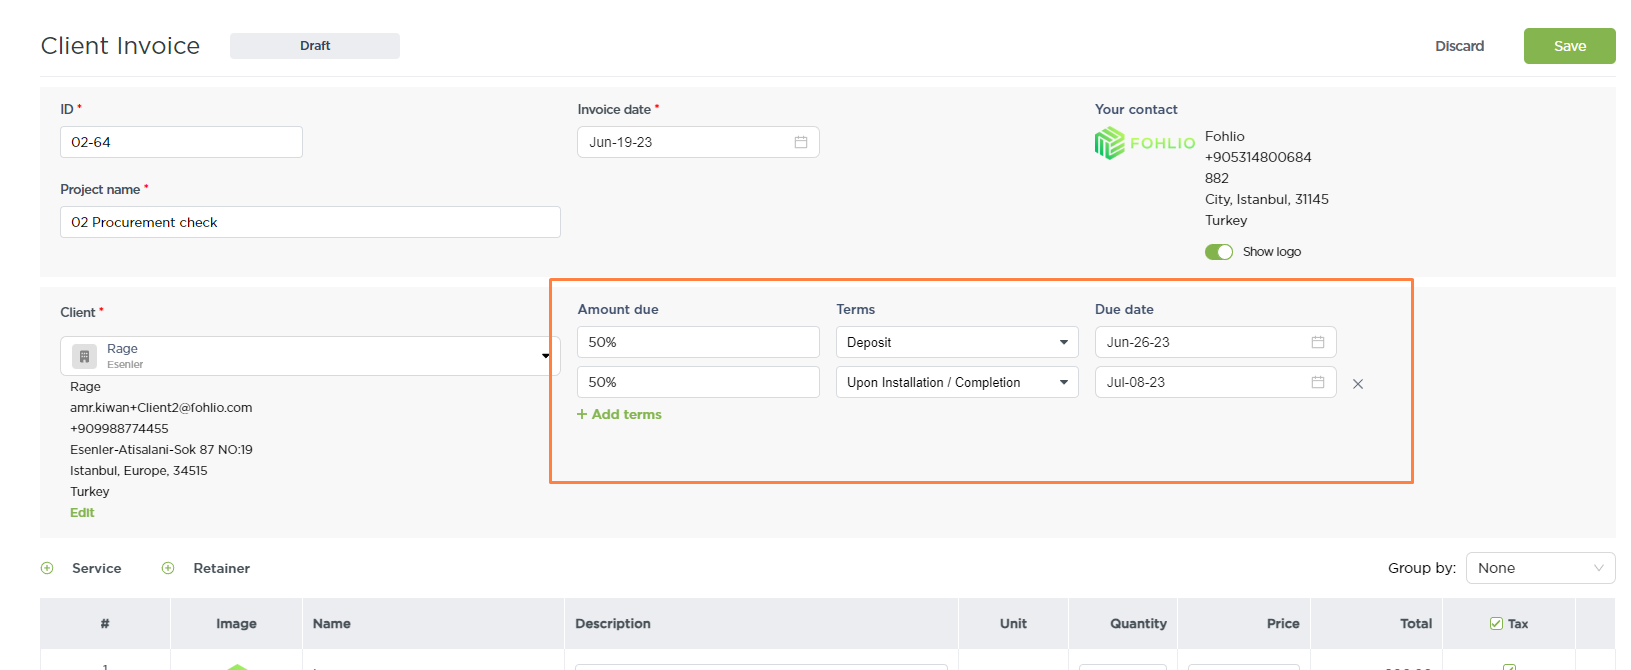
- .Set the Client Invoice ID, Invoice Date, and payment terms for the invoice.
- The payment terms can be set as a percentage (%) or amount($).Example: Set the payment terms as a percentage (e.g., 50% for each payment).
Adding Services or Retainers (Optional)
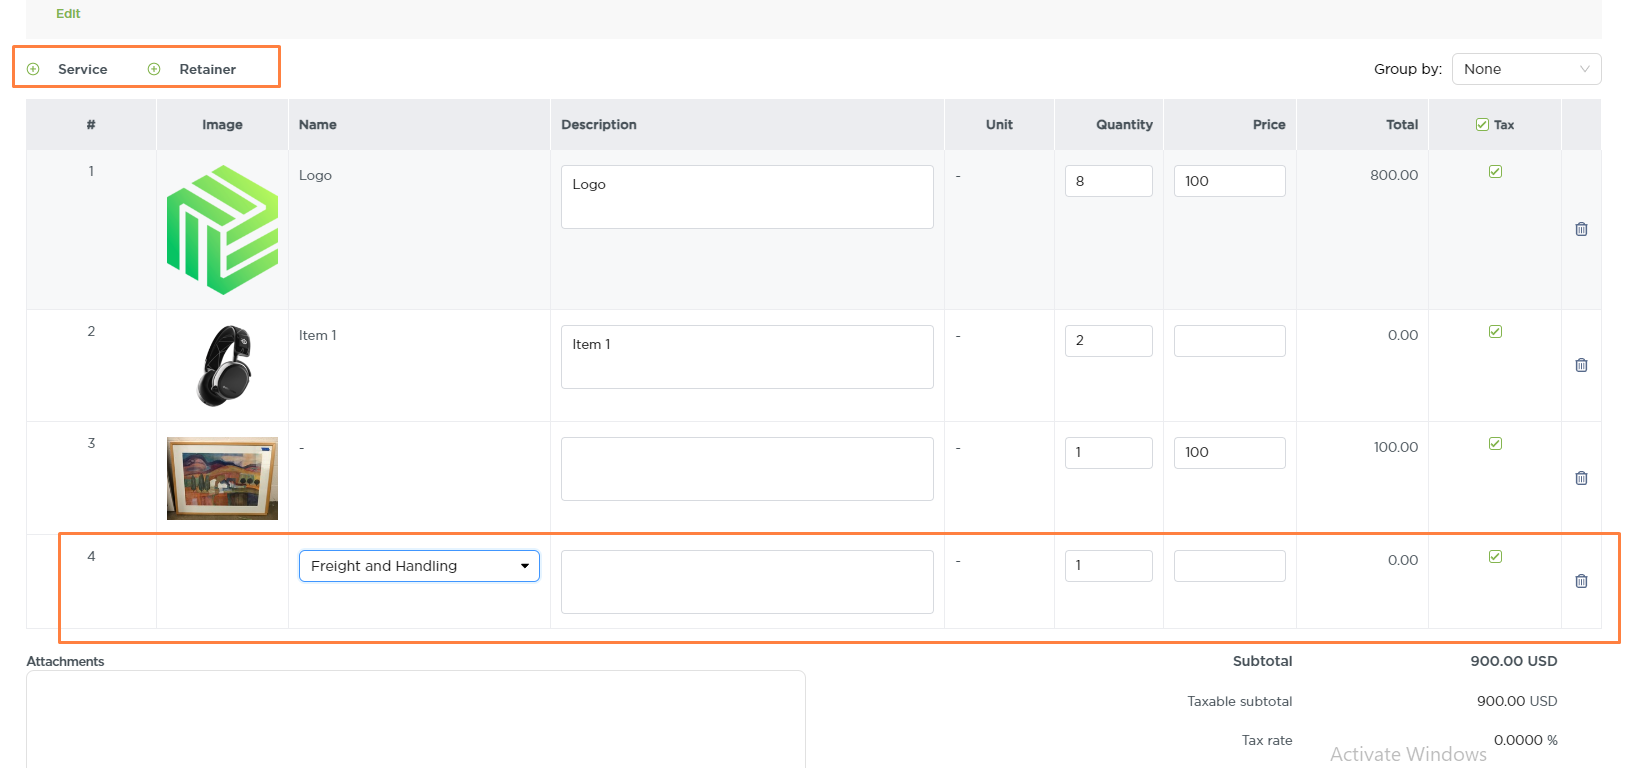
- If necessary, you can add services or retainers to the invoice.
- You can configure these settings in the Procurement settings.
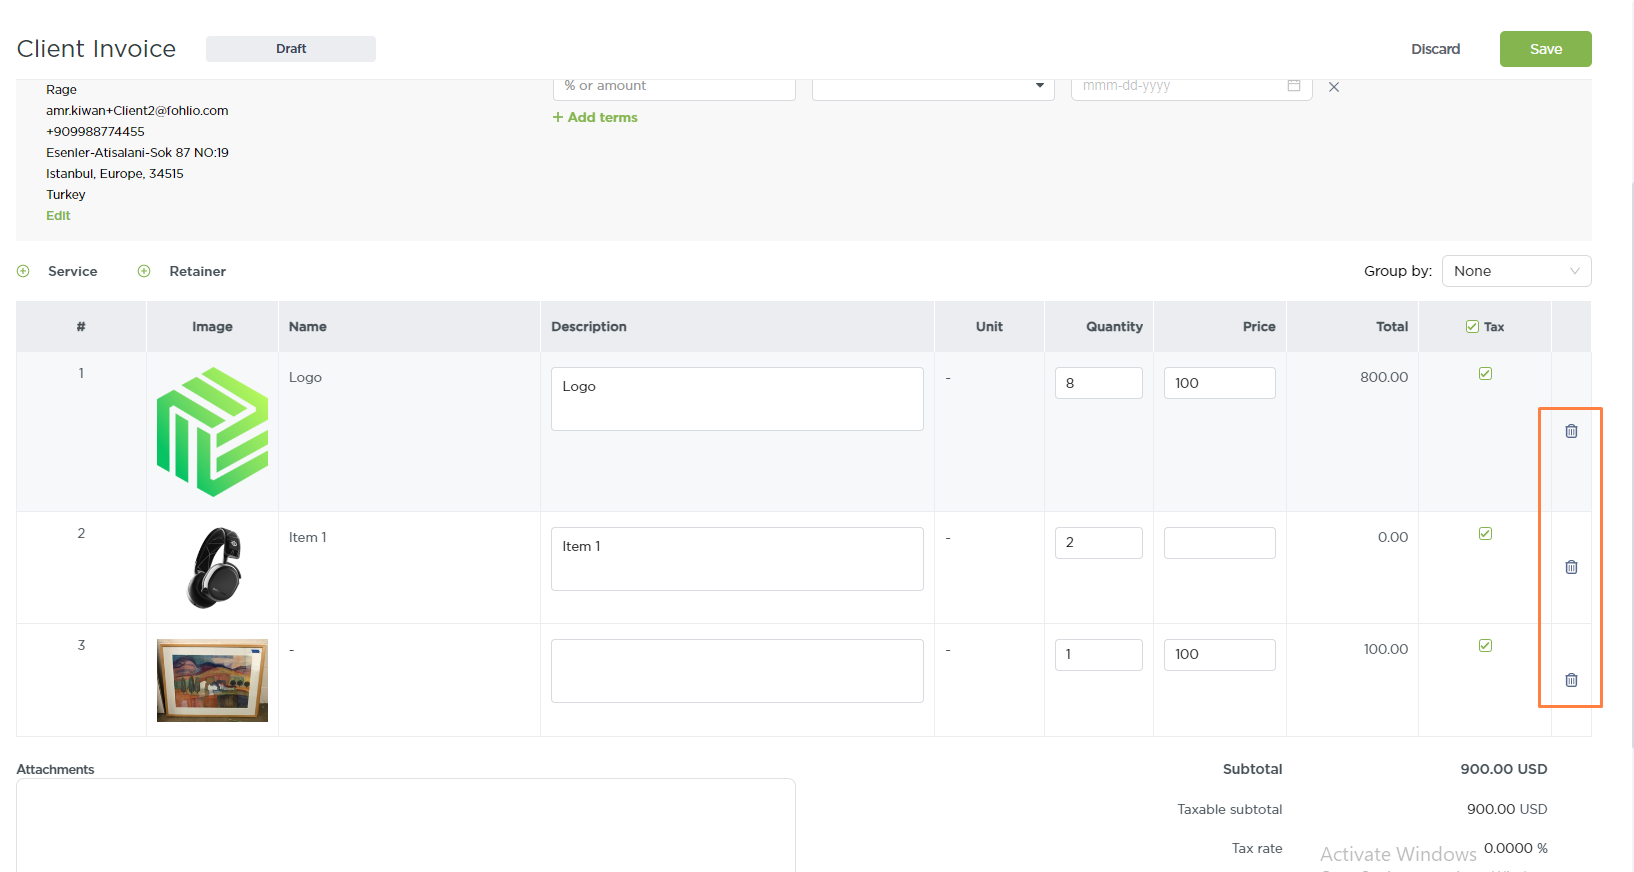
Modifying or Removing Items
- Adjust the quantity and price of items in the invoice, this won't reflect on the Project sheet as Procurement documents are separate entities
- If needed, you can remove items from the invoice.
Applying Taxes (Optional)
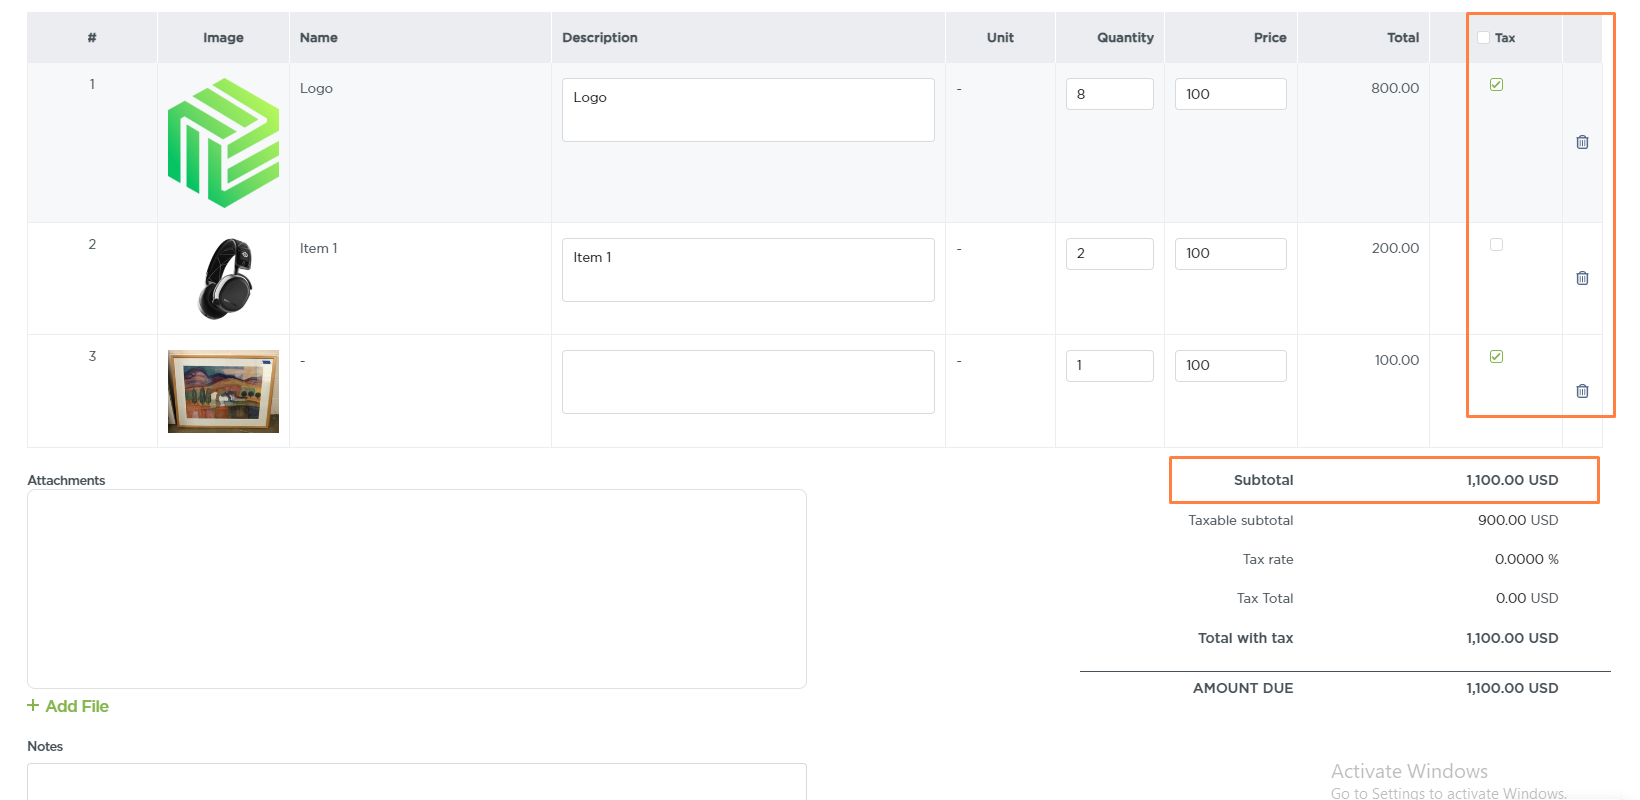
- Choose whether to apply taxes to specific items in the invoice.
- Enable or disable the tax checkbox accordingly.
- You can set up the Taxes from Procurement settings > Procuct > Tax
They are unique per project.
Note: Procurement changes apply to newly created documents.
Sending Invoices to the Clients
- Save the invoice after making all necessary adjustments.
- You can send the invoice to the client in two ways:
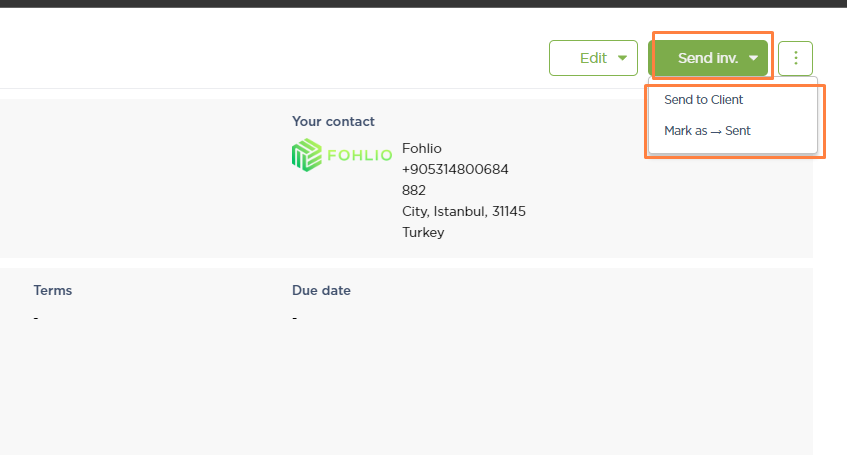
- Share the invoice directly from Fohlio, a link will be sent to the client email selected in the document, and they will access the invoice, for checking and approving.
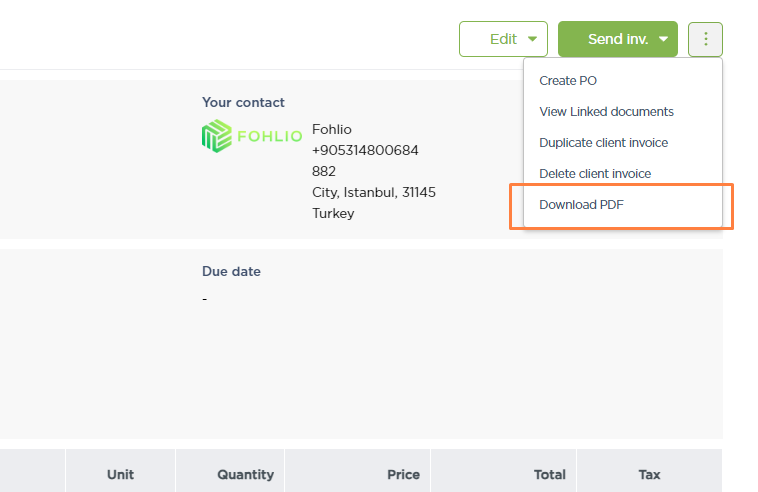
- Download the invoice as a PDF file and send it via email, you can mark the Invoice as sent after that.
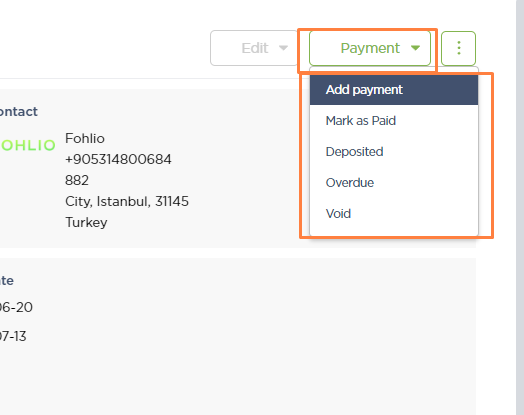
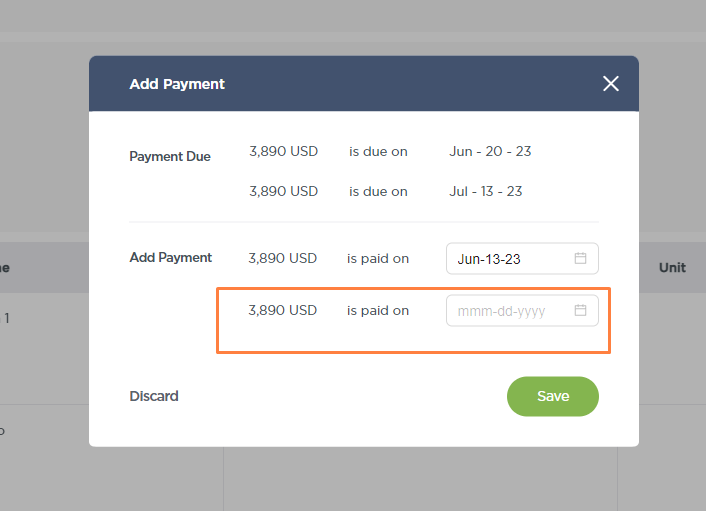
Adding Payments
- After sending the invoice, start adding payments received from the client.
- Specify the payment date and enter the payment details depending on the terms you have set for the invoice.
- Save the payment information.
Tracking Payment Status
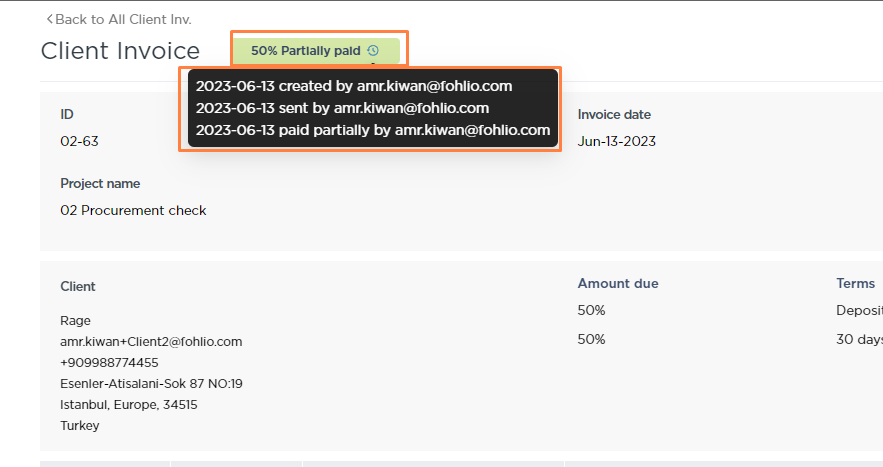
- The invoice status will automatically update based on the added payments.
- Monitor the payment status to keep track of received payments.
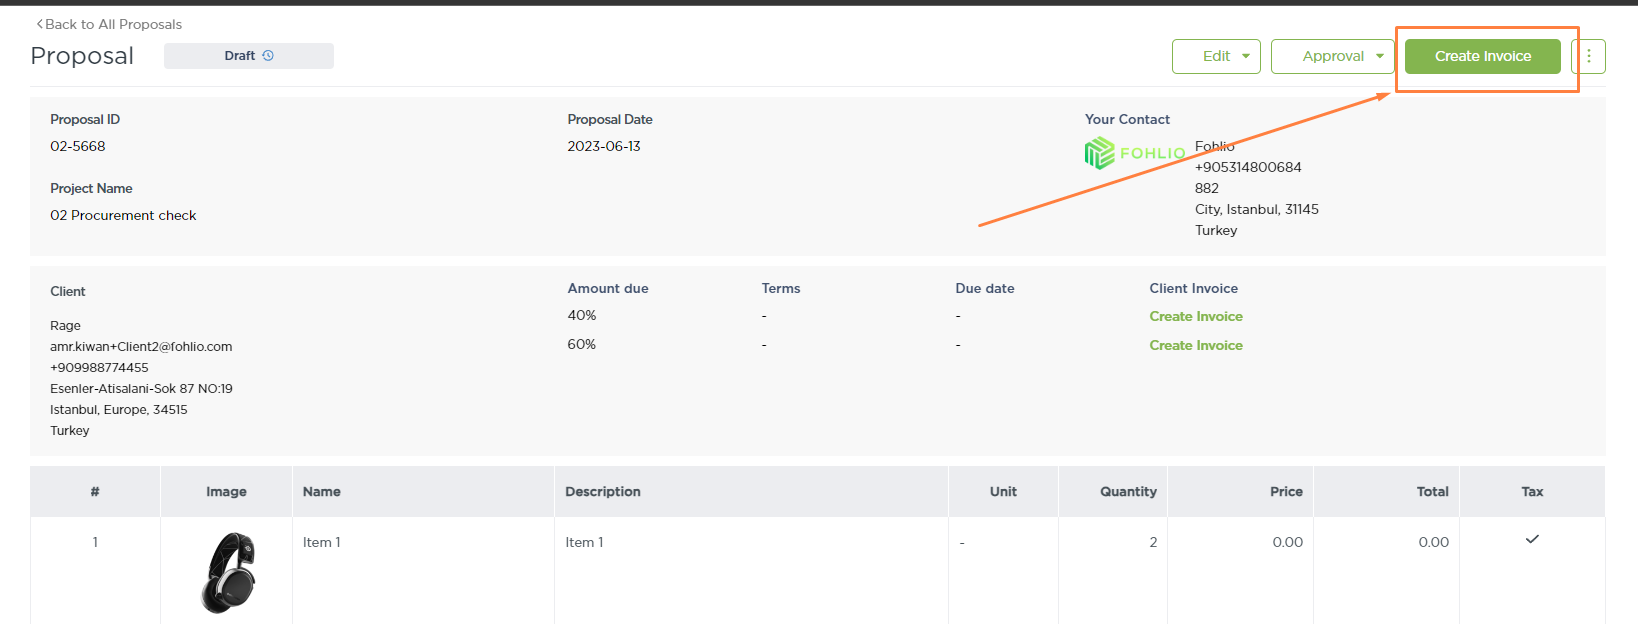
Another Method: Creating Client Invoice from Client Proposal
- If you have a shared Proposal with the client, you can create a Client Invoice based on it.
- You have two options:
1. Create a client invoice that matches the entire proposal.
2. Create separate invoices for each payment.
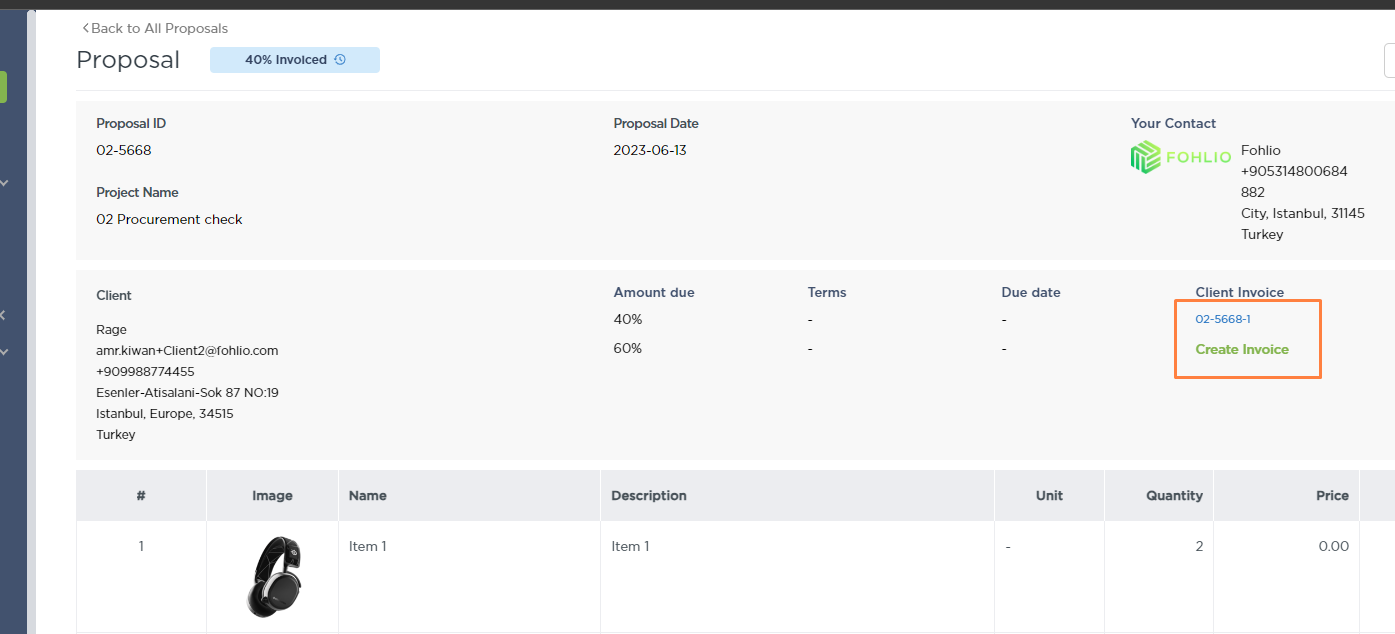
Identifying Proposal-Related Invoices
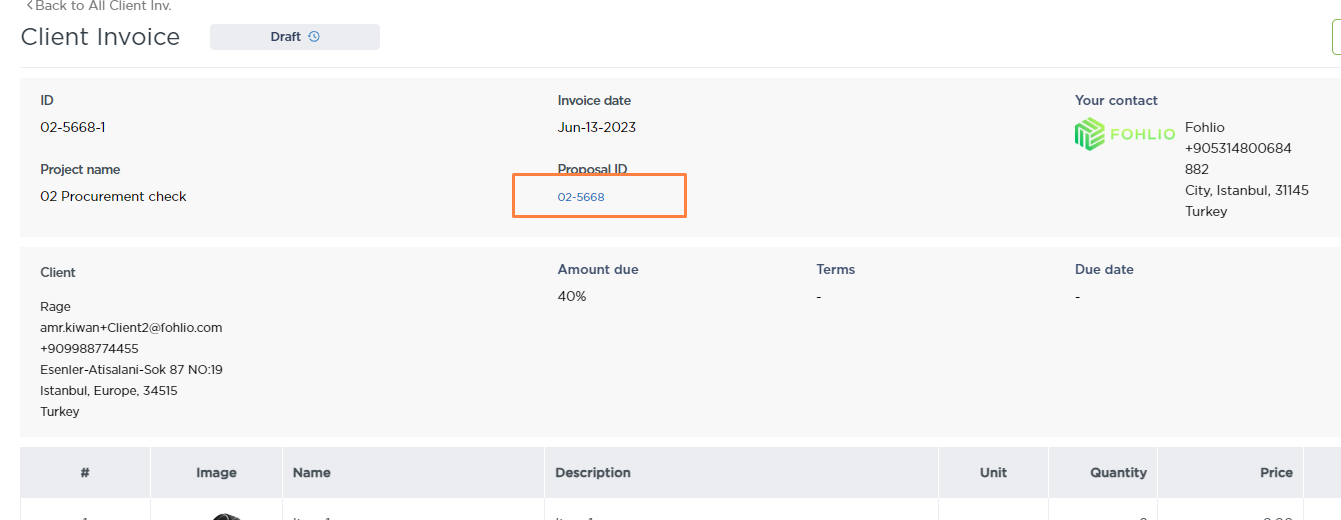
- Invoices created from a Client proposal will have a Proposal ID.
- Use the Proposal ID to track which proposal the invoice belongs to.
Additional Features:
- You can still add services or retainers to the invoice created from Proposals.
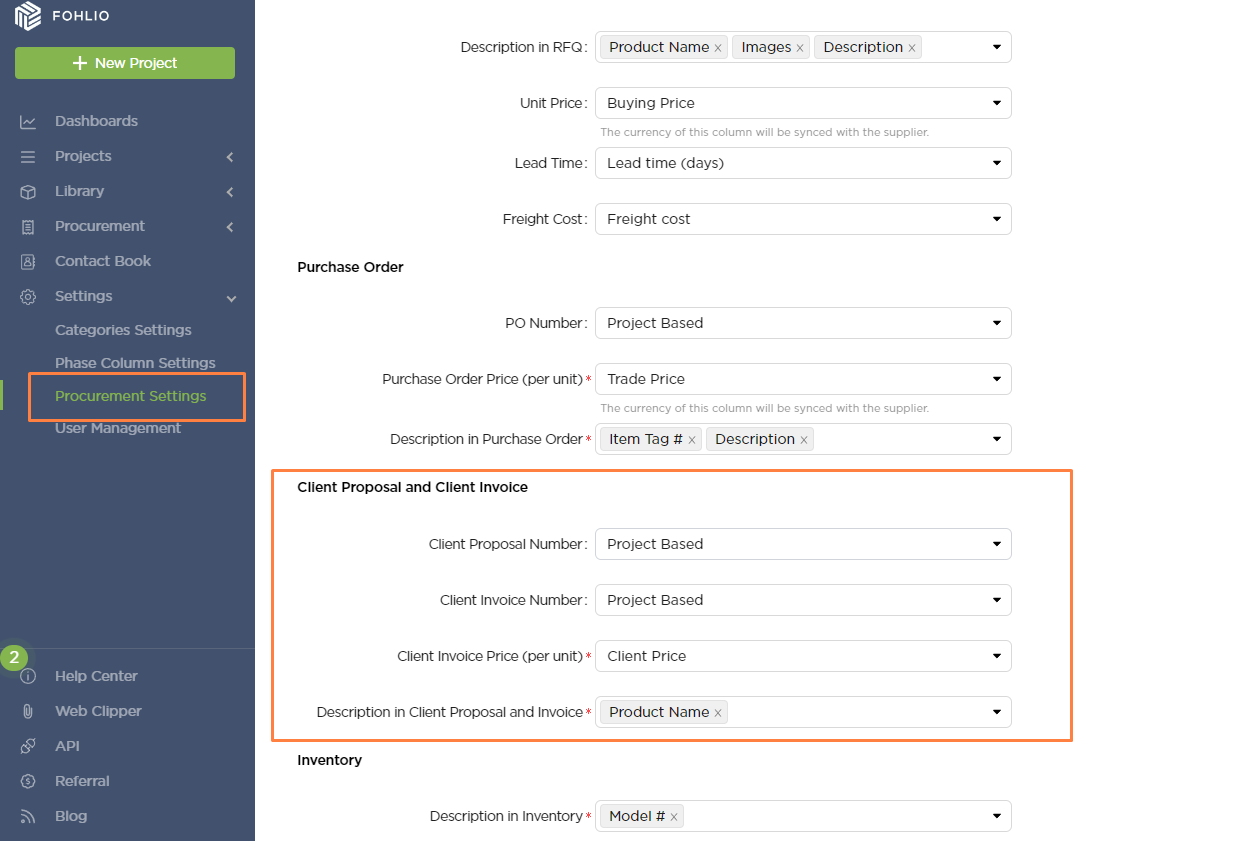
- Customize the name and description used in the invoice from the Procurement Settings.
- Adjust the product name, tax settings, and other details
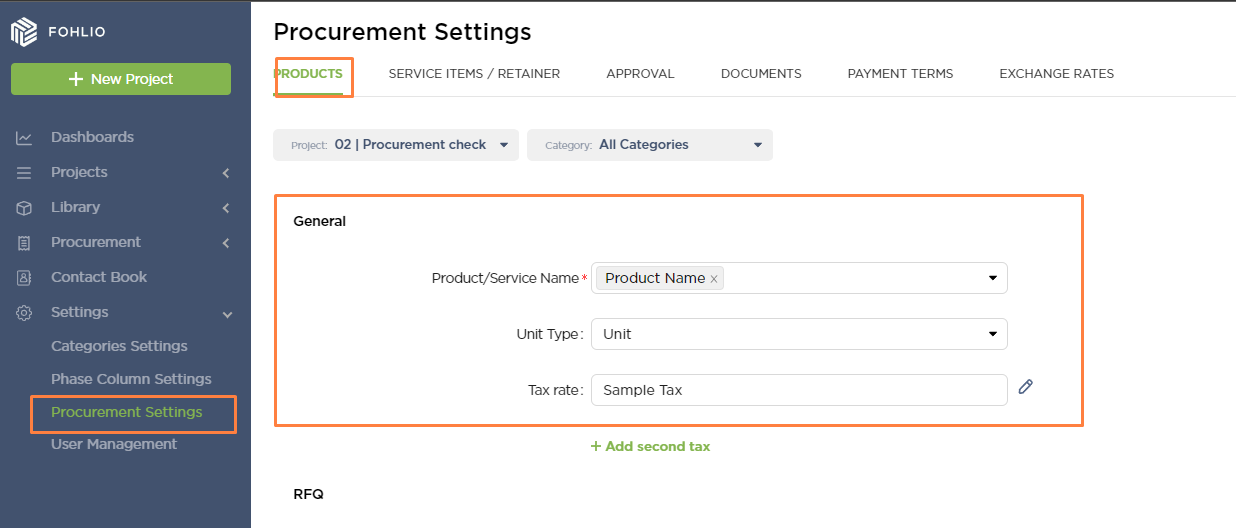
- Scroll down to configure the description columns and price used in proposals and invoices.
And finally, you can create a Purchase order out of the Client invoice, so you avoid duplicated work.
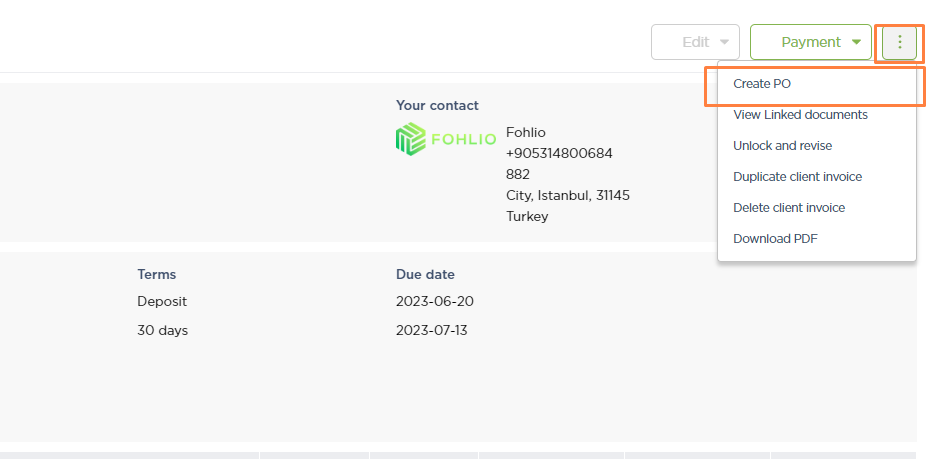
The Recommended workflow starts from Client Proposal > Client Invoice > Purchase Order
In that case, all your documents will be linked together.
Was this helpful?
We hope this article was helpful, please rate the article, and reach us via Live Help if you still need assistance.


