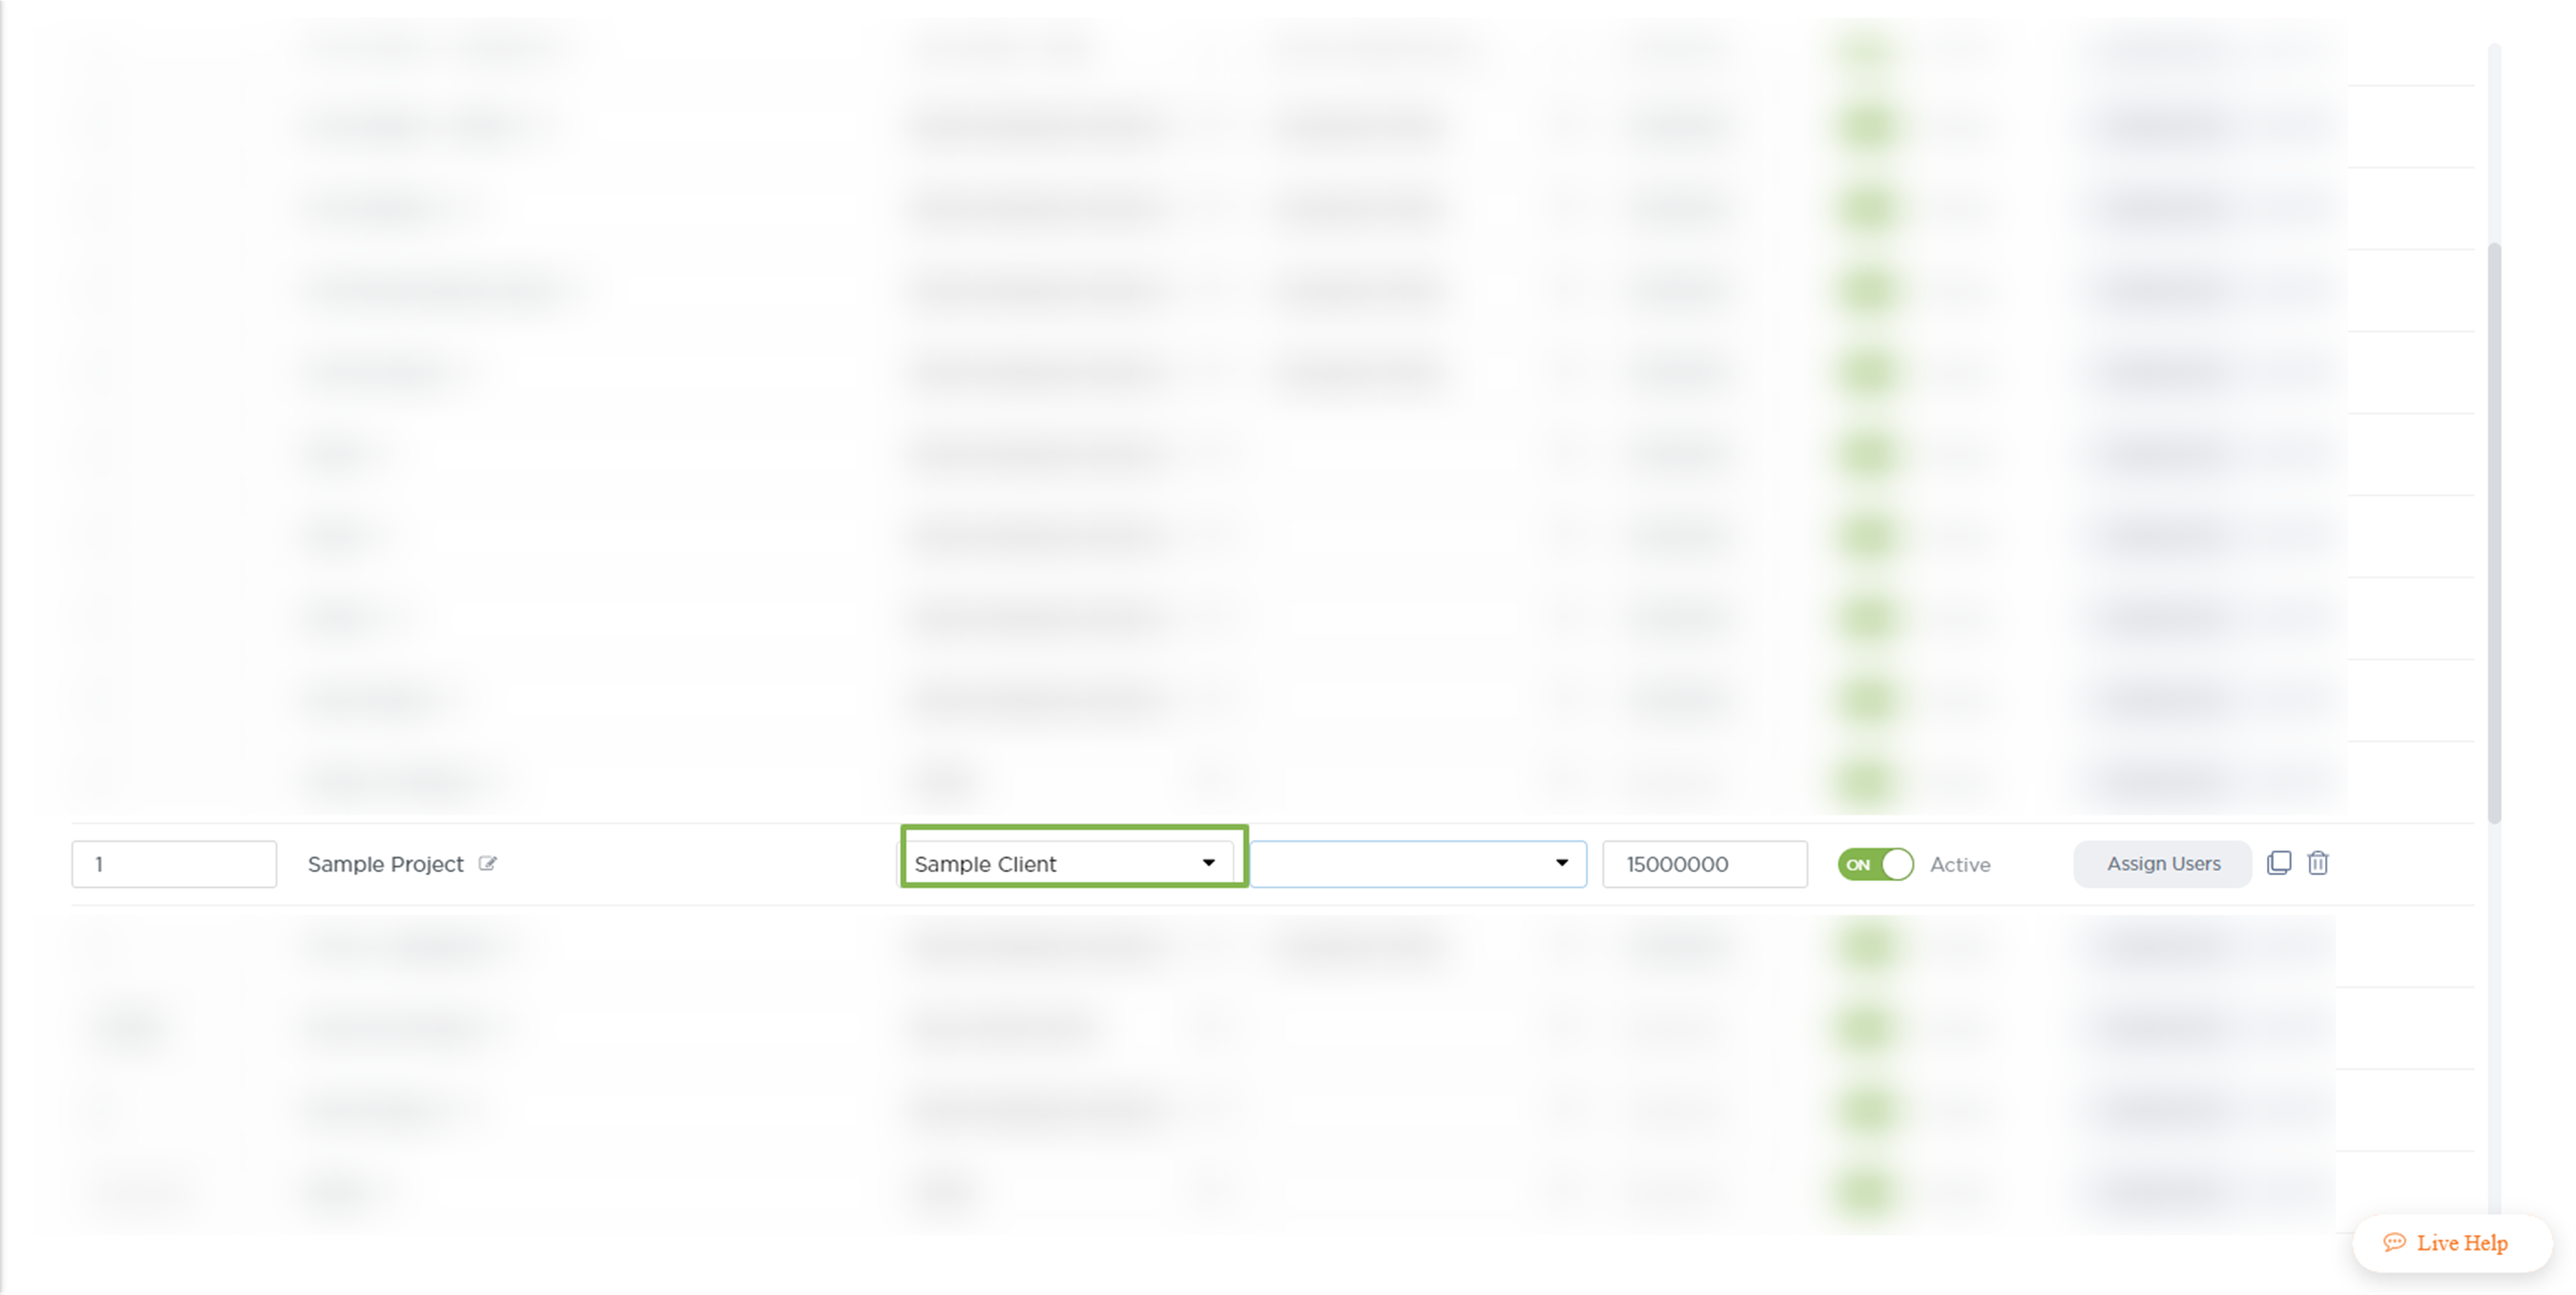
Quickbooks Integration - Part II - Chart of Accounts & Sending Documents
This is a multi-step guide on how to configure the integration between Fohlio and Quickbooks.
After completing it, you and your team will gain knowledge on:
- How to configure Procurement Settings in order to have a correct data flow.
- How to send & sync documents from Fohlio to Quickbooks Online.
- The answers to the most common questions related to the integration.
- How to identify and troubleshoot various problems.
With our integration you can:
- Keep a close eye on your cash flow.
- Track invoices, payments, purchases, and more by syncing your Fohlio account with QuickBooks Online.
This part of the guide includes instructions related to the following sections.
Sections
-
Mapping the Chart of Accounts
-
Sending documents from Fohlio to Quickbooks
-
Optional: Linking your Fohlio project to a Quickbooks project
Mapping the Chart of Accounts
In order to ensure that each income and expense is tracked accordingly, we need to select which Accounts are going to be used for your transactions.
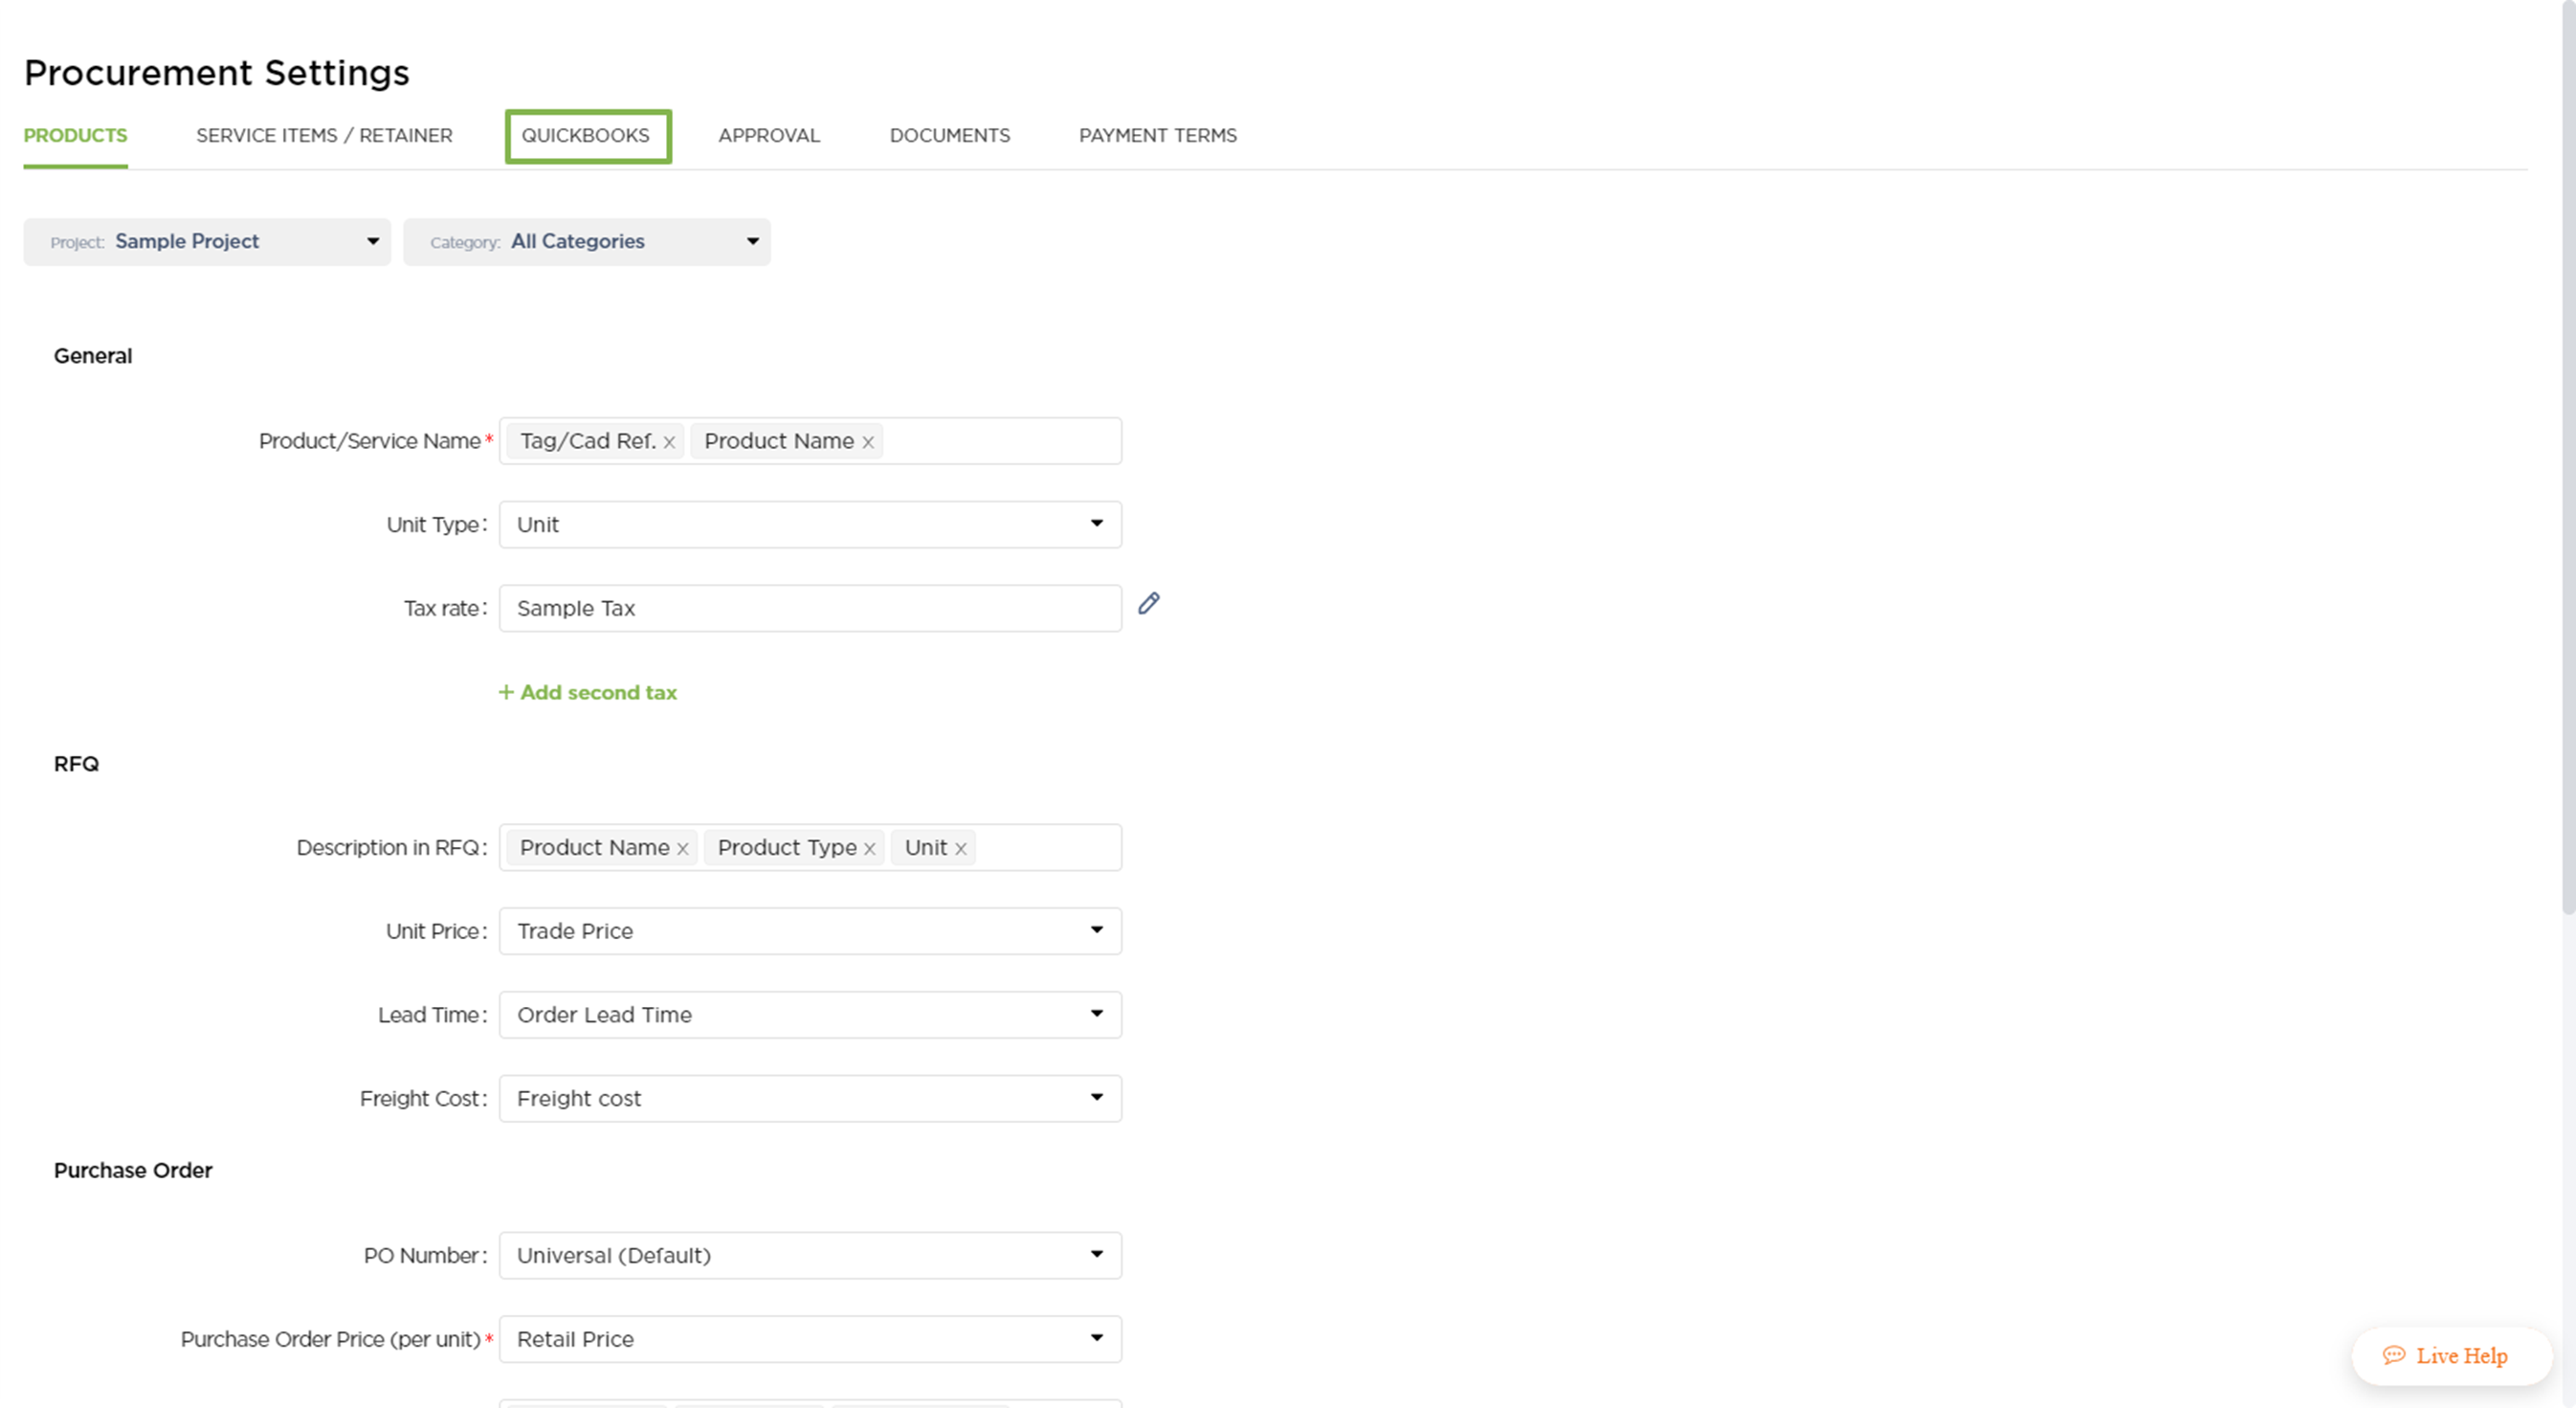
1. Access the Quickbooks tab on the Procurement Settings page.
2. You will need to select an account from the dropdown list for each available account type.
-
Ensure that the account type matches on Quickbooks.
.png)
3. Optional: The same step can be followed for the list of services (if your team will use them on Client Proposals and Client Invoices)
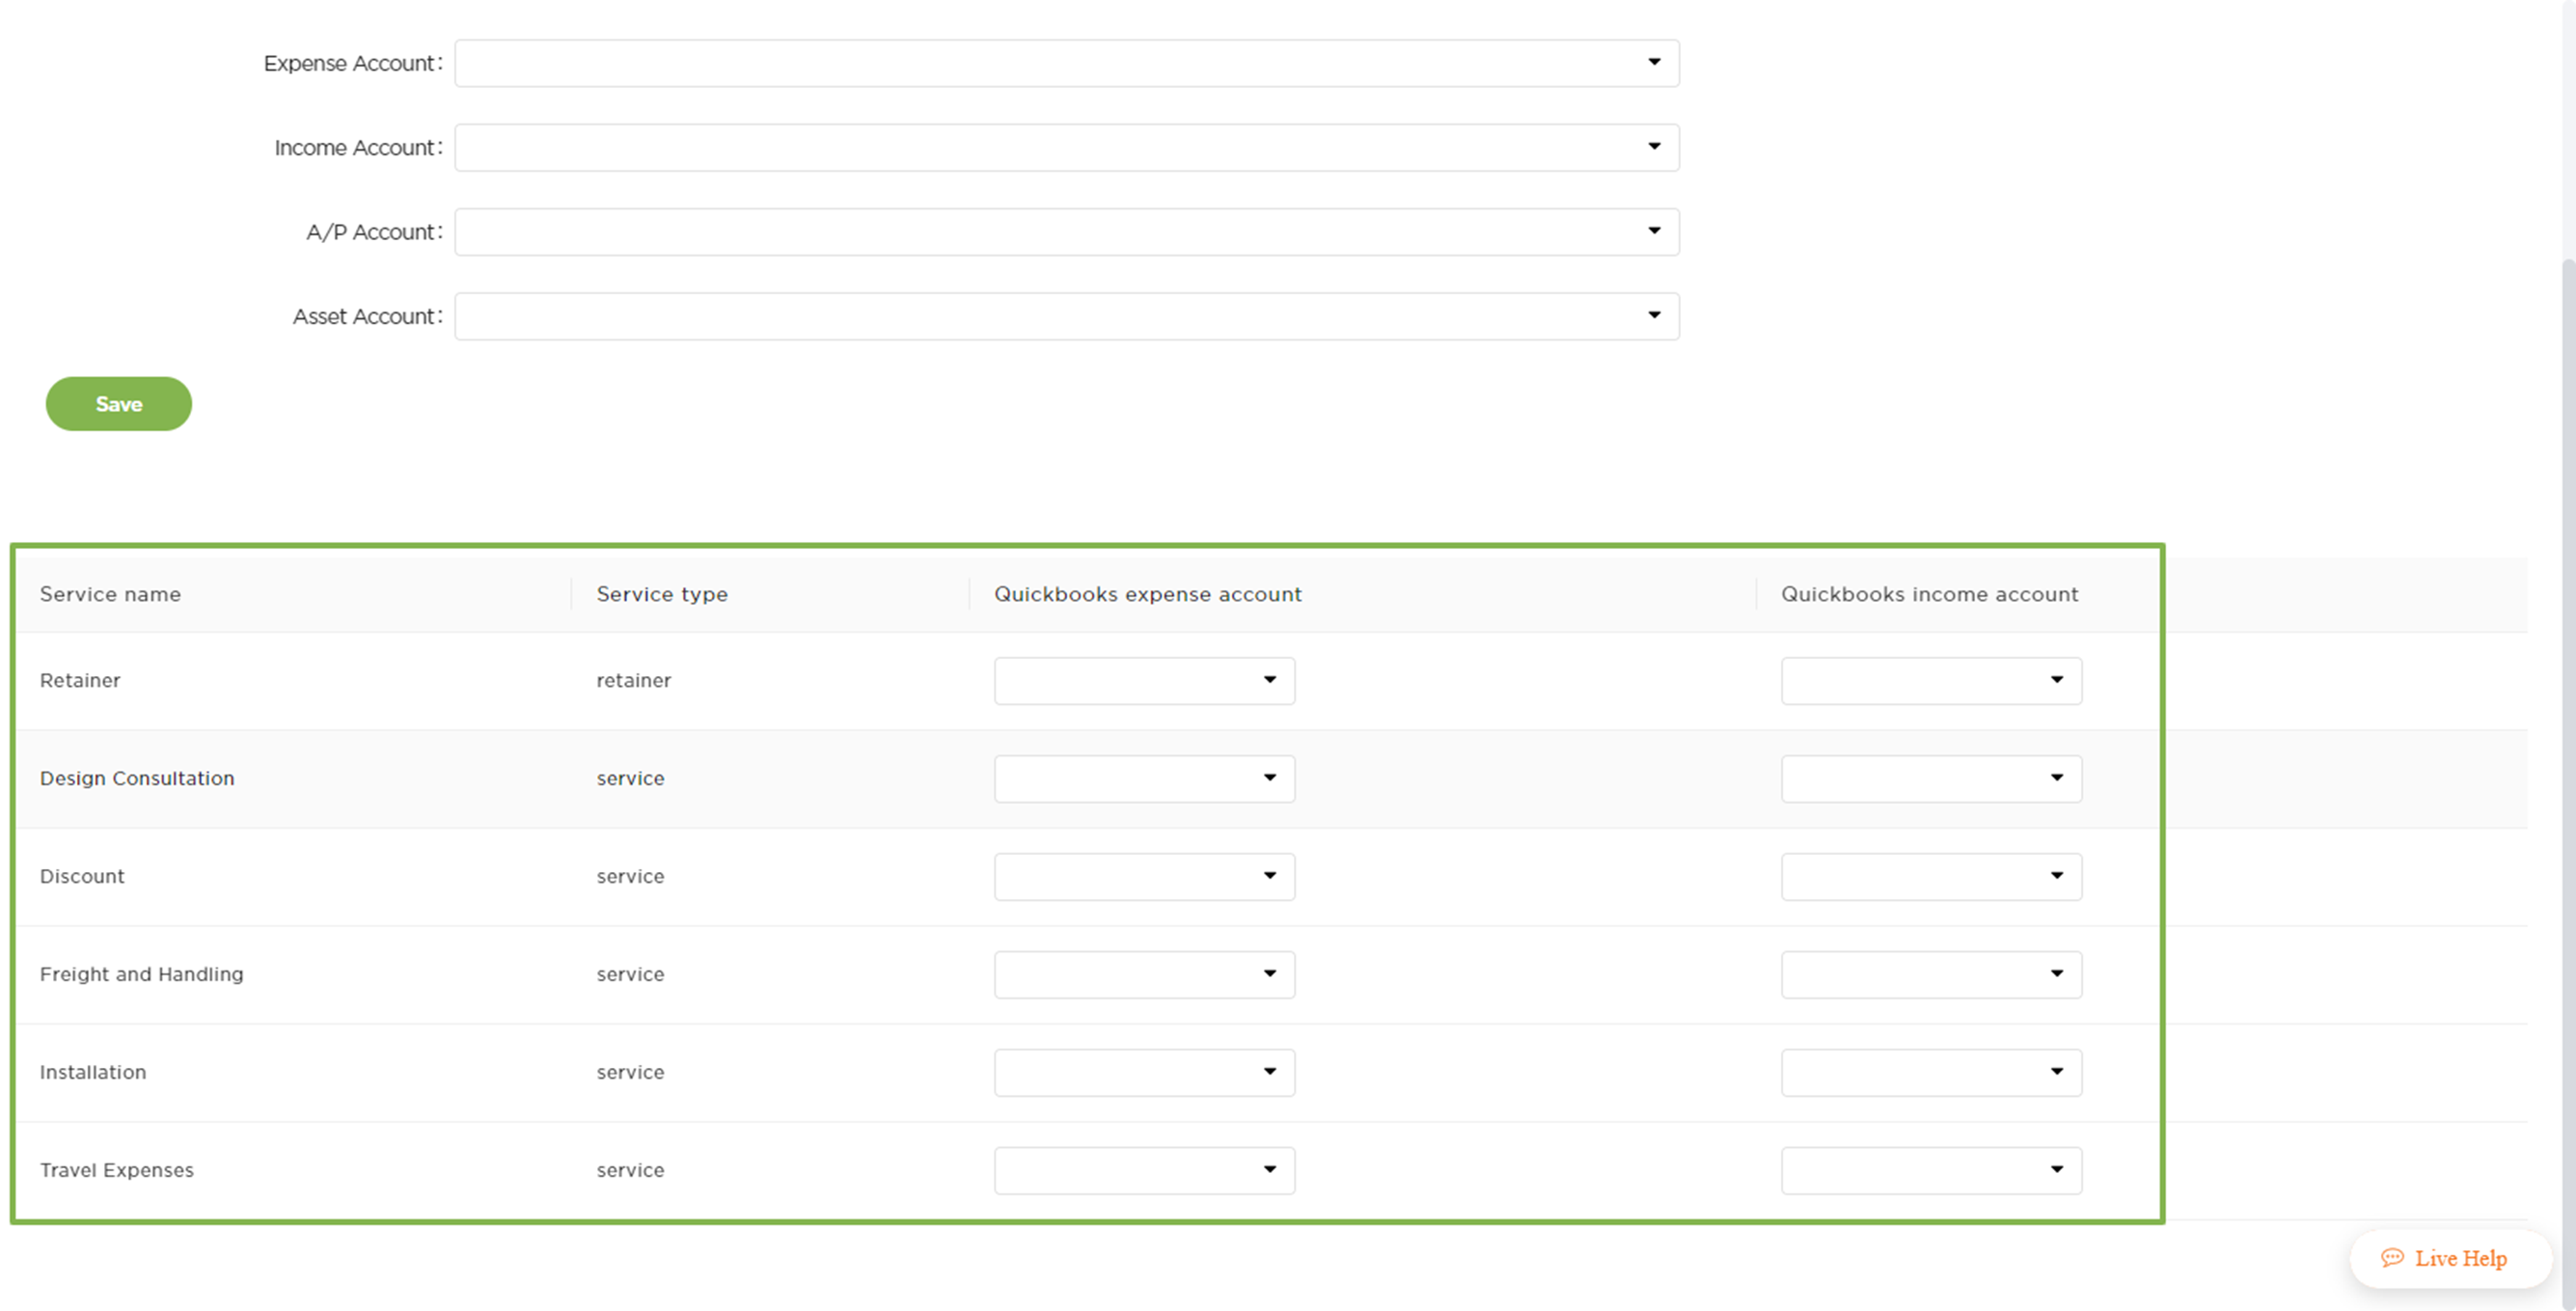
4. The last step is to Save the settings.

Sending documents from Fohlio to Quickbooks
Note: We do recommend creating a new document (Client Proposal, Client Invoice, or Purchase Order) for testing purposes.
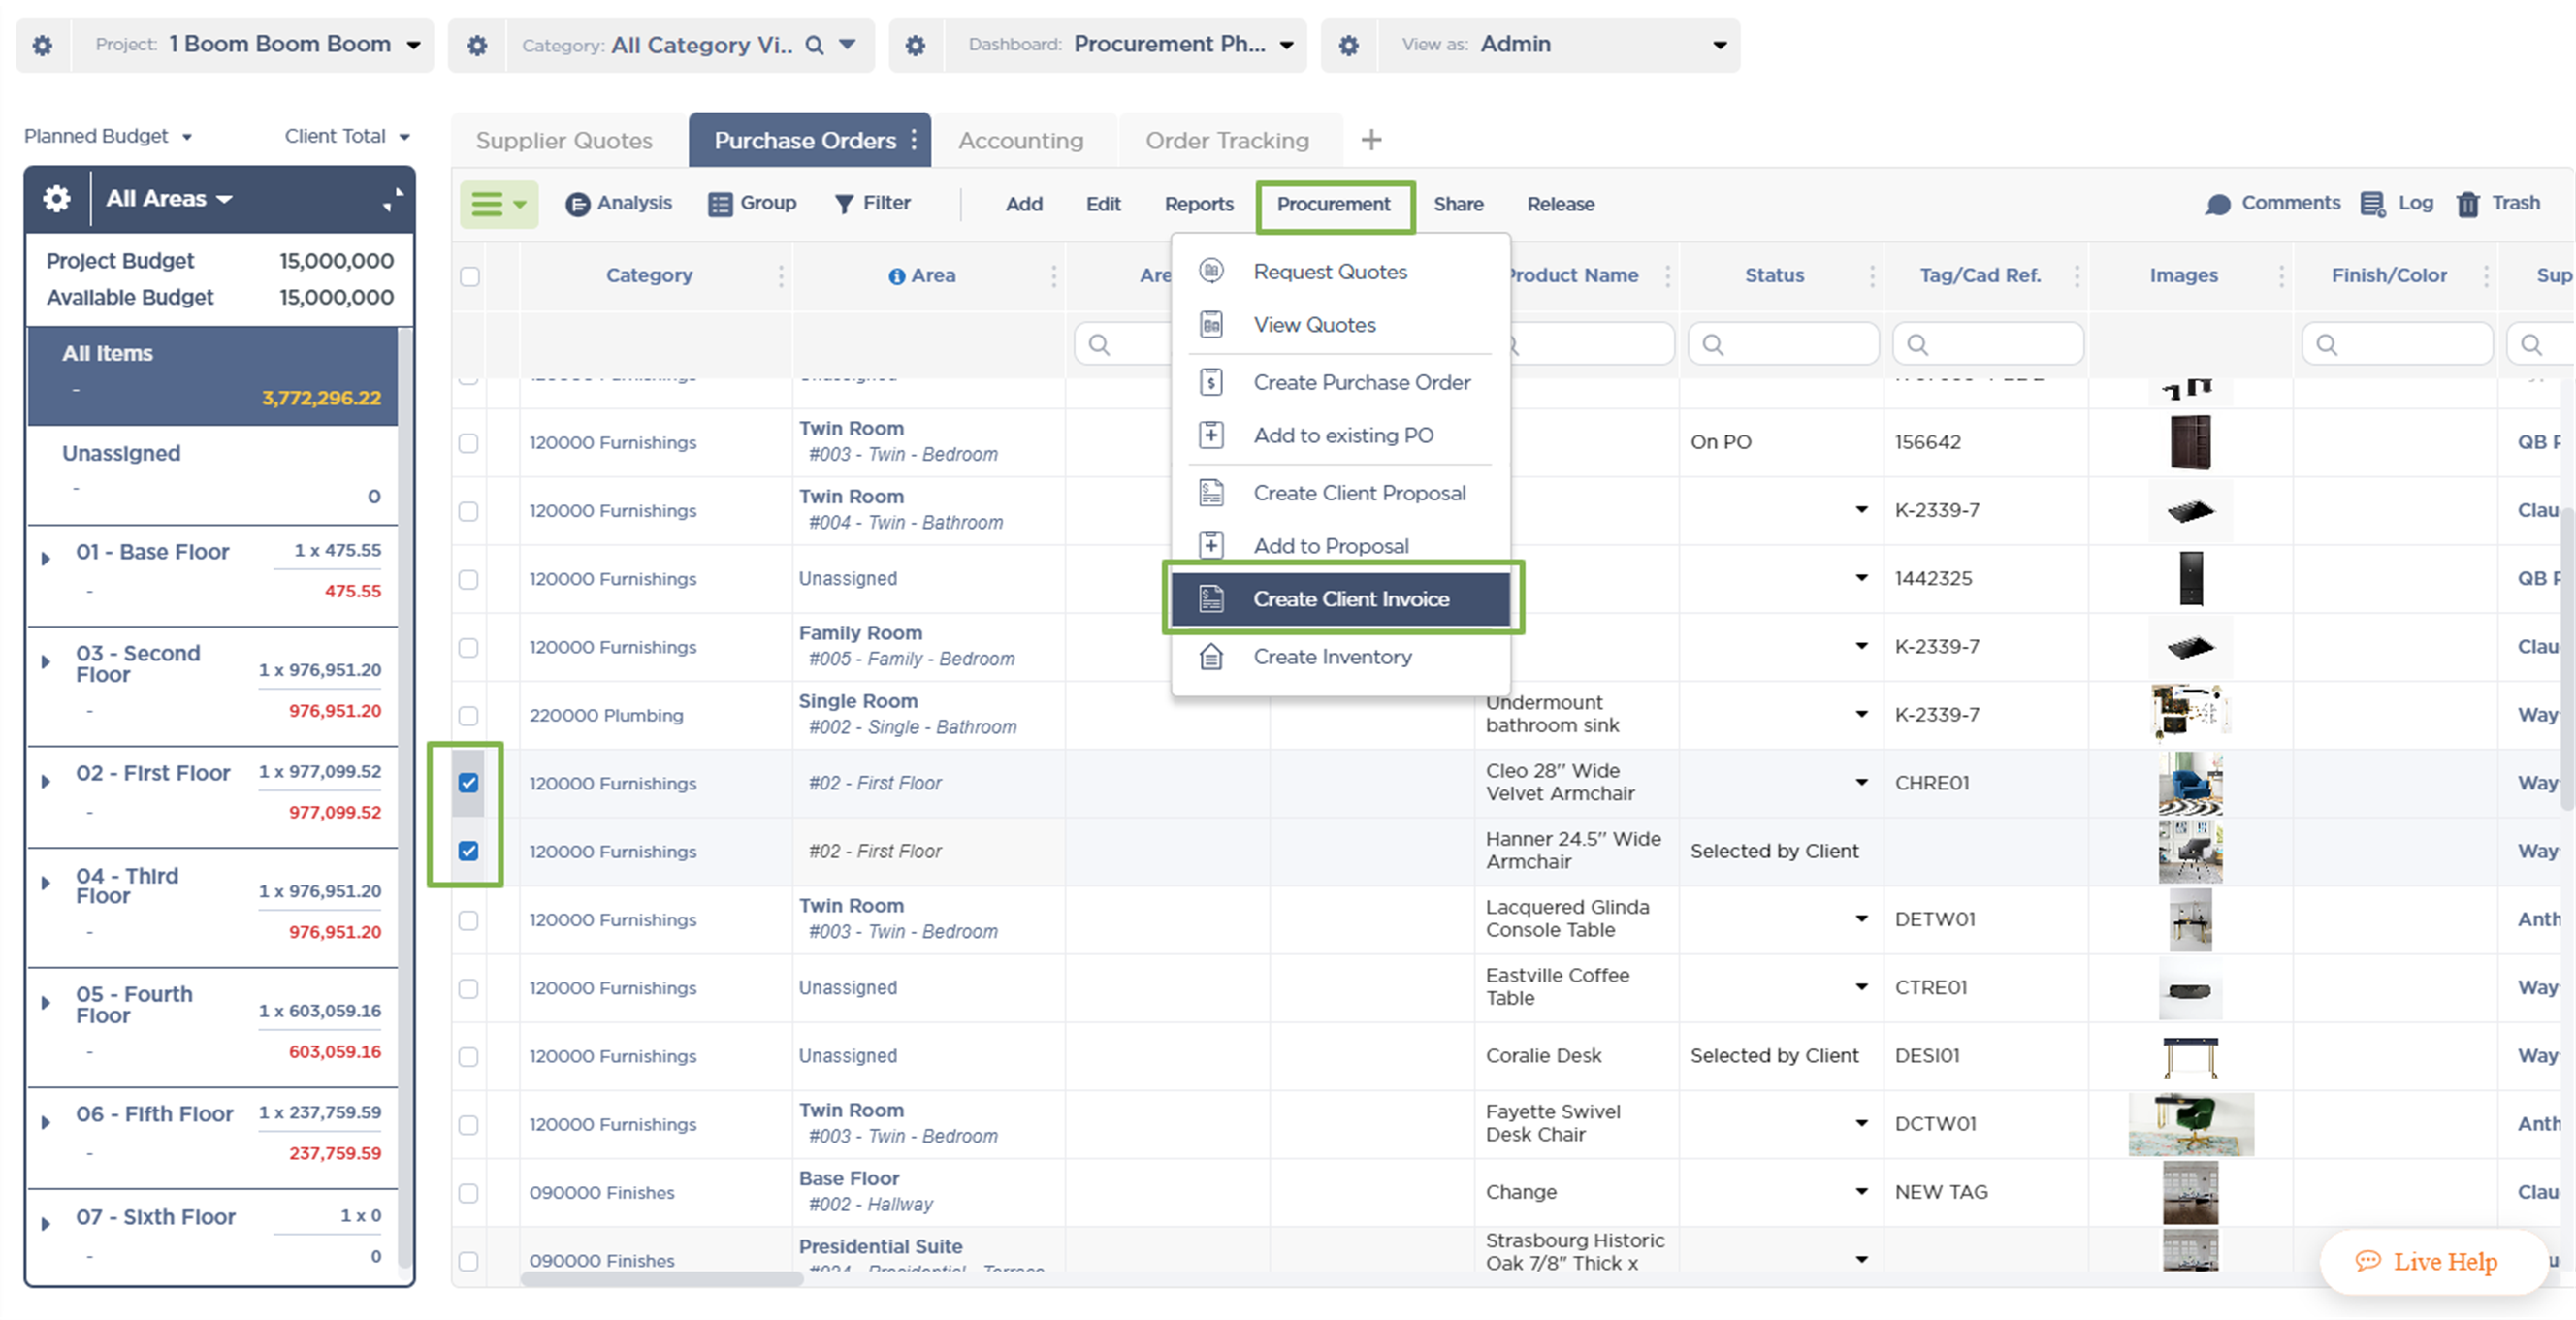
1. Create a new document (ie. a Client Invoice) by clicking on Procurement and then on Create Client Invoice
Note: An existing newly created document could also be used.
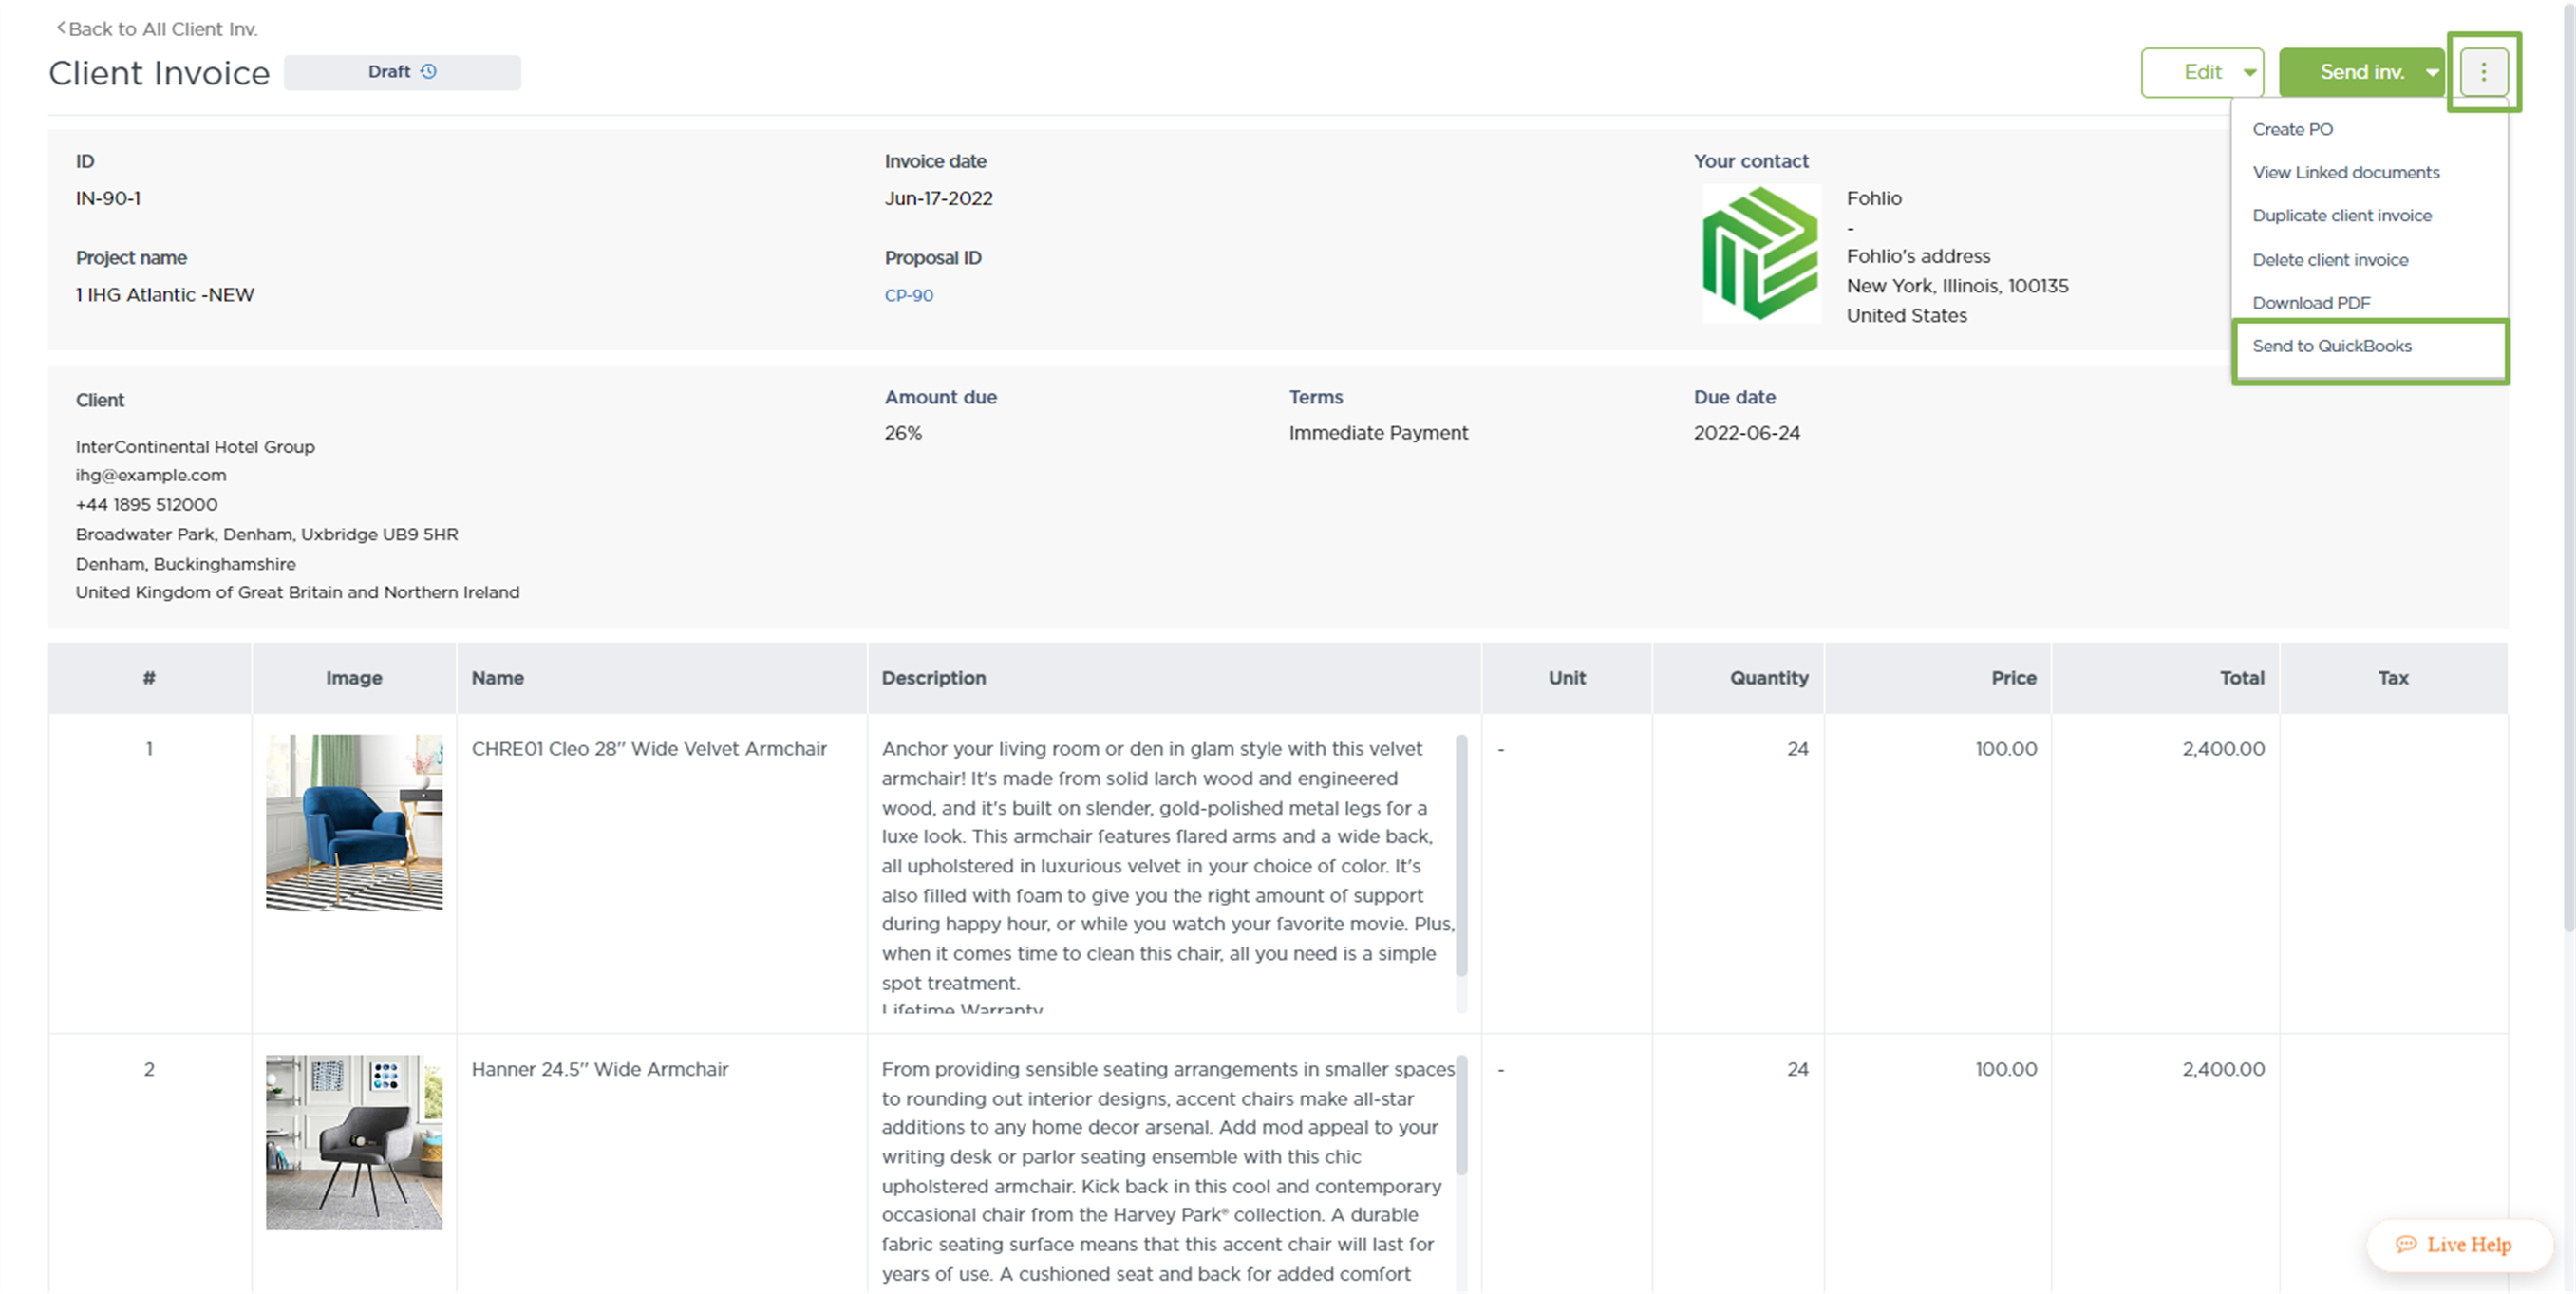
2. Click on the ⋮ icon and then select Send to Quickbooks
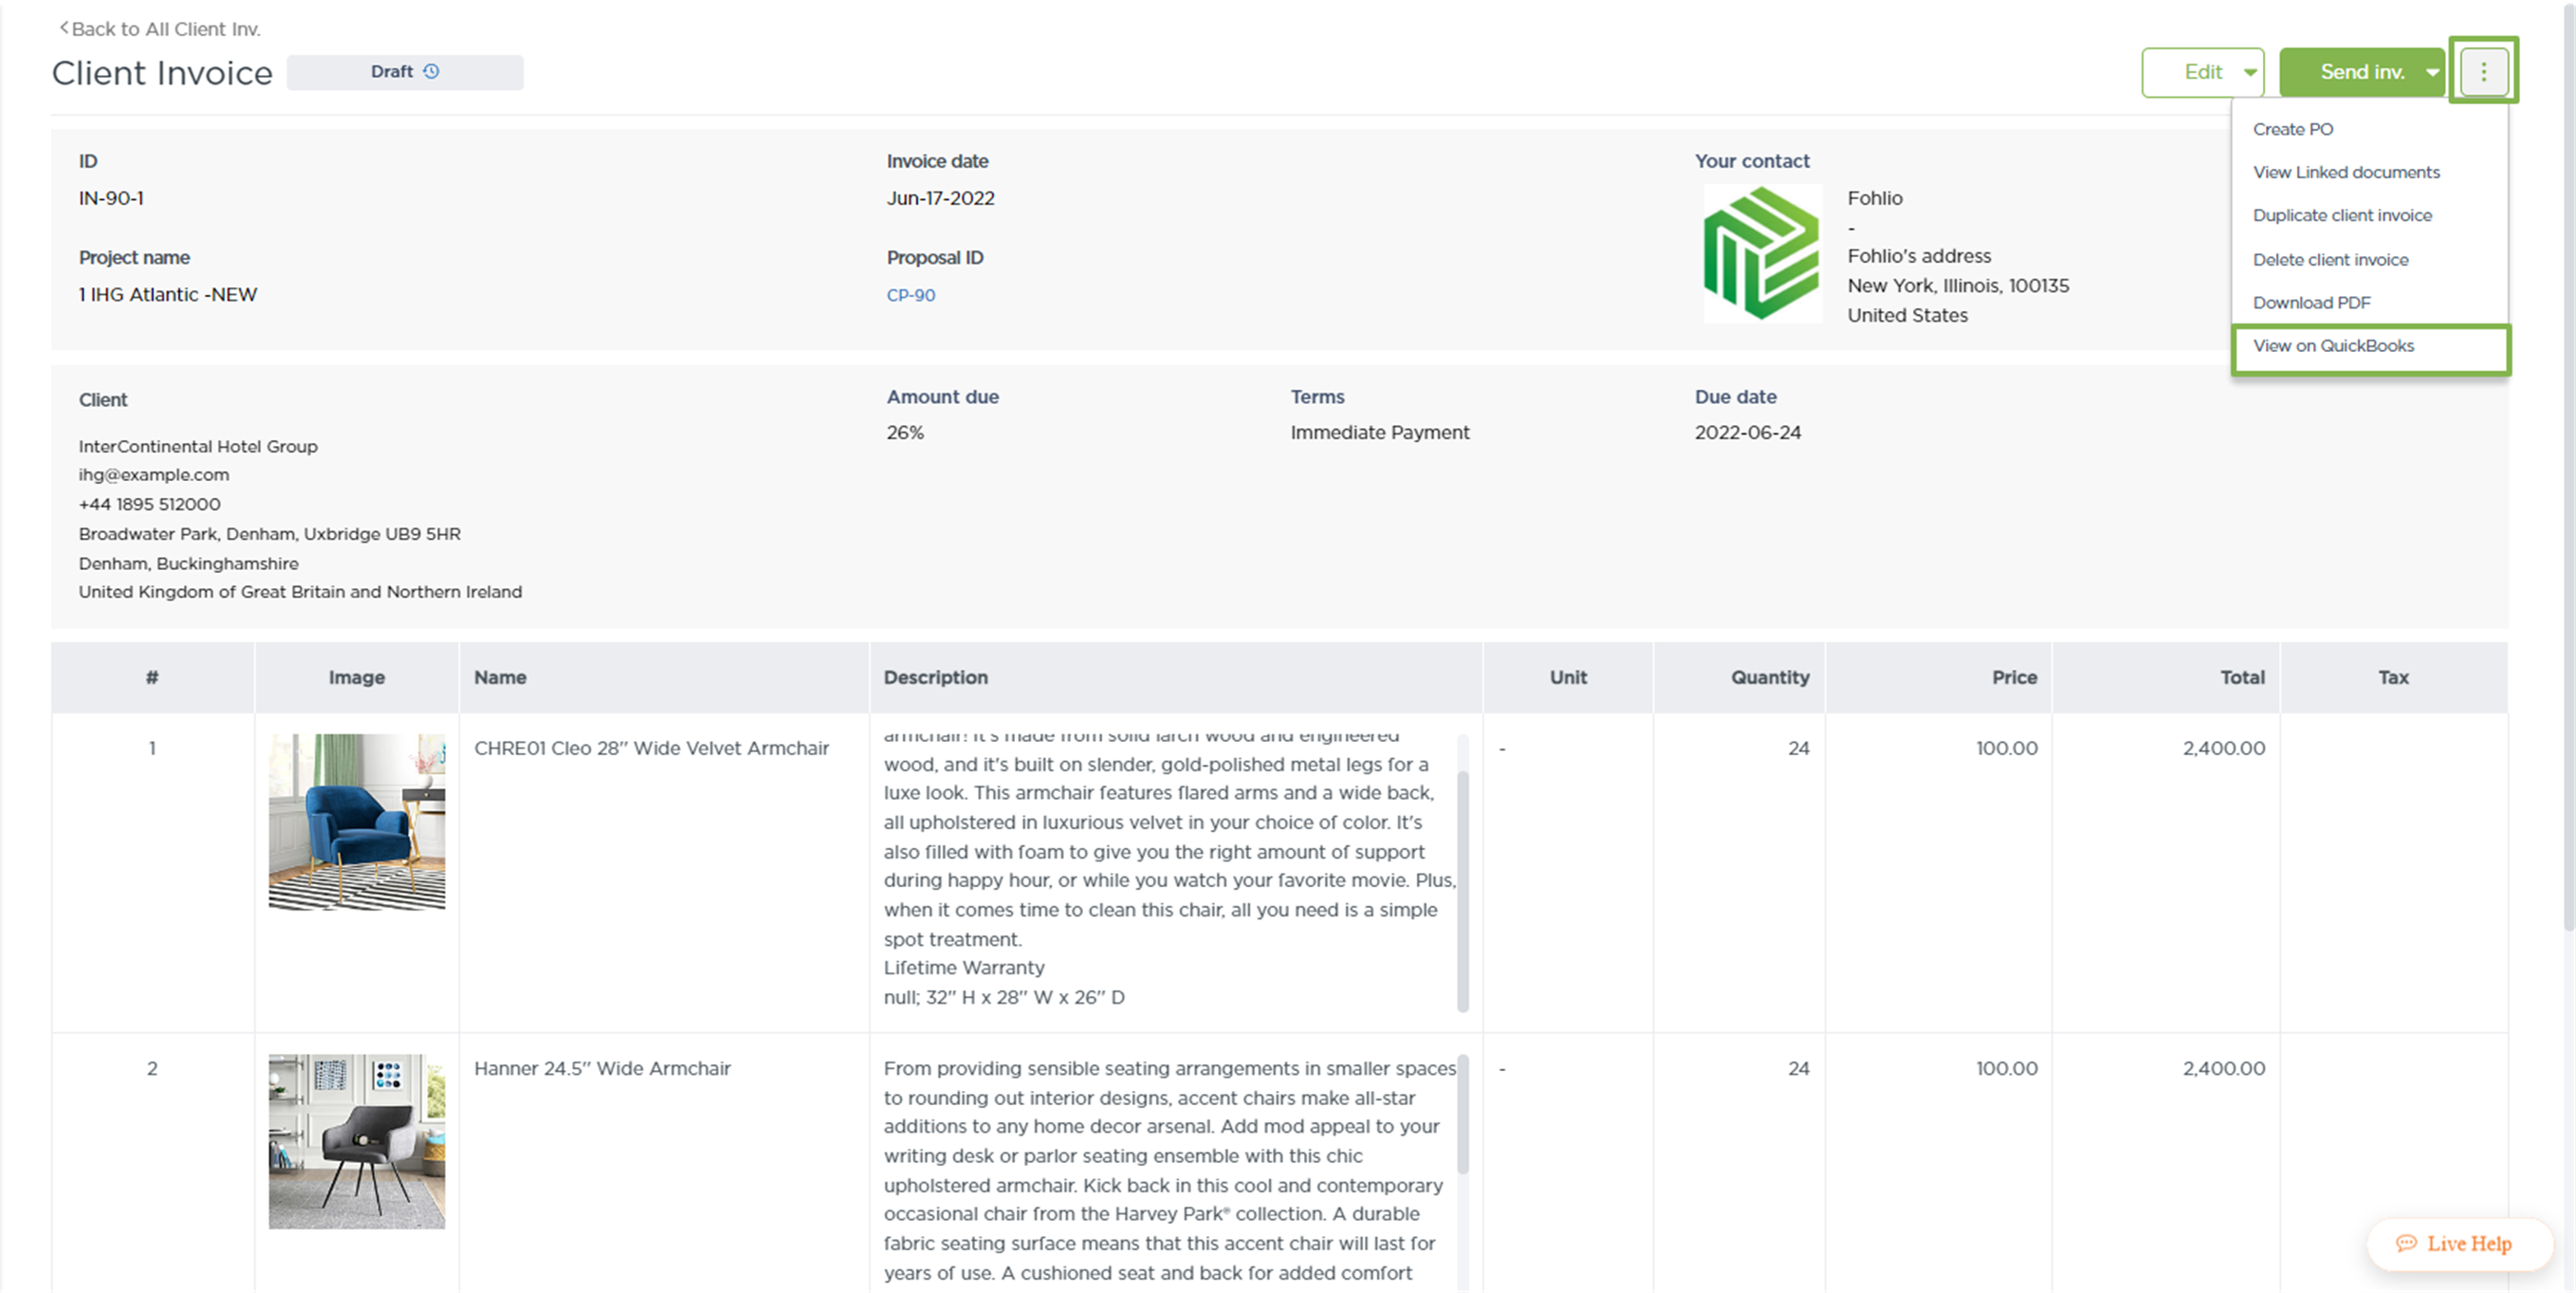
3. Click on the ⋮ icon and then select View on Quickbooks
Note: The same document will open on Quickbooks
Optional: Linking your Fohlio project to a Quickbooks project
Note: This step is completely optional and it can be skipped if you do not use Projects in Quickbooks.
.png)
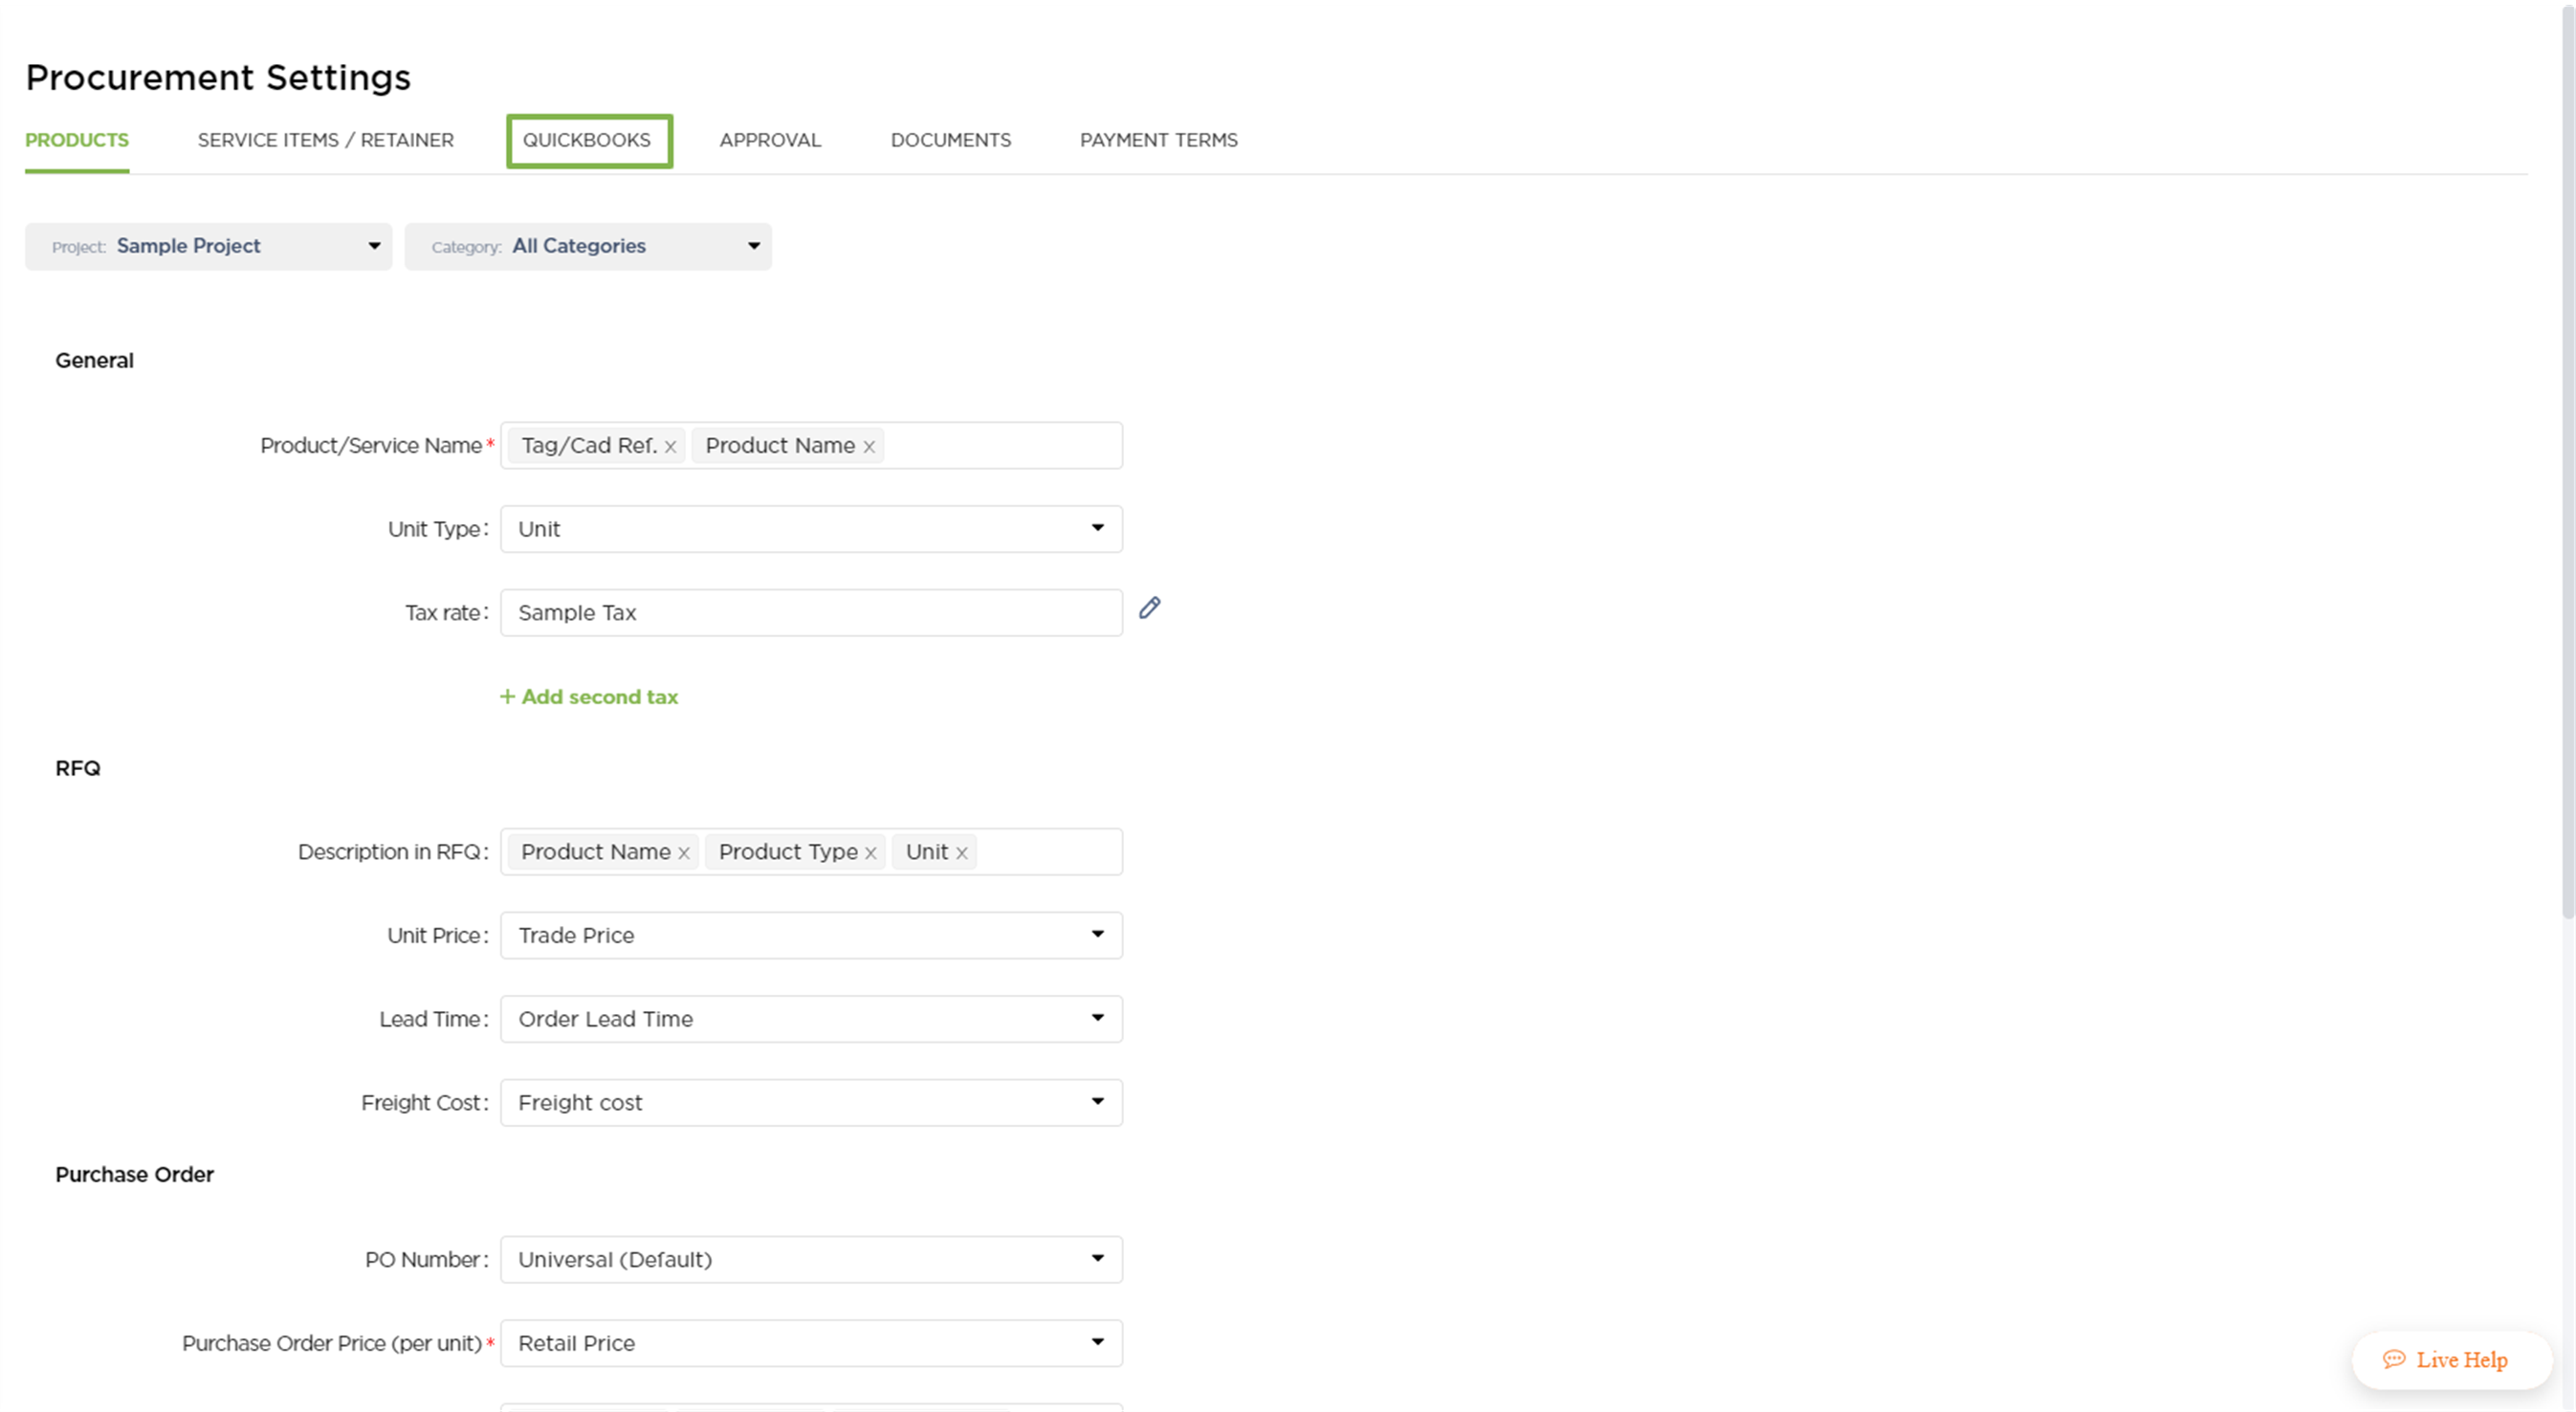
1. Access the Quickbooks tab on the Procurement Settings page.
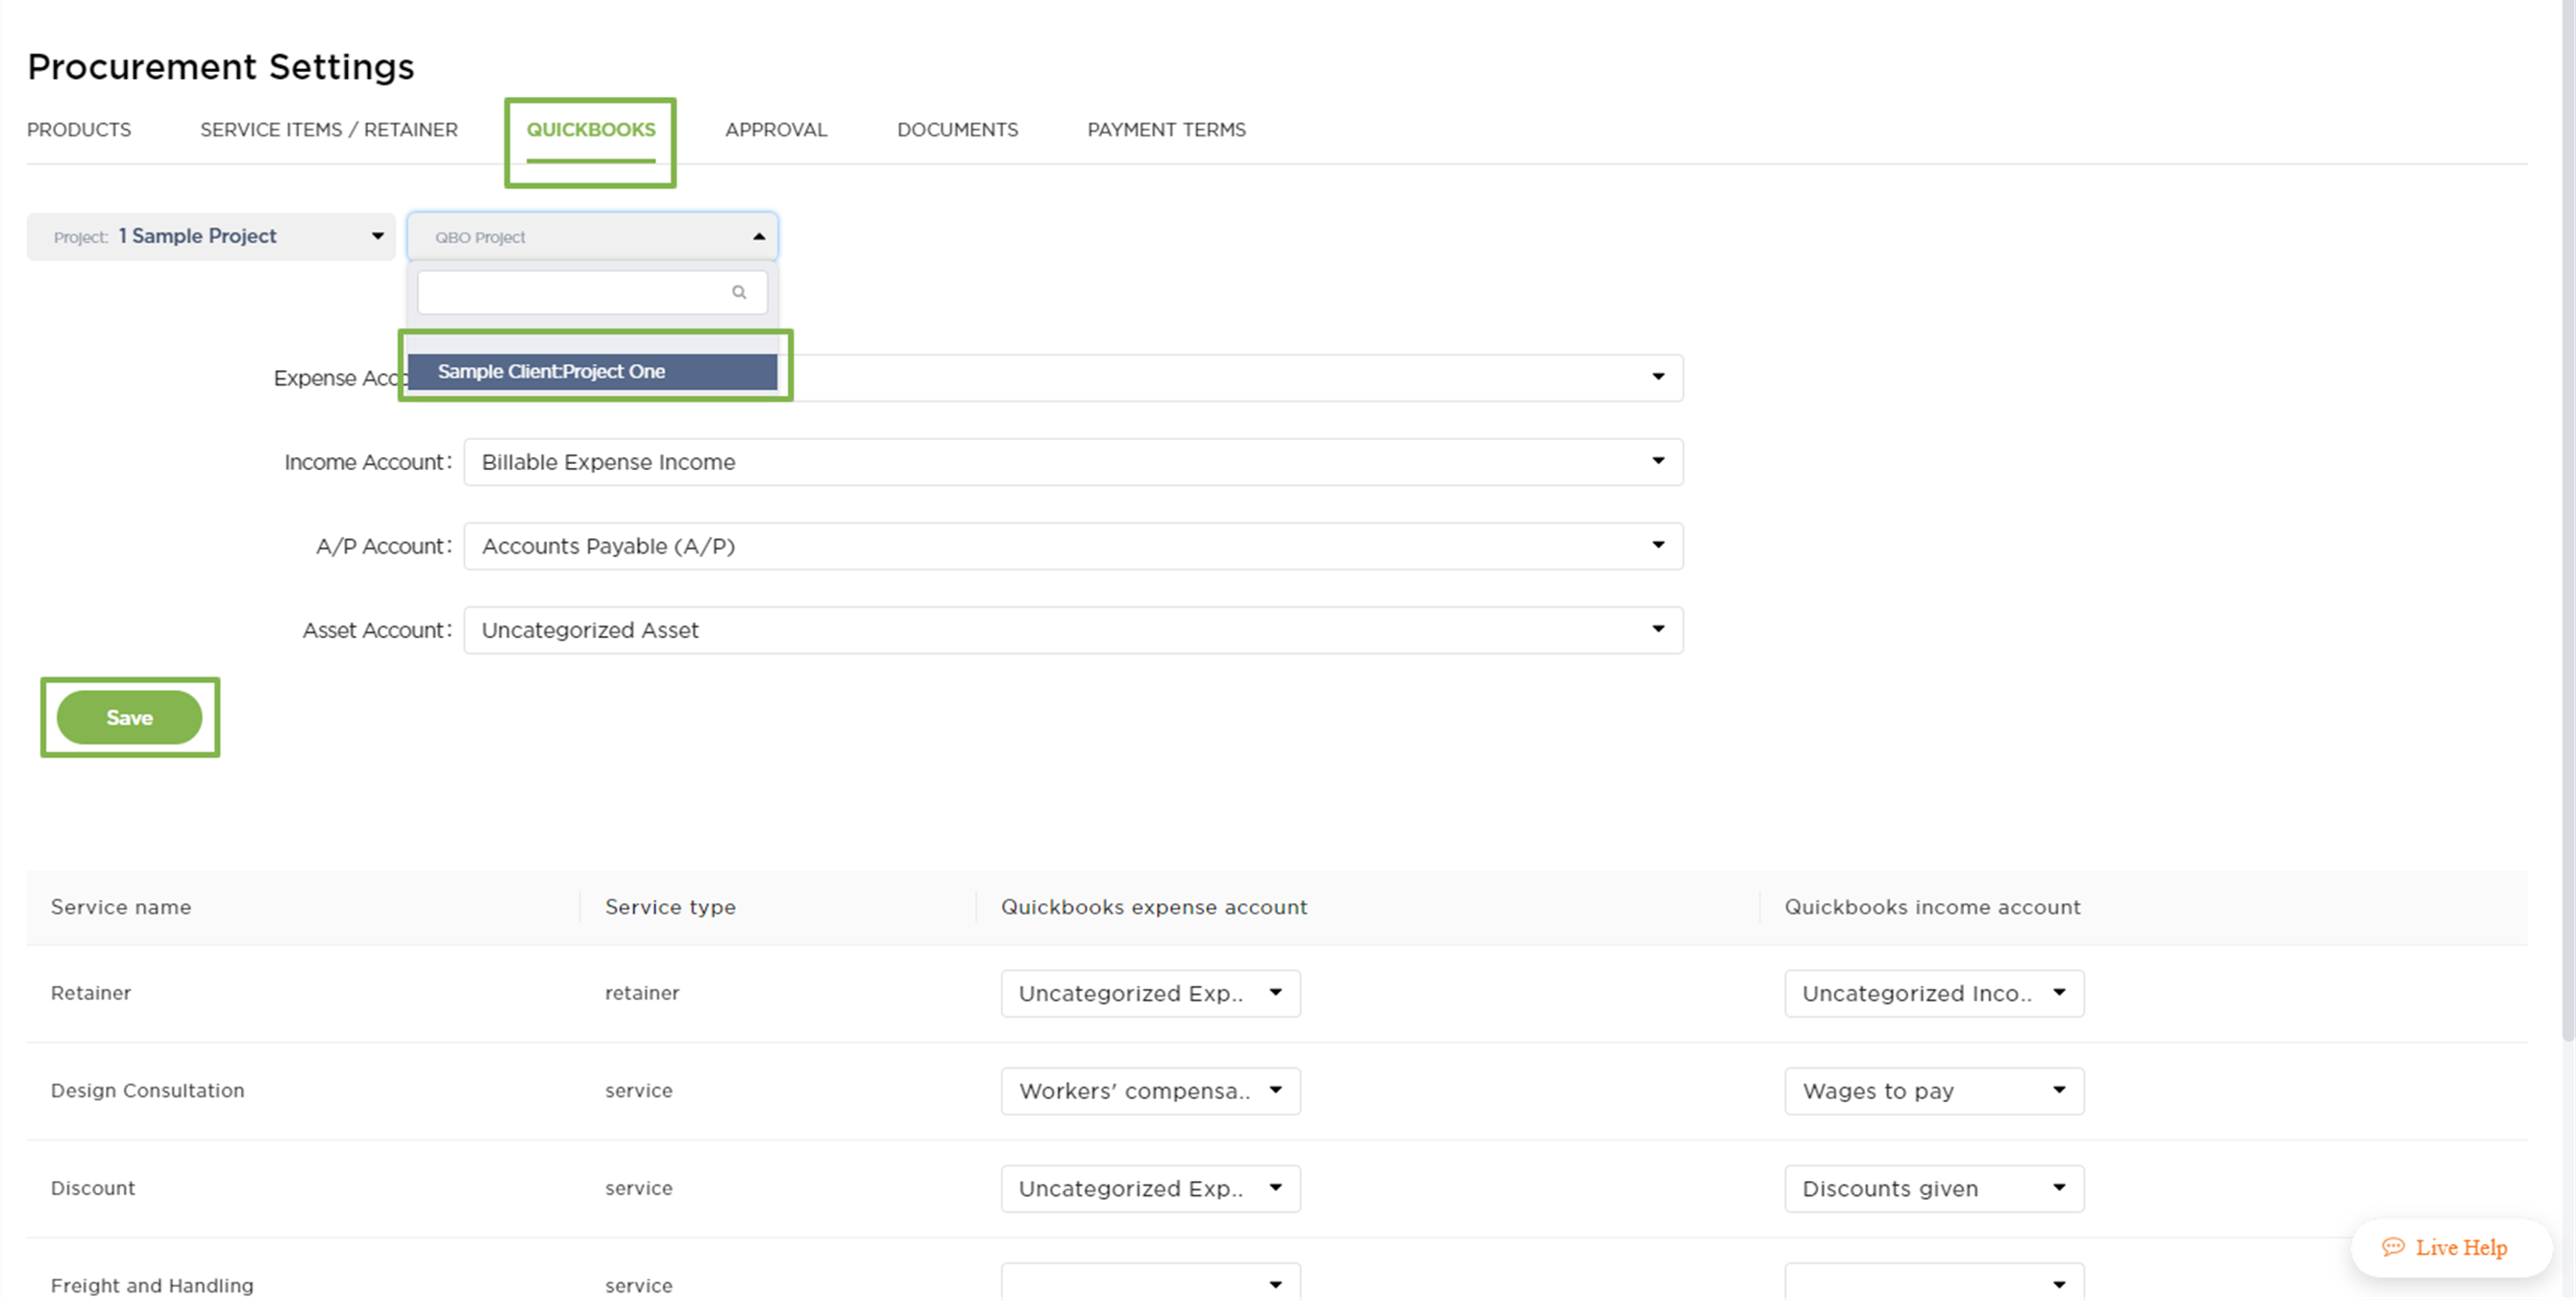
2. Next to the Project Name at the top of the screen, you will see that there is the option to select a QBO project.
-
The projects need to be assigned to the same client/customer in both Fohlio and Quickbooks.
-
In order to have the same client on both platforms, a Client Proposal or Client Invoice needs to be sent to Quickbooks from Fohlio
3. Select one of the projects from your Quickbooks account and then click on Save at the bottom of the page.
We hope this article was helpful, please rate the article, and reach us via Live Help if you still need assistance.


.png)
