Quickbooks Integration - Part I - Connection & Tax Agencies
This is a multi-step guide on how to configure the integration between Fohlio and Quickbooks.
After completing it, you and your team will gain knowledge on:
- How to configure Procurement Settings in order to have a correct data flow.
- How to send & sync documents from Fohlio to Quickbooks Online.
- The answers to the most common questions related to the integration.
- How to identify and troubleshoot various problems.
With our integration you can:
- Keep a close eye on your cash flow.
- Track invoices, payments, purchases, and more by syncing your Fohlio account with QuickBooks Online.
This part of the guide includes instructions related to the following sections.
Sections
-
Connecting to Quickbooks
-
Setting up the Tax Agency for Tax Rates in Fohlio
Connecting to Quickbooks
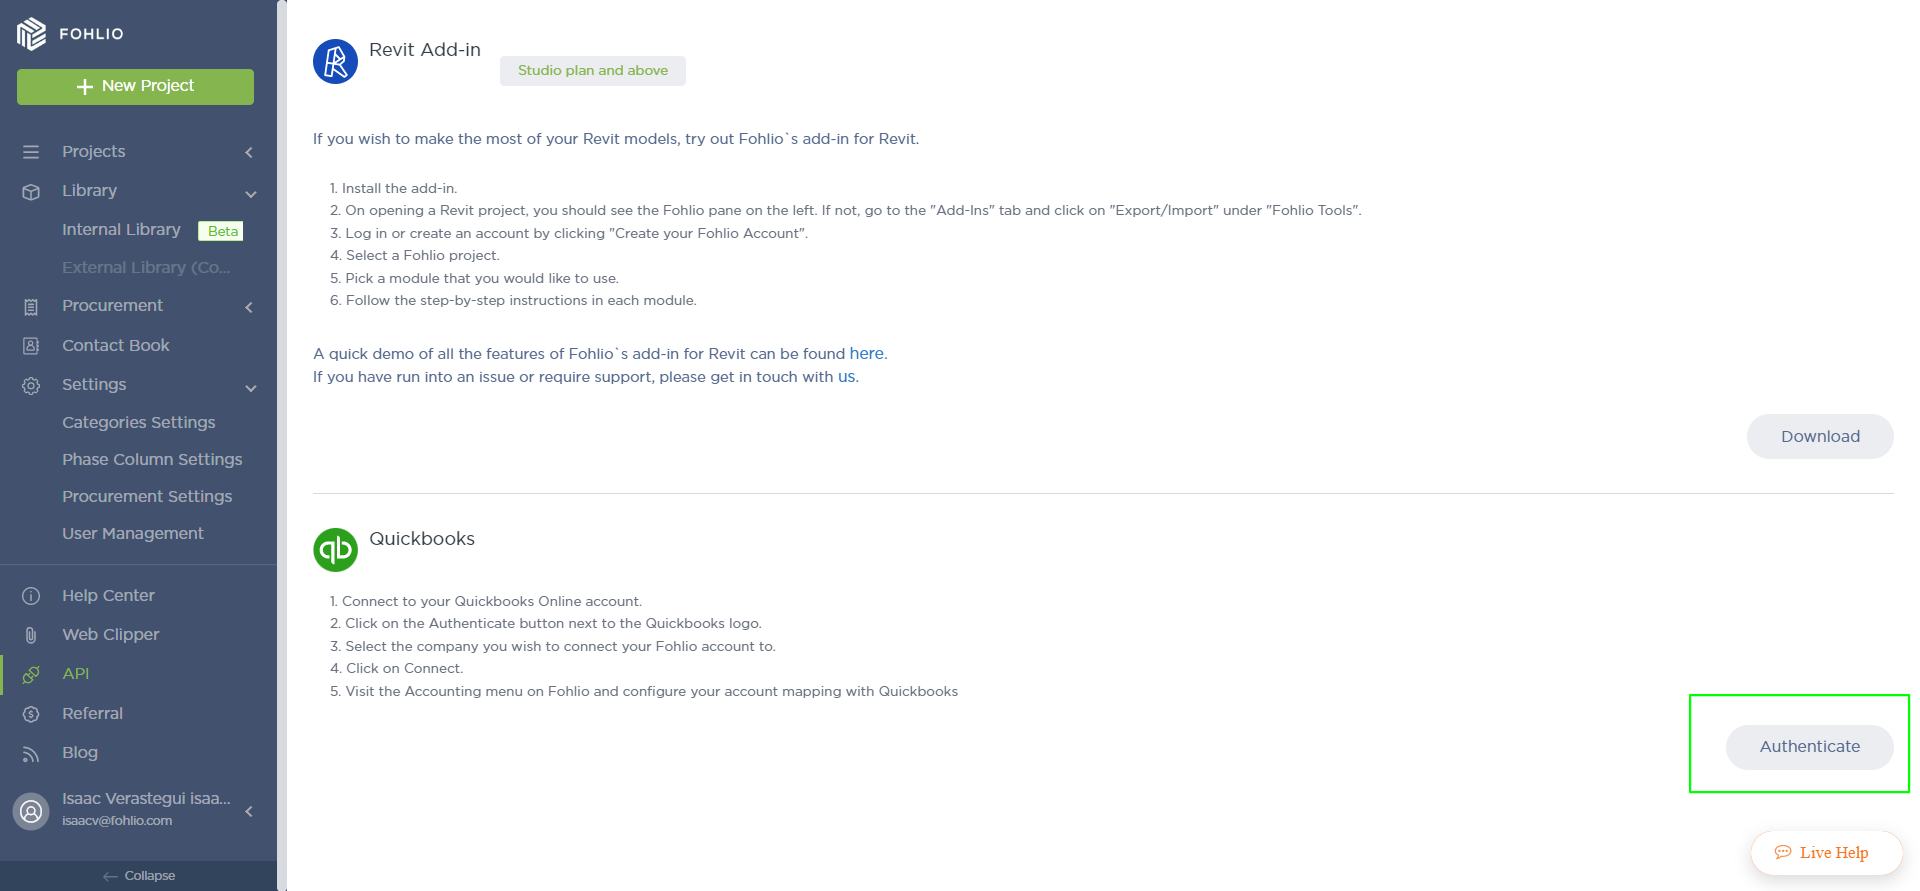
The first step in configuring the integration between Fohlio and Quickbooks is you need to connect your Fohlio account to your Quickbooks acount.
1. Upon clicking on Authenticate, you will be redirected to Quickbooks.
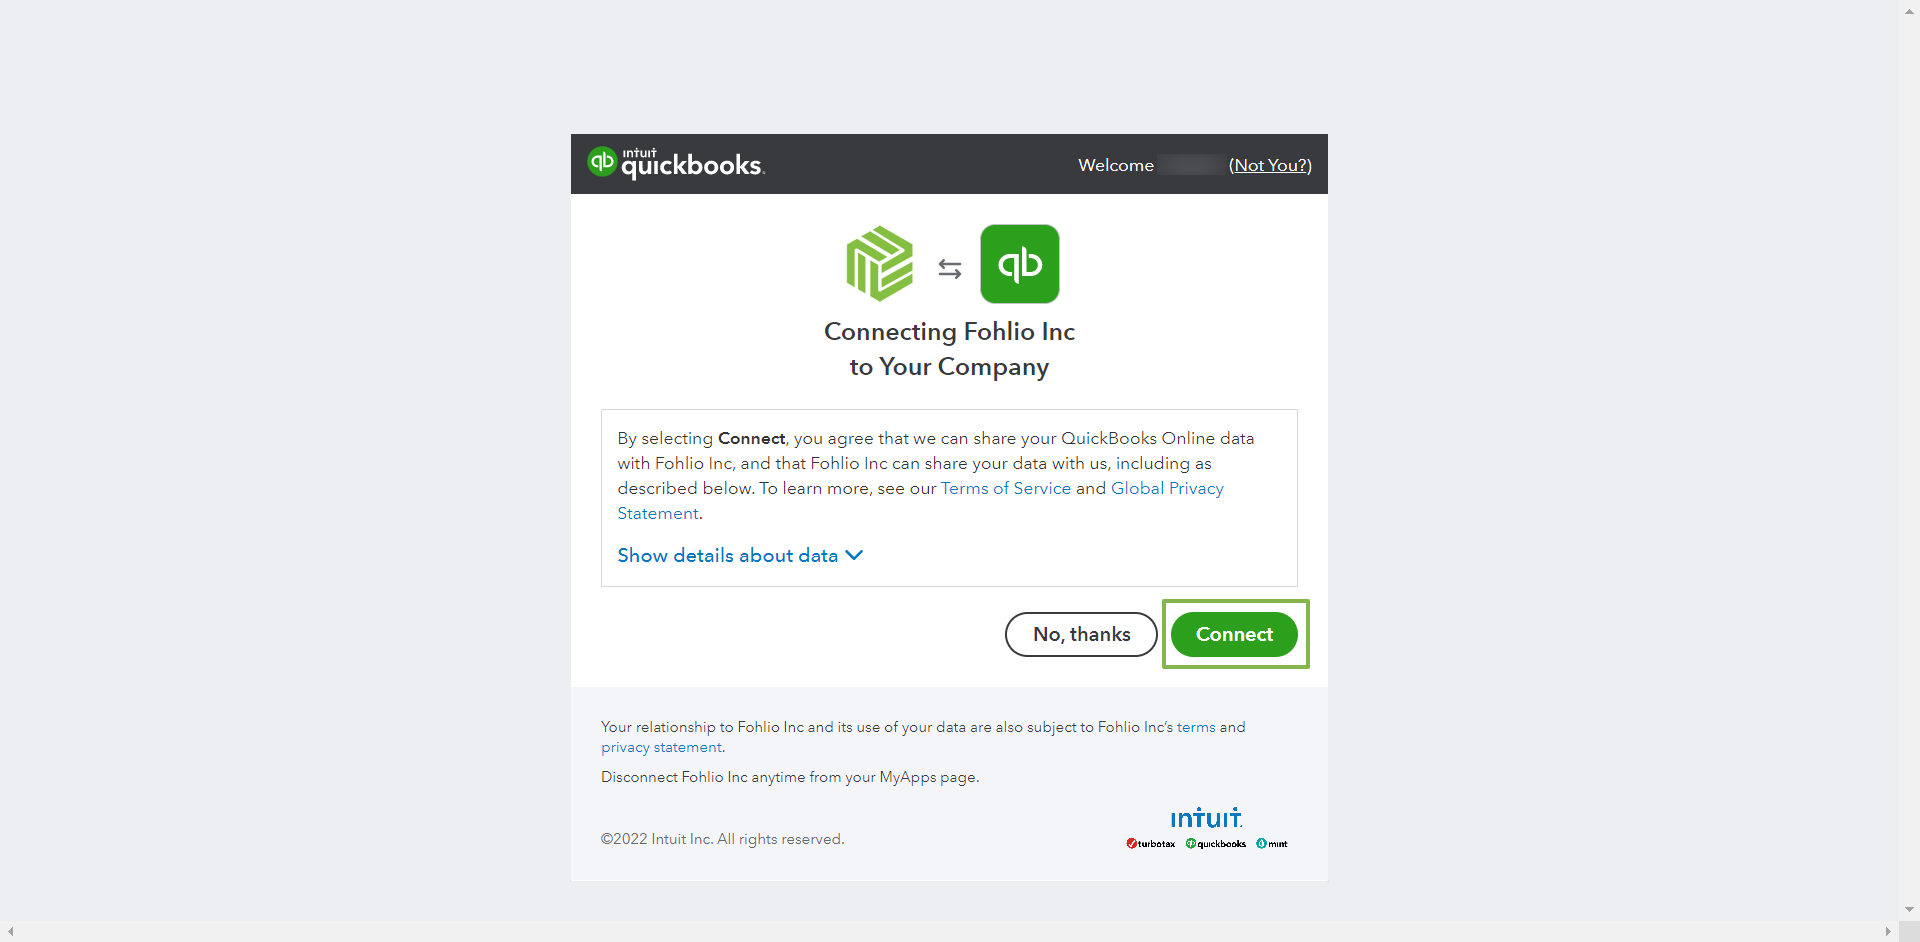
2. You will have to select the Company and click on Connect
Note: If you are not signed in on Quickbooks, you will first be prompted to sign in.
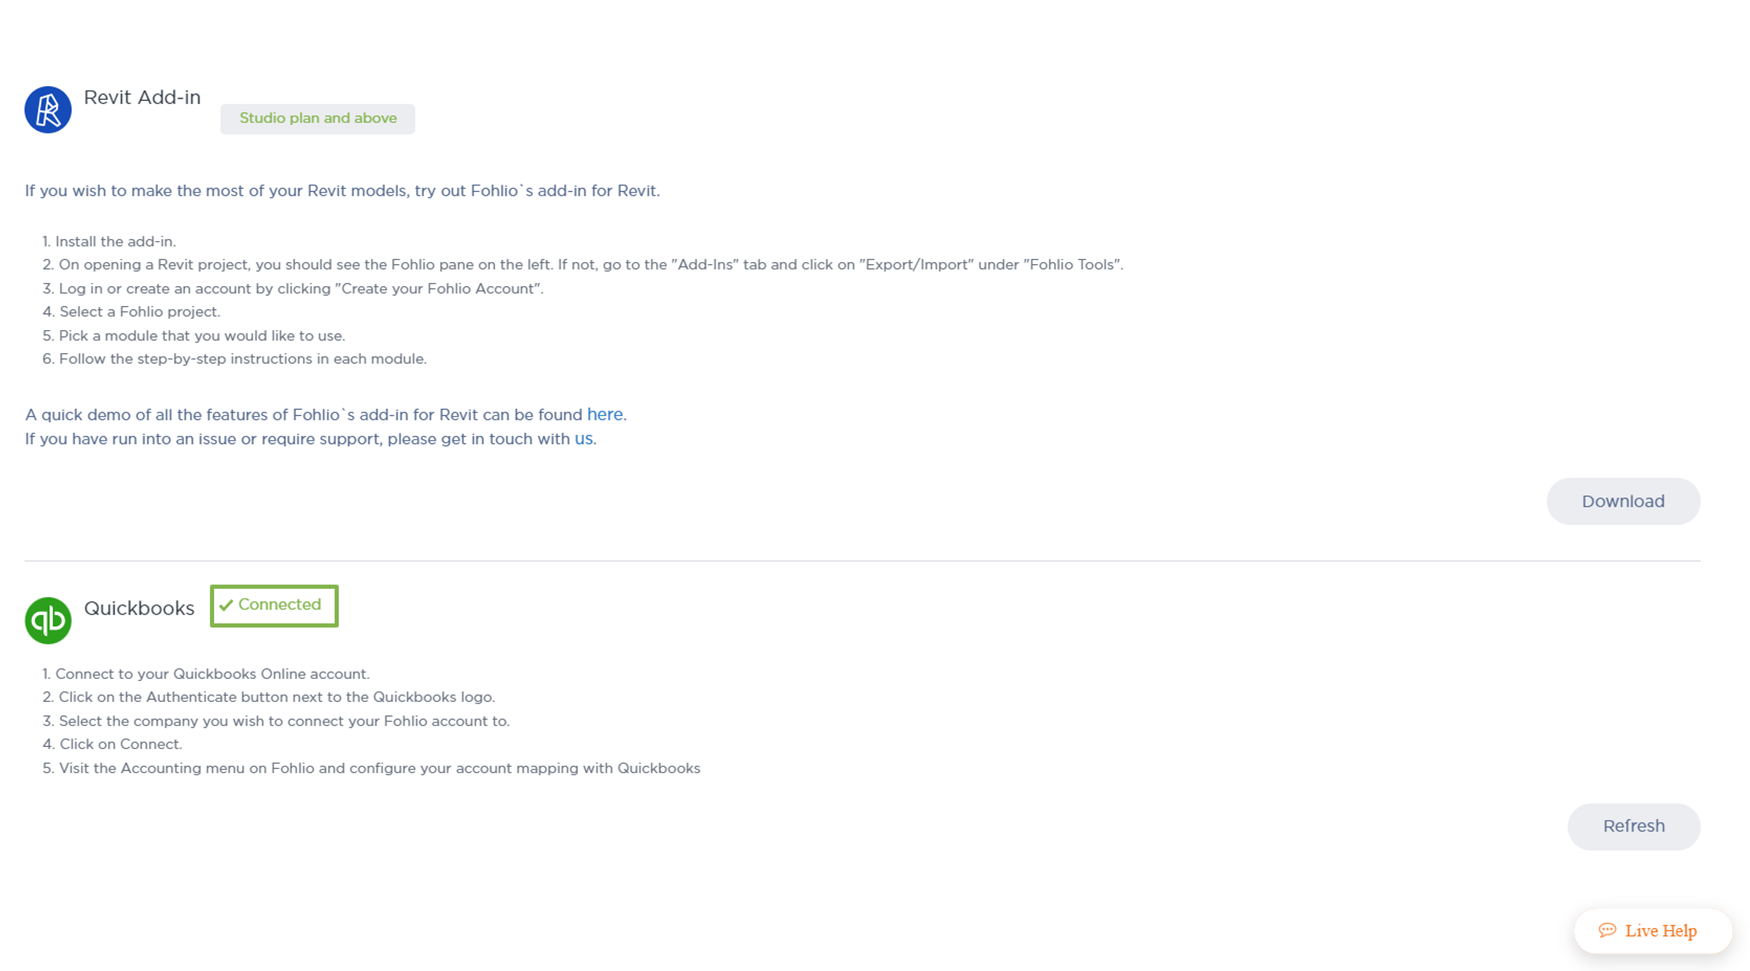
Once your account is connected to Quickbooks, you will be redirected to Fohlio and the status of the connection will be updated.
Setting up the Tax Agency for Tax Rates in Fohlio
The next step after connecting to Quickbooks is to configure the settings, on average, it takes around 5 minutes to set it up.
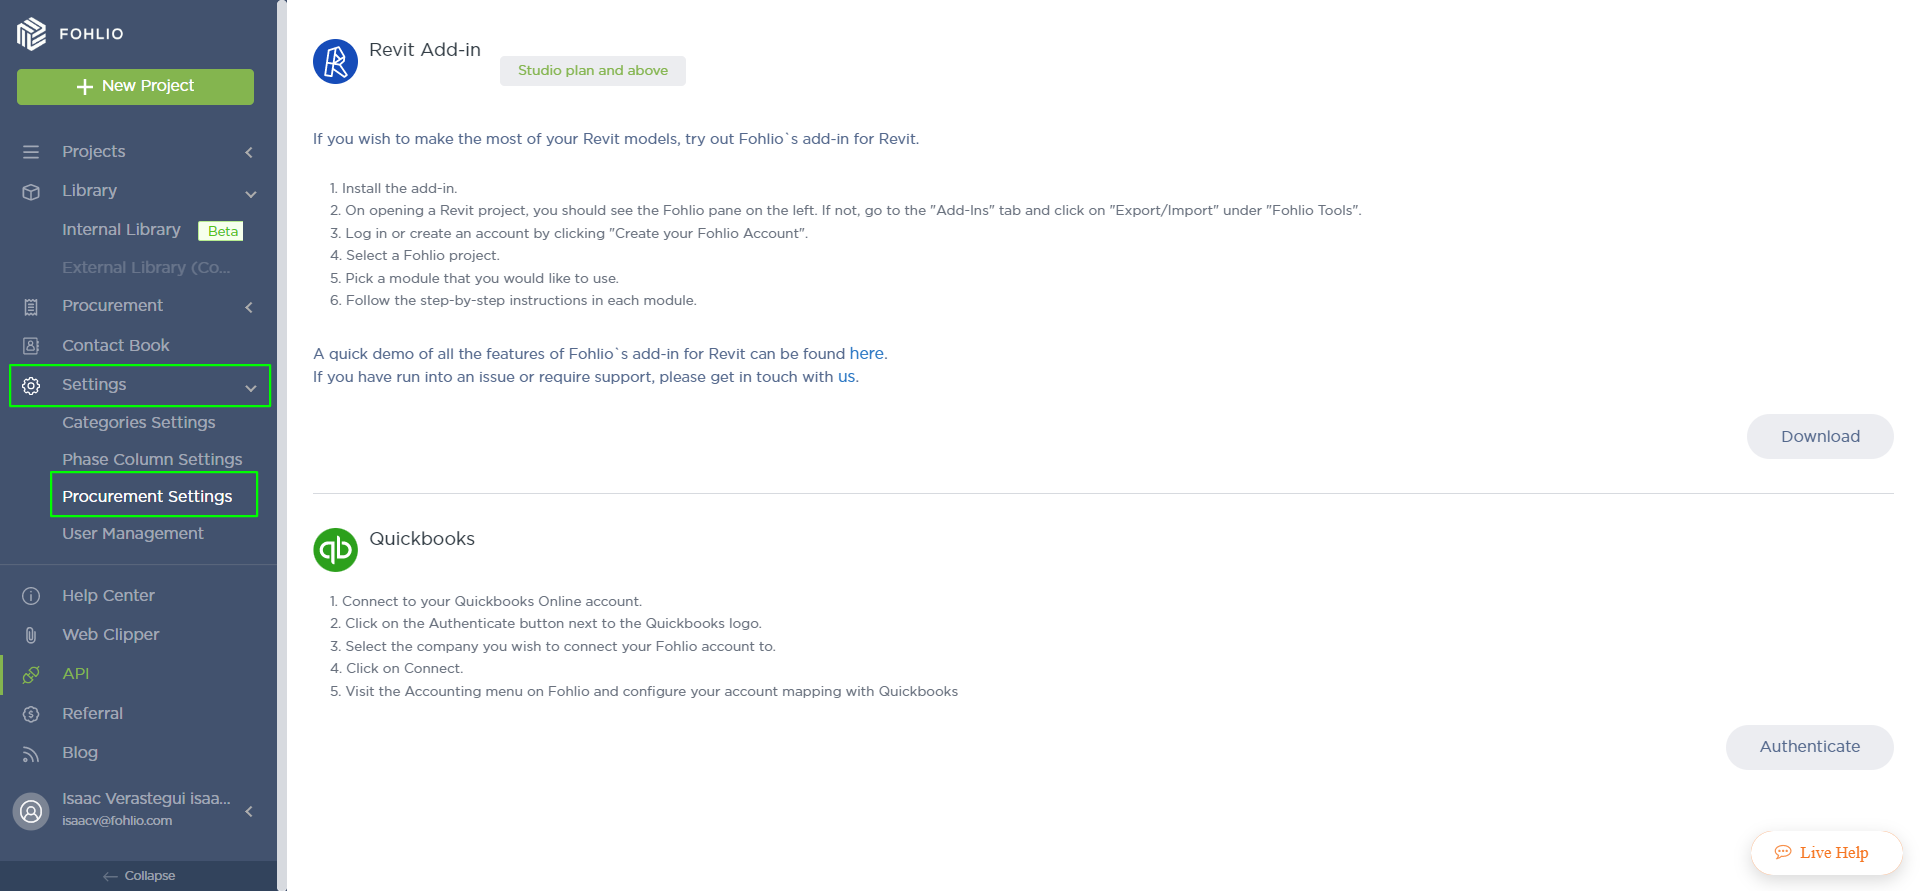
1. Click on Procurement from the navigation sidebar and then click on Settings
2. In the General section of the Products tab, we are able to configure the Tax Rate that is used for the selected project.
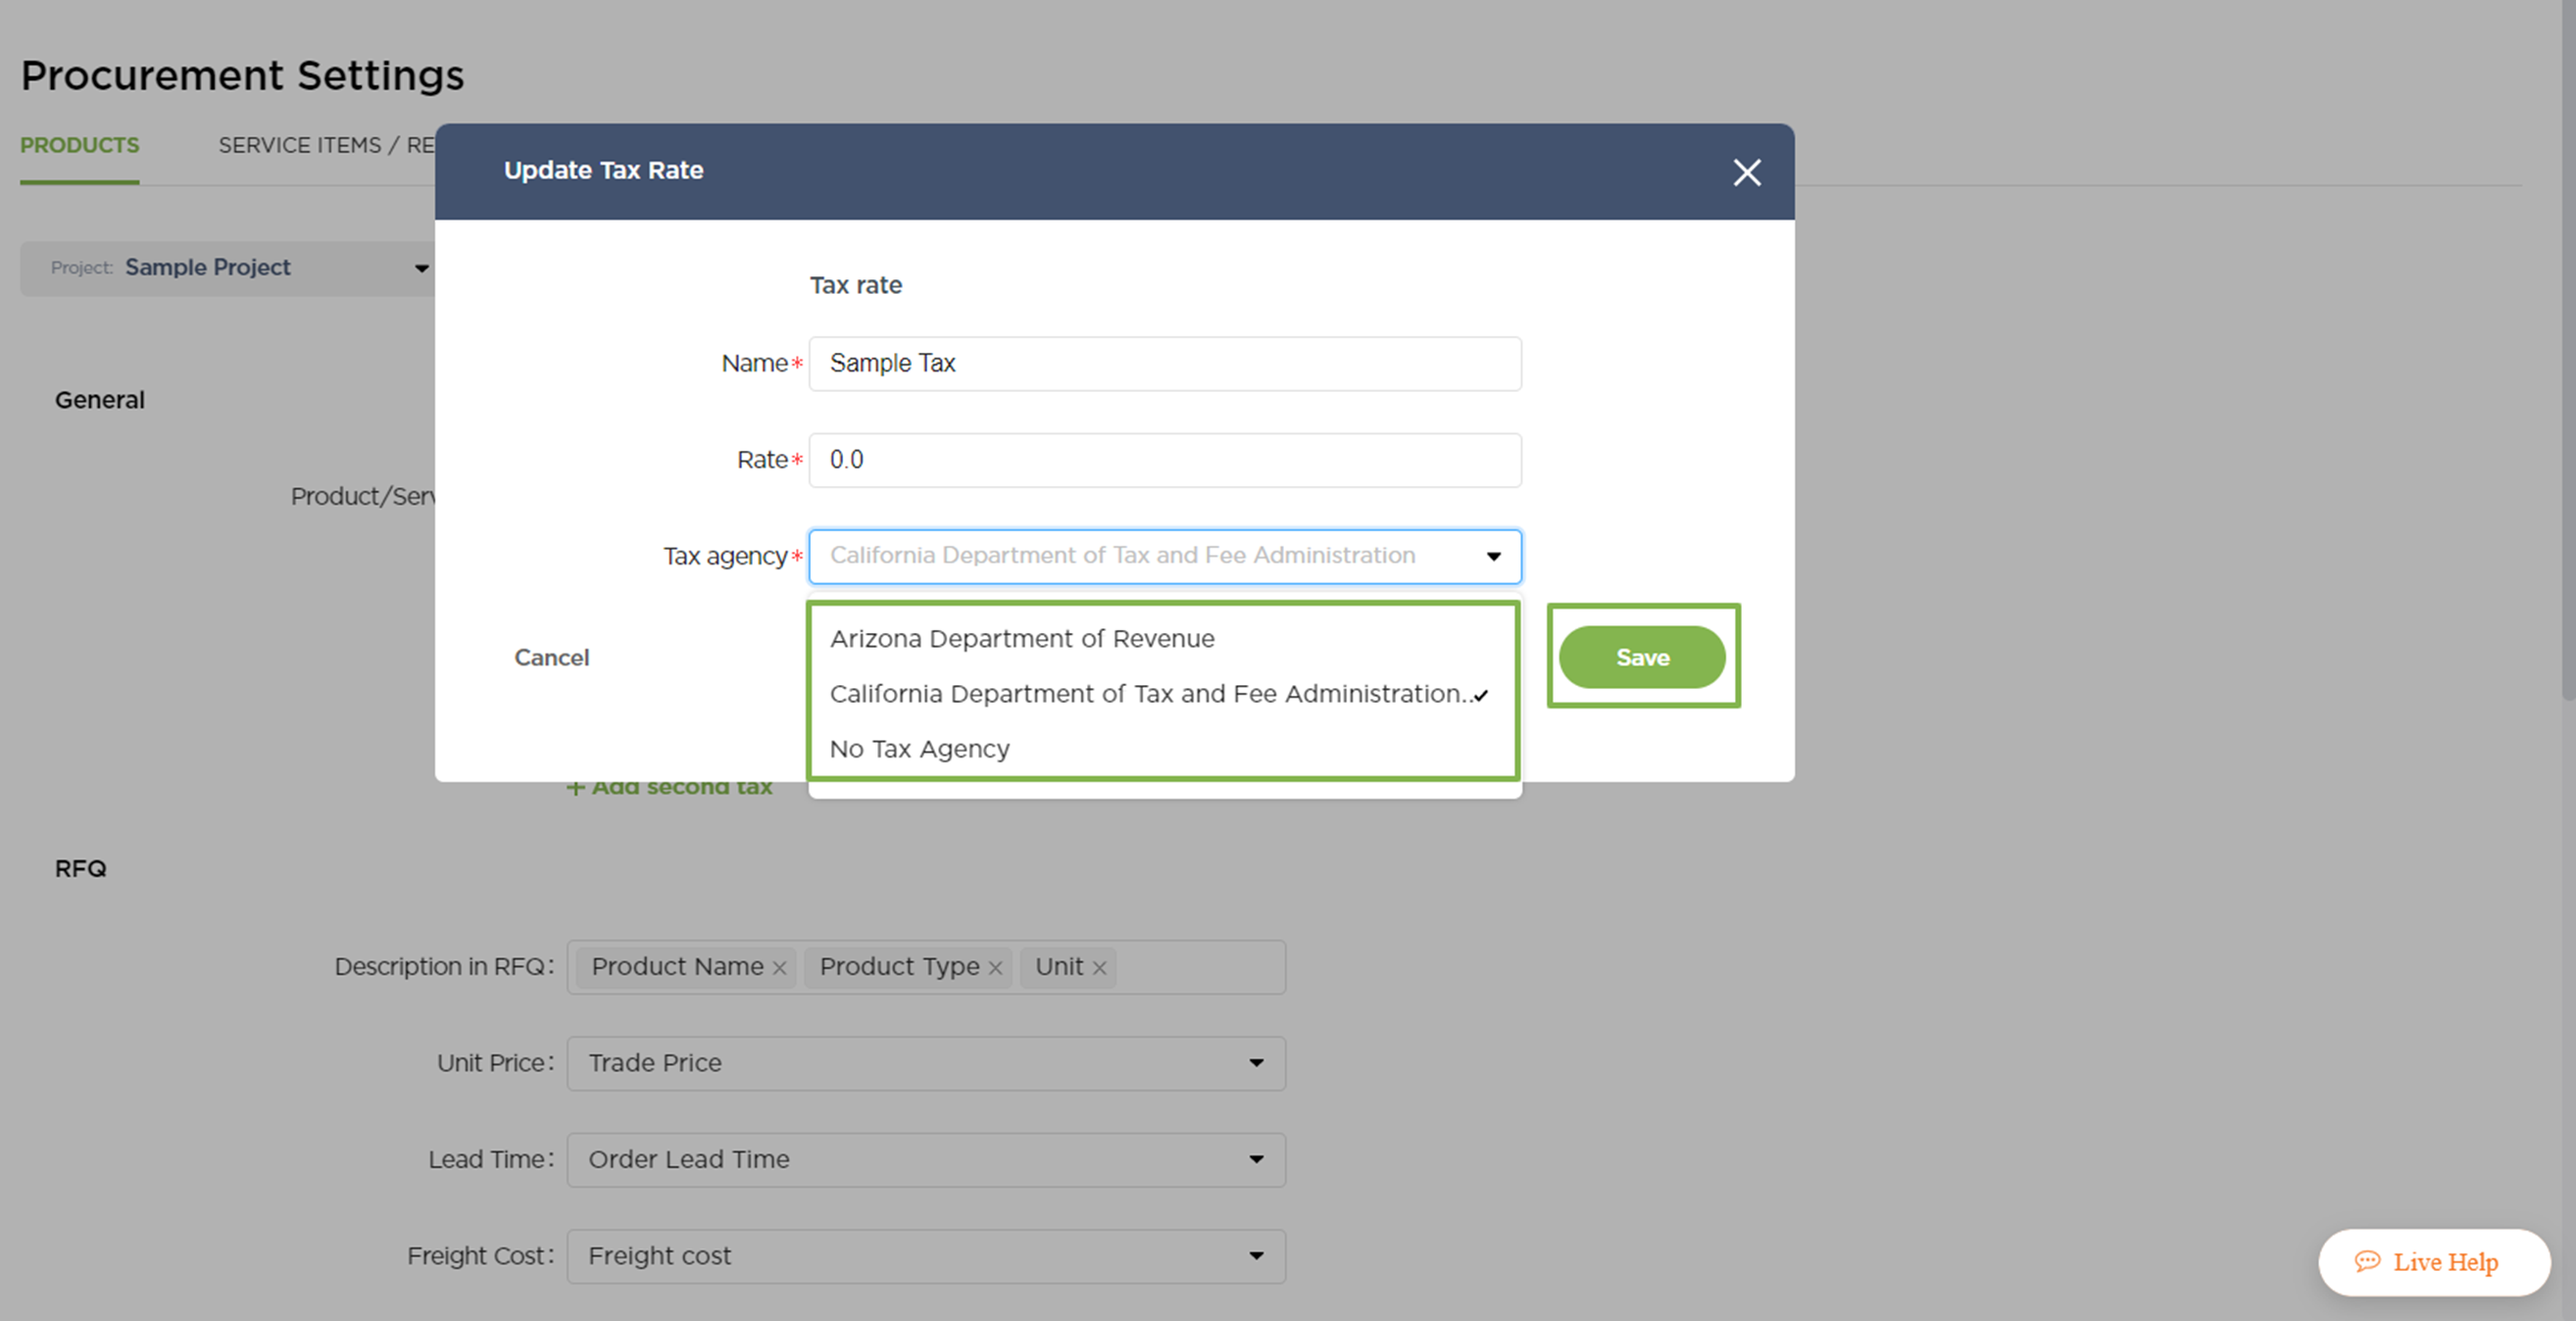
Here we need to click on the Edit and select one of the Tax Agencies available
-
The list of Tax Agencies comes from your Quickbooks configuration on the Taxes page.
-
The settings are per project, meaning that you can use a different Tax Rate for each project.
-
In case there are no Tax Rates created for your account, you can create a new one by following this tutorial

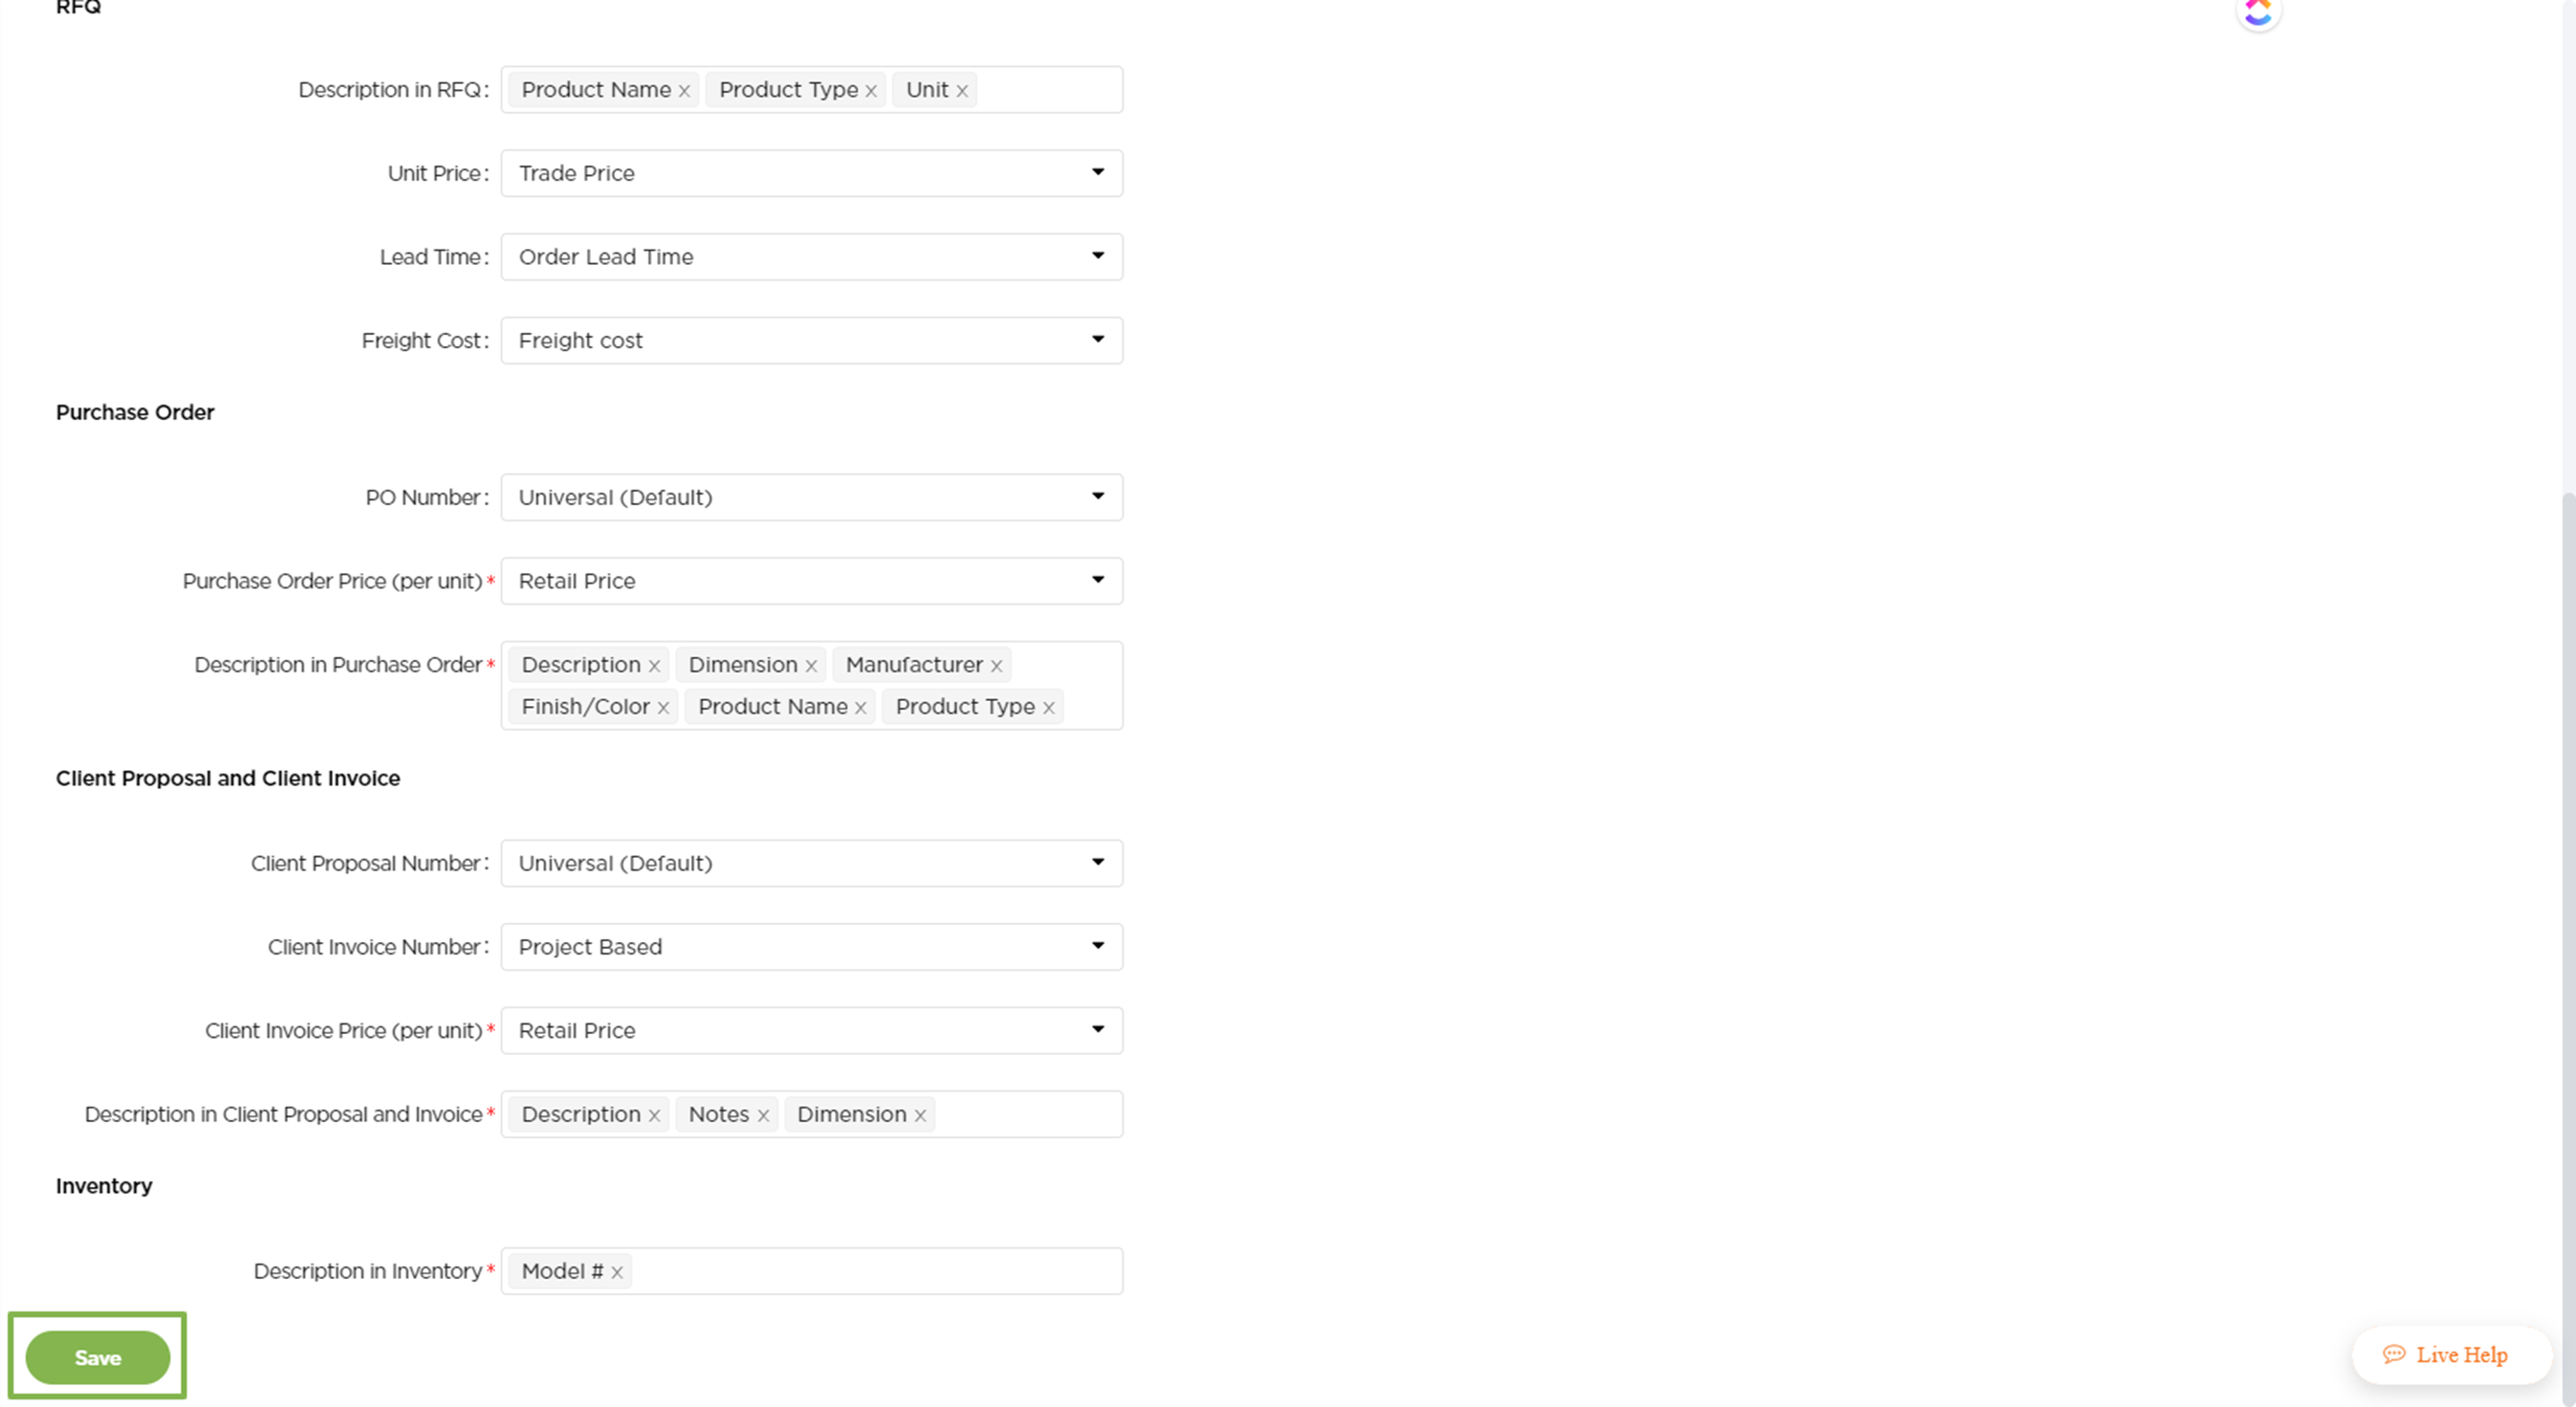
3. The last thing that needs to be done is to save the changes, click on Save from the Update Tax Rate window and then click on Save at the bottom of the Products tab.
We hope this article was helpful, please rate the article, and reach us via Live Help if you still need assistance.
