
- Click on Projects > Area List from your Project Sheet:

-
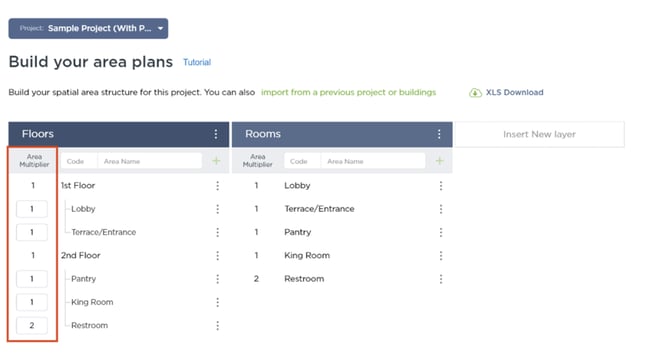
Now you can add your Floor and Rooms! You can also change the name for these Layers by double-clicking them. Take into account your Rooms are the subareas for your Floors.

-
To Add a new Area, type the name on the layer blank box and click the green plus sign.

-
You can also add sub areas to these floors by clicking in the 3 dots on the right hand of the Floor, besides that you can also duplicate the floor or room and delete in the same menu.
-
Note that you can add a Numeric Value (Code) to each one of the Sub Areas that way you keep your project areas organized and accurate.

-
The Area Multiplier will help you save time if you want to duplicate room settings and specs. Just add a number on the left! It will multiply the room by the number you want.
-
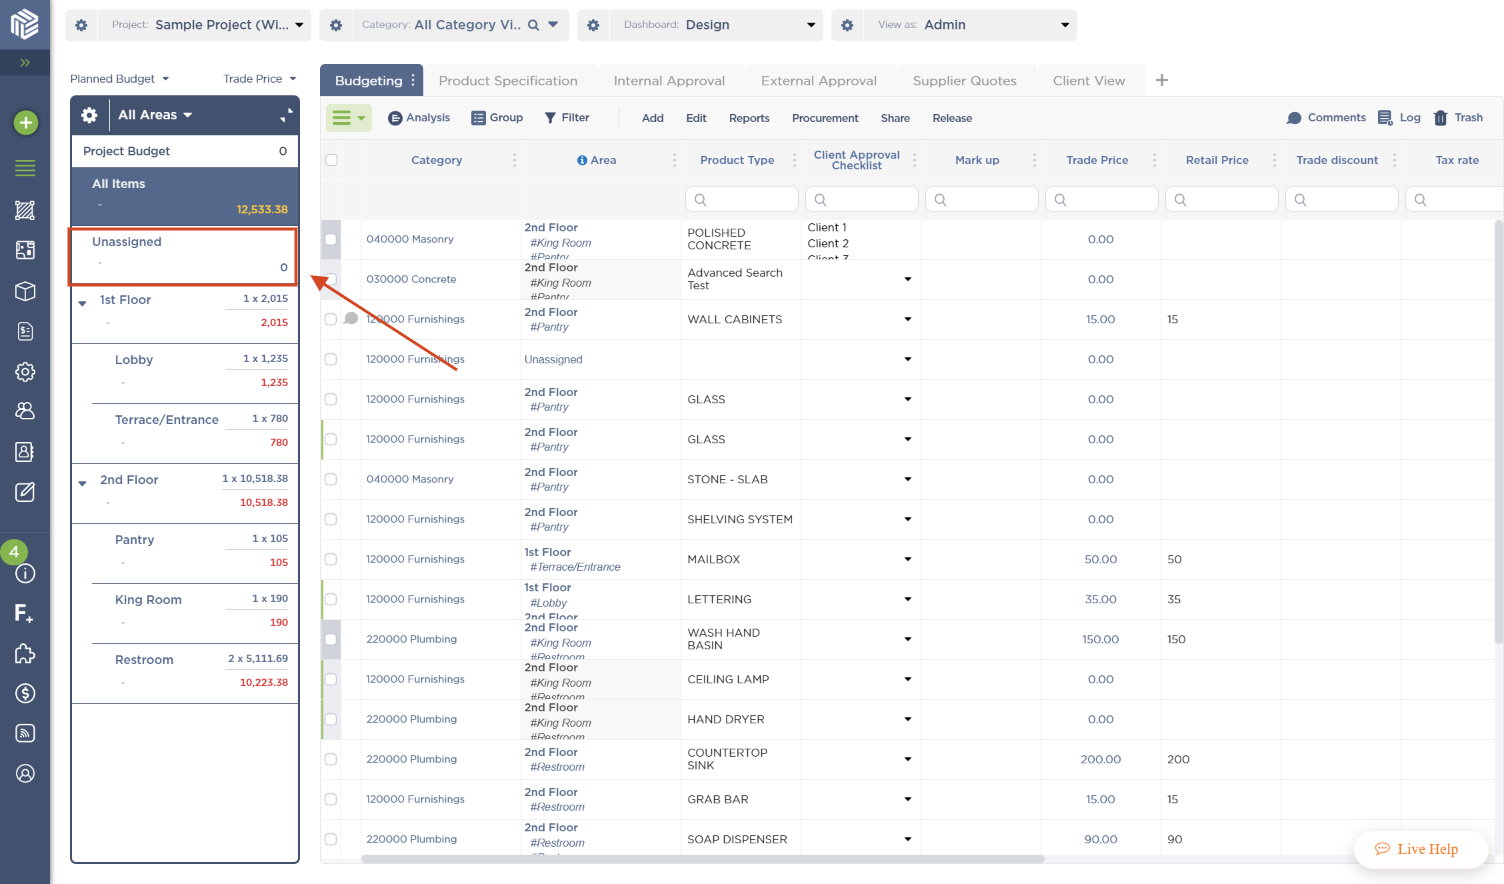
If you go back to your Project Sheet you will find the area plans exactly the same way you built them in your area column on the left of your Project Sheet.

-
You will Find that the first 2 Rows of this Area column will be “All Items” and “Unassigned”. Here is a short description for each one of them.
All Items: The complete list of items of your project will show in the Project Sheet.
Unassigned:The items that have not been assigned to an area will show up here.
Extra QTY: It shows any items with Extra QTY added to them.
-
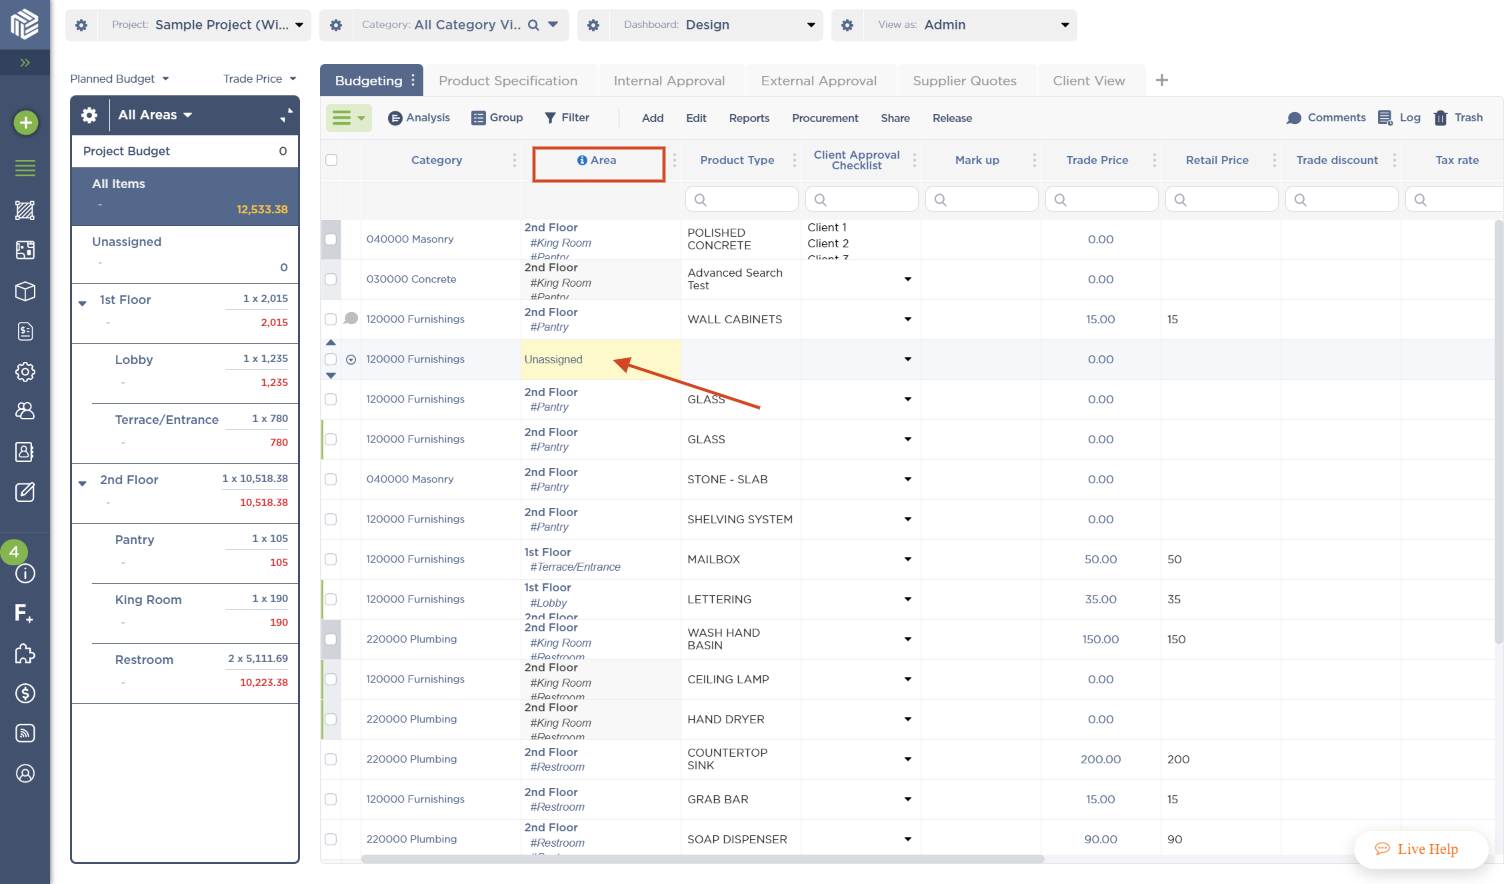
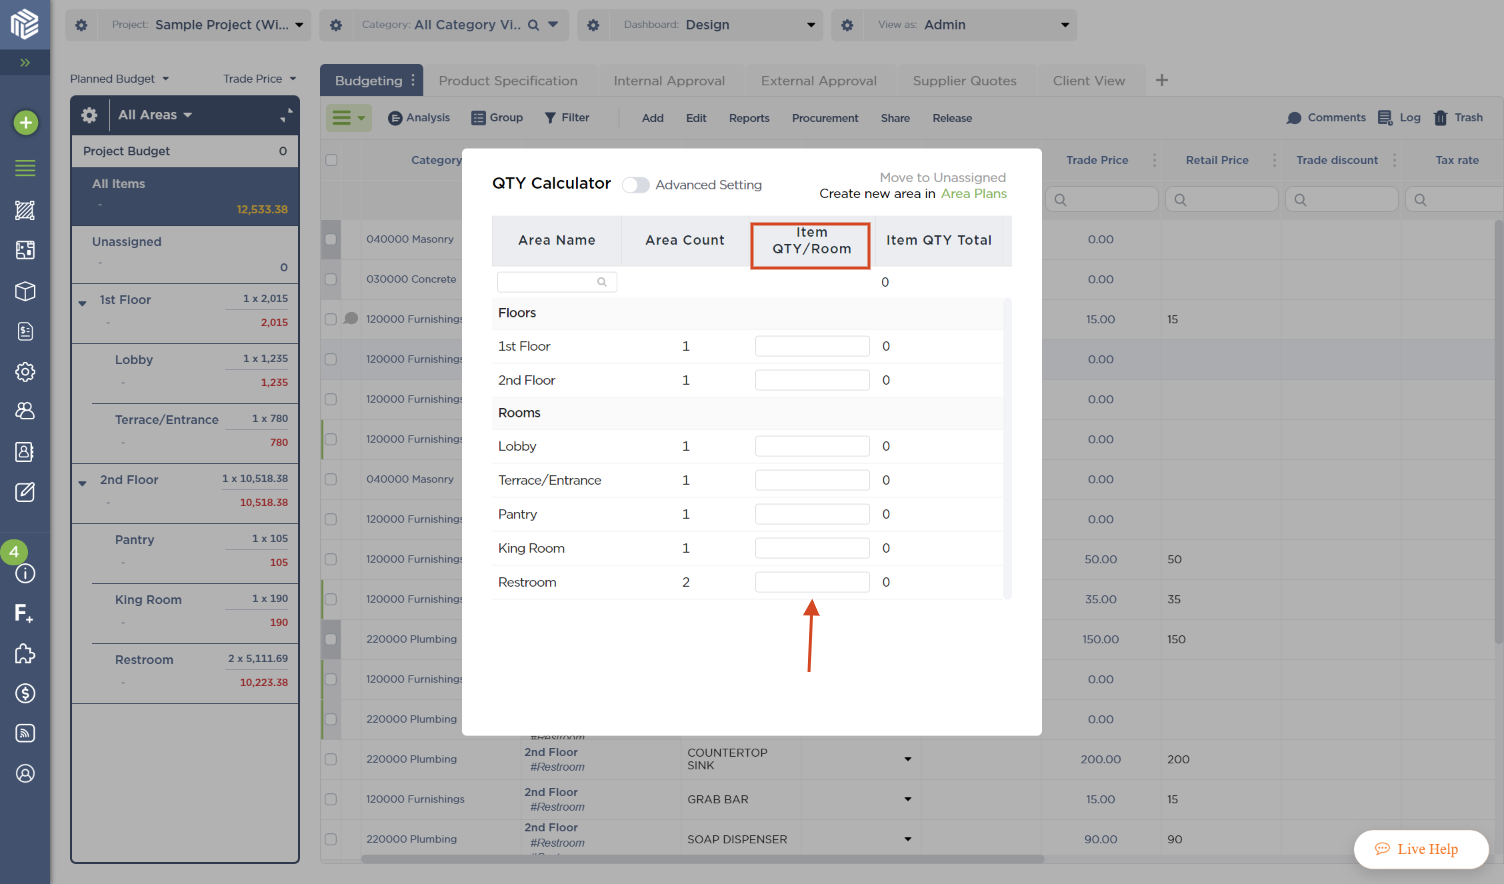
To assign items to an Area you have to click on the Area cell of the item and a menu will appear.
-
This menu will show you all the rooms in your project, type down the right quantity and click away! Your items have now been assigned to the specific area!
-
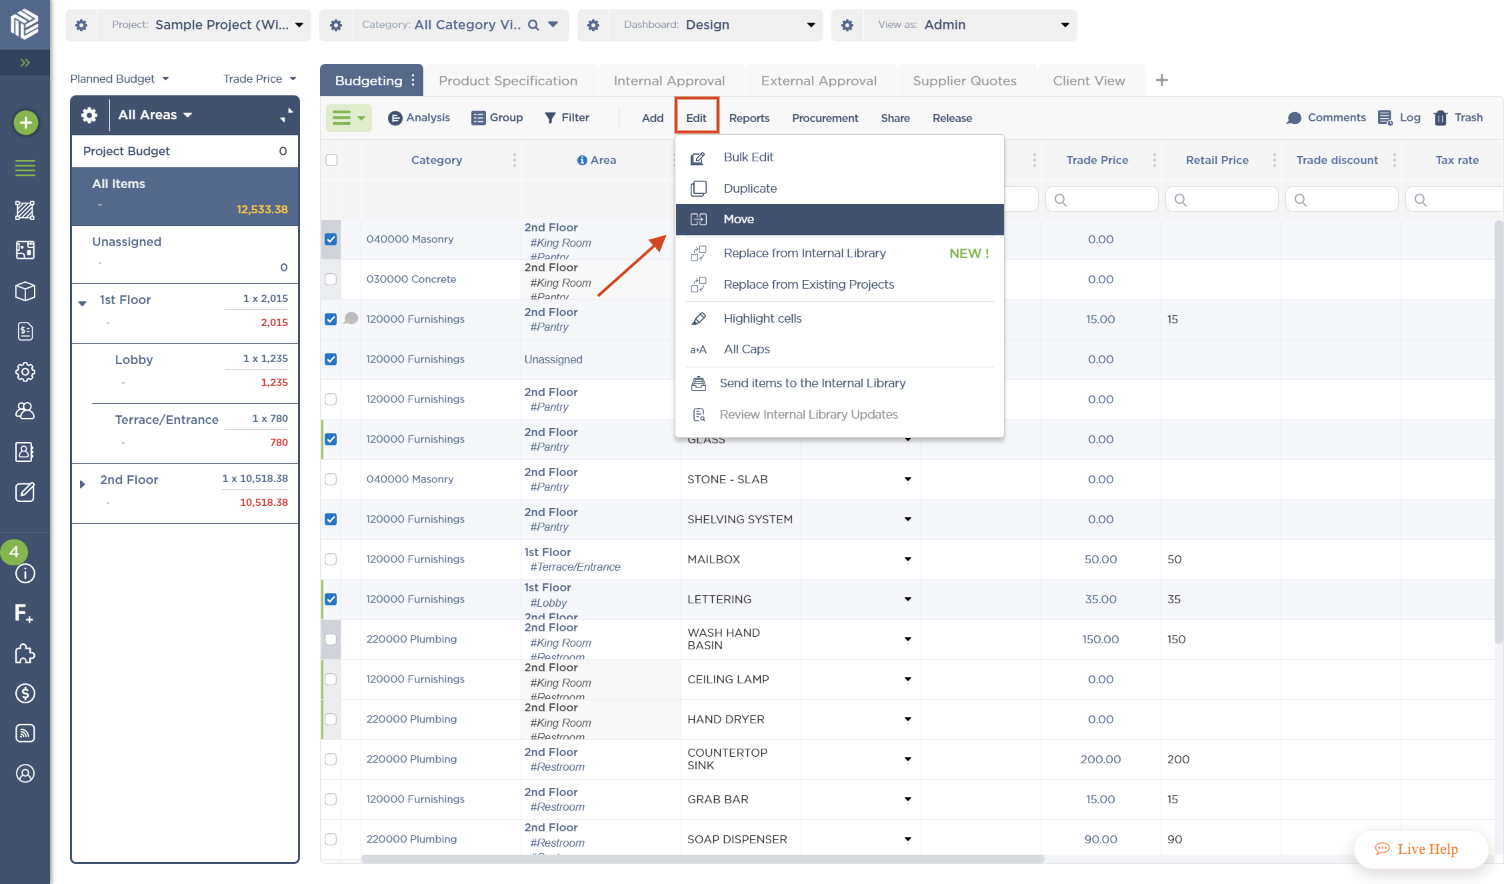
If you want to move multiple items to an area just select them and then click on Edit, after that click on Move and select the wished area.
Now you are ready to build your Area Plans!
Thank you for reading. Please rate this article or let us know about other ways we can improve the tutorial for other users. We hope you find this article useful.