How to Use the Web Clipper
One of the best Fohlio tools is to easily copy & update data from Websites into your Dashboard. Update item specifications in few clicks.

Use Fohlio's Web Clipper to copy and collect product information with ease. When browsing a webpage; interior designers, spec writers, or anyone on your team, can use a simple click action to add product information to their specification list via Fohlio Web Clipper. It is a much easier way than manually copying and pasting to gather product information (such as text, images, and files).
Installing Web Clipper
-
Click here, and a Fohlio page where the extension can be downloaded from the Chrome Web Store will pop up.
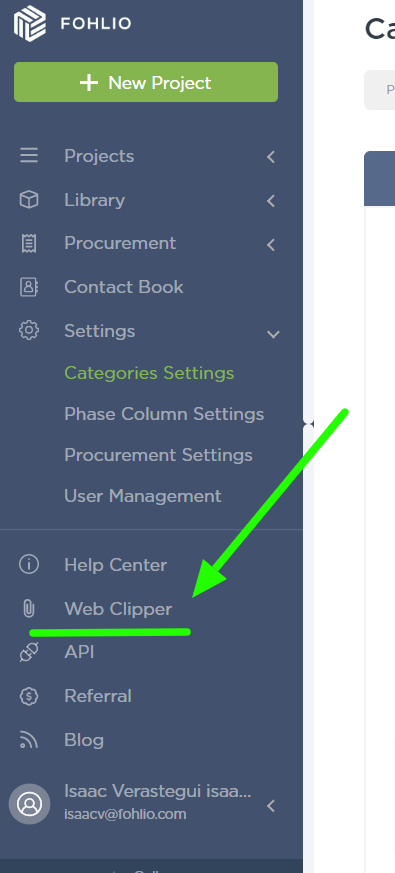
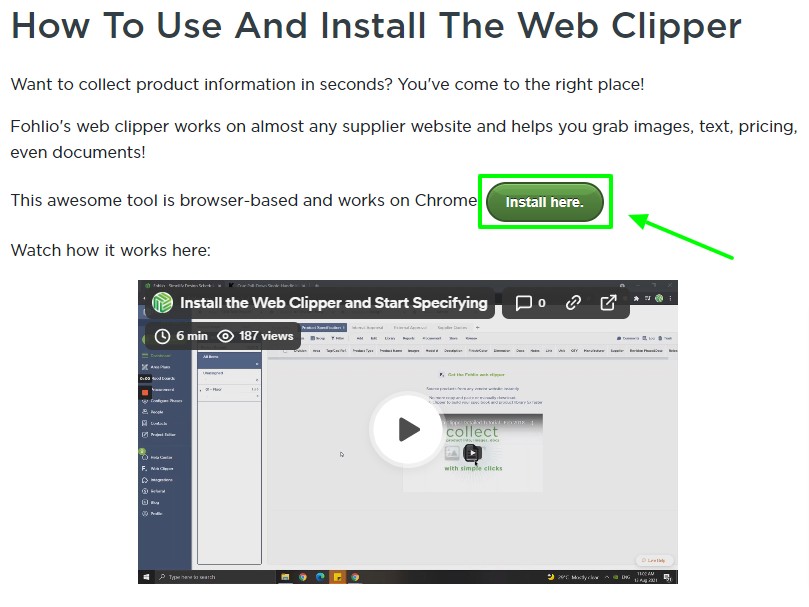
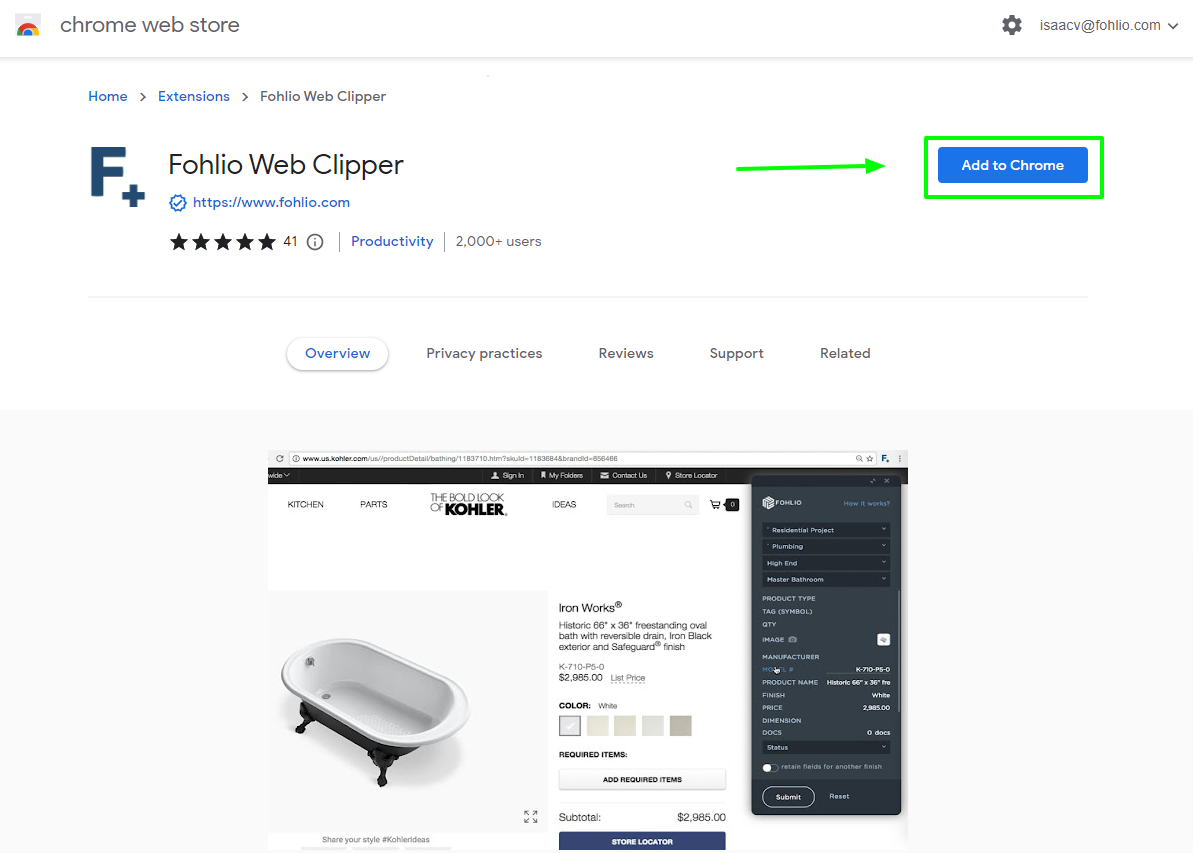
2. Select Add to Chrome
3. With Web Clipper installed. You can now Pin the Extension and it will appear at the top part of your Chrome browser.
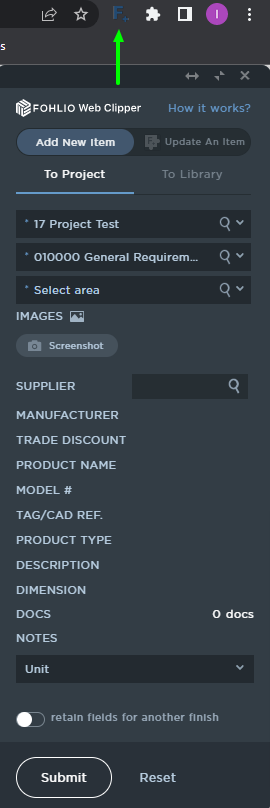
Browser Settings for Web Clipper
For the Web clipper to automatically connect to your Fohlio account, your browser should allow this type of operation.
If you are logged into the Fohlio website, but the Web clipper is still asking you to sign in, follow the steps below.
Chrome:
- Go to chrome://settings/cookies , or Open the setting and search for "Third-party cookies"
- Make sure "Block third-party cookies" toggle is OFF
- Retry to see if the Clipper works and it recognizes you are signed in.

Using the web Clipper
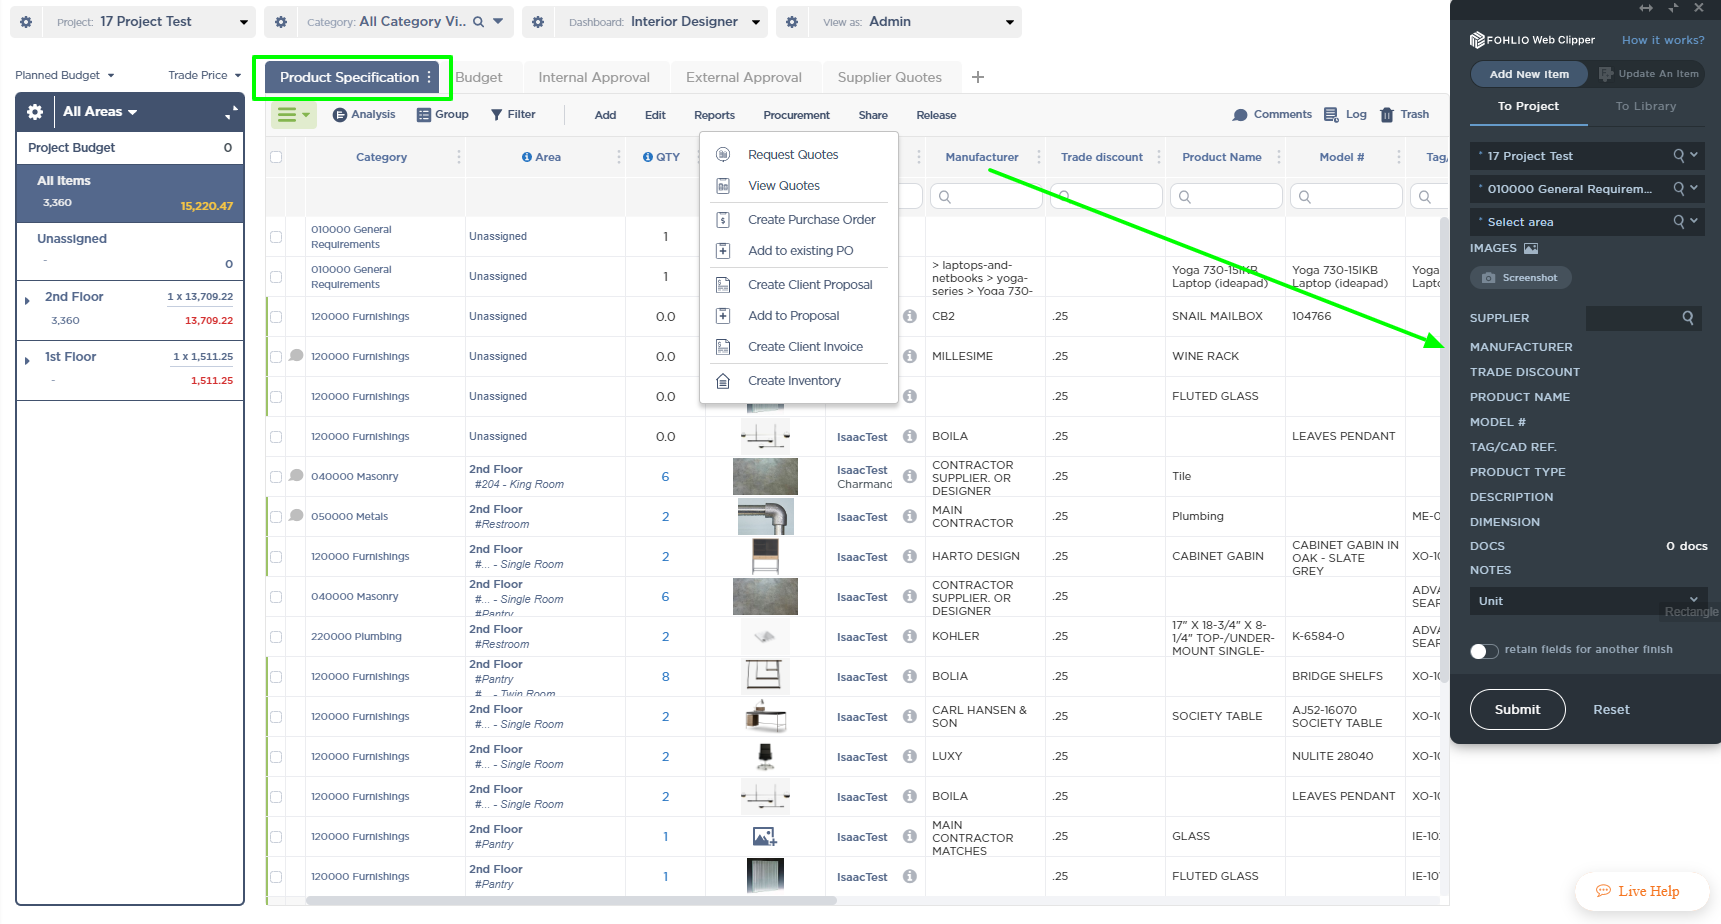
The Web Clipper interacts with your Dashboard. The Phase (highlighted in a green rectangle) will display its Columns, in the Web Clipper when the extension is Active. After changes have been submitted, remember to close the Chrome Tab you are in, or to close the Webclipper extension, before working on the next item.
Notice the order of the Columns from your Phase matches the descending order of Columns from your Web Clipper. In this example, we are focusing on Product Specification related data.
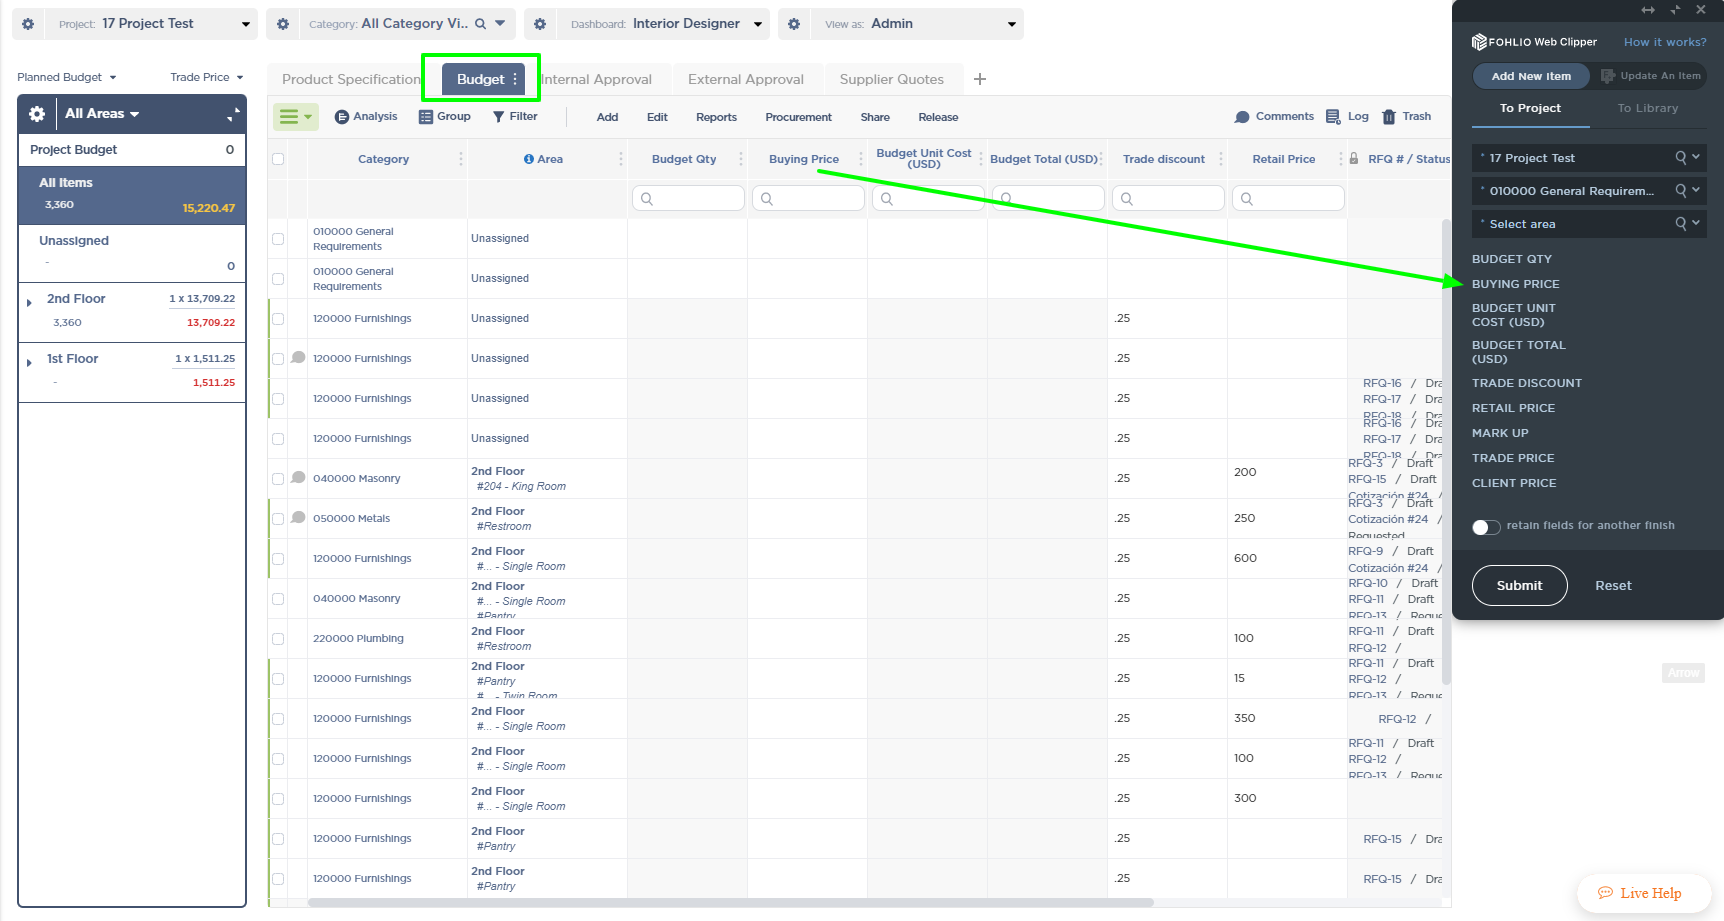
You may have unique Columns in different Phases. By switching between Phases you can have the Web Clipper show the Columns you need. In this example, we are focusing on Budget related data.
Now that you know the basics, let's now try a live example using a furniture website.
Find an item you would like to copy to your Dashboard. Once found, summon the Web Clipper, by clicking on the extension, up in the Chrome window.
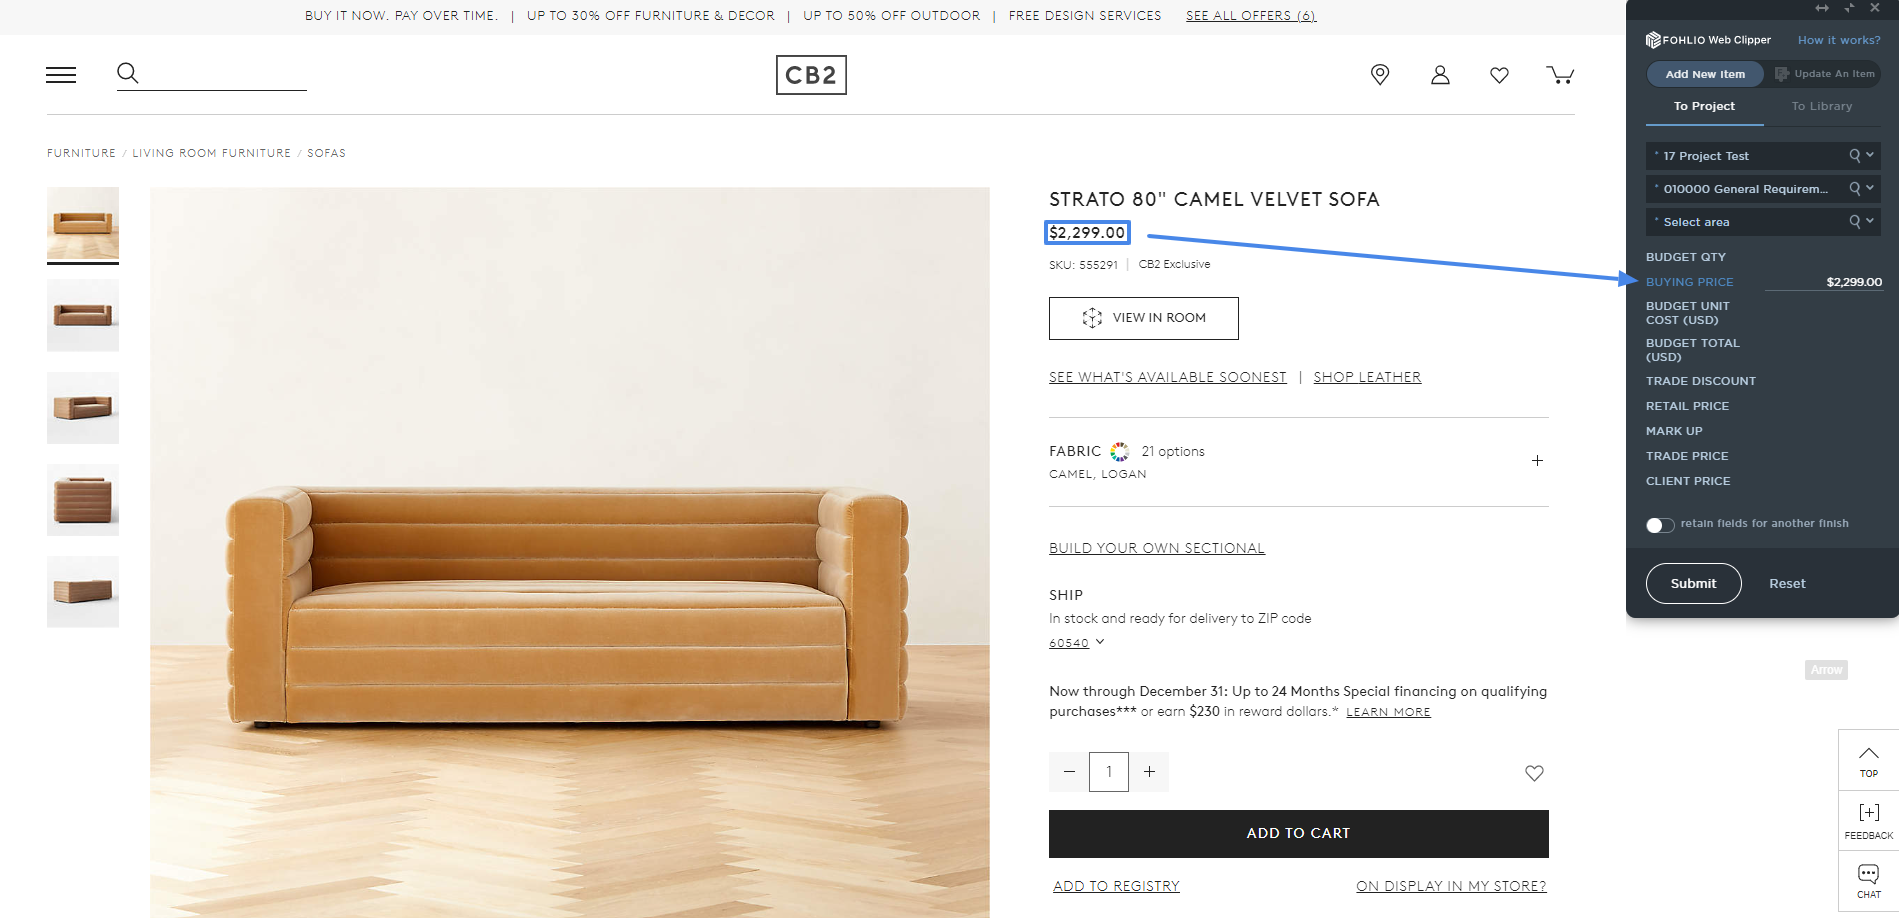
With your Web Clipper Active, first click on the Column where you will be copying data from the website, in this example Buying Price was clicked on. Then we hovered the mouse over the amount of $2,299.00 shown in a light blue rectangle. This light blue rectangle indicates the text field that will be copied over to the Web Clipper.
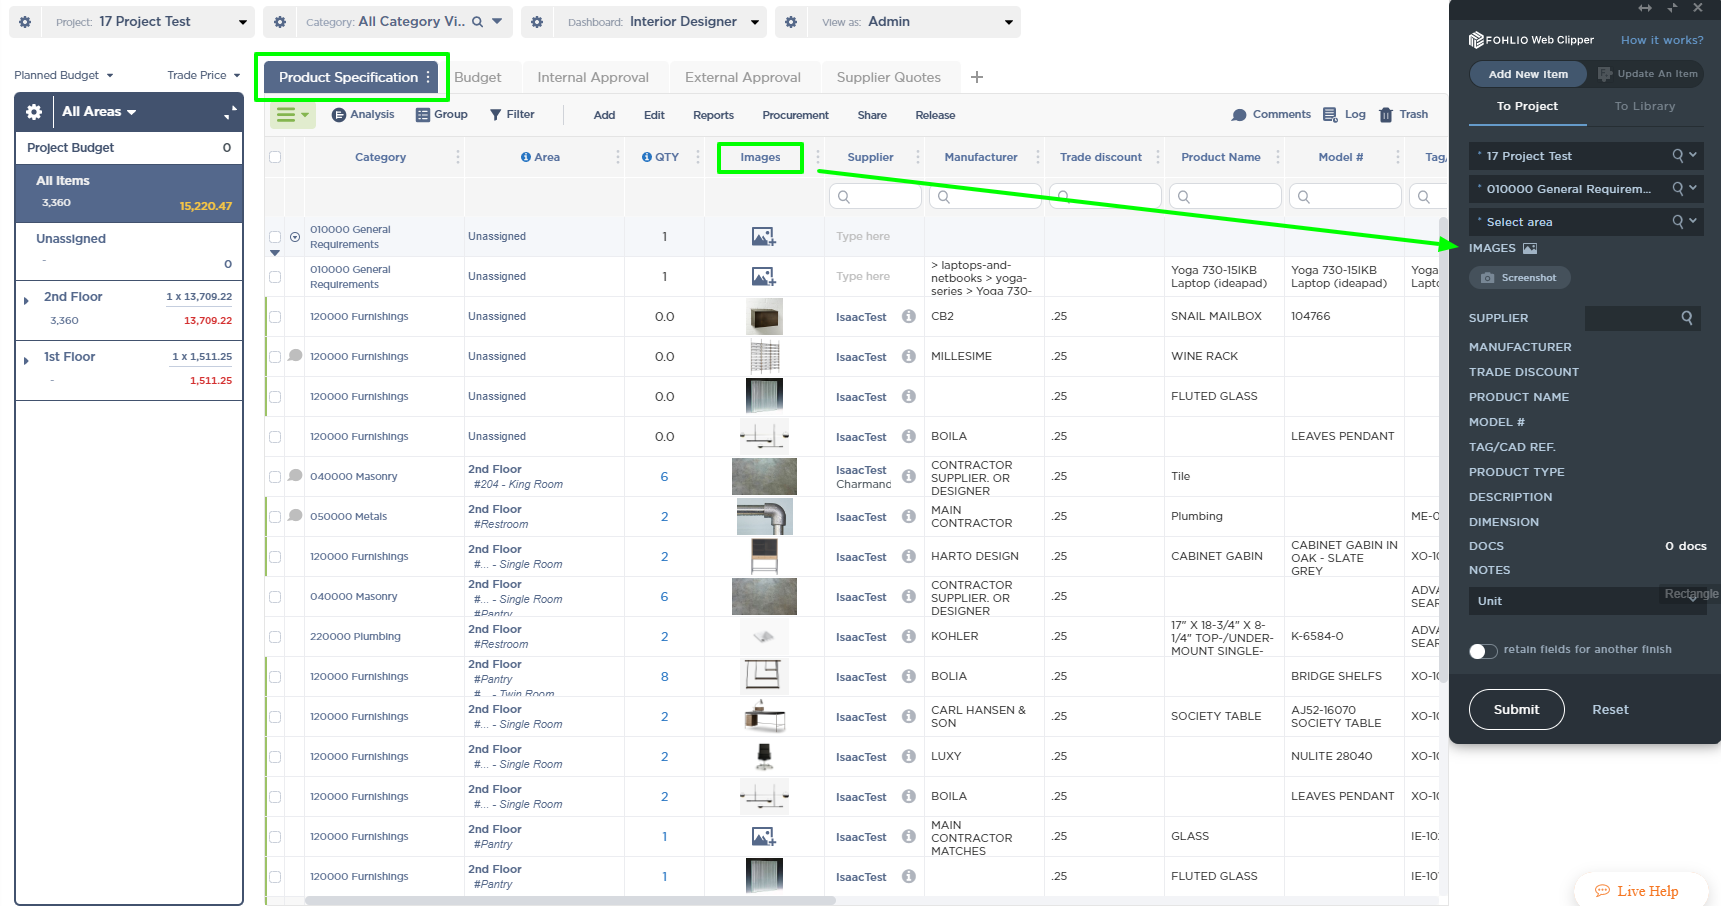
Now we realized we needed to add the Images from the website. To get this done, we went back to our Fohlio account and selected the Phase that shows the Images Column, in this example Product Specification.
Now back to the website:
-We clicked on Images, then selected the first Image on the left.
-Clicked on Images again, then selected the second Image, and repeated the step for the third Image. Whether text, image, or doc, the Web Clipper behaves the same way. -Whichever Column is selected, what is clicked on next will be copied inside that Column.
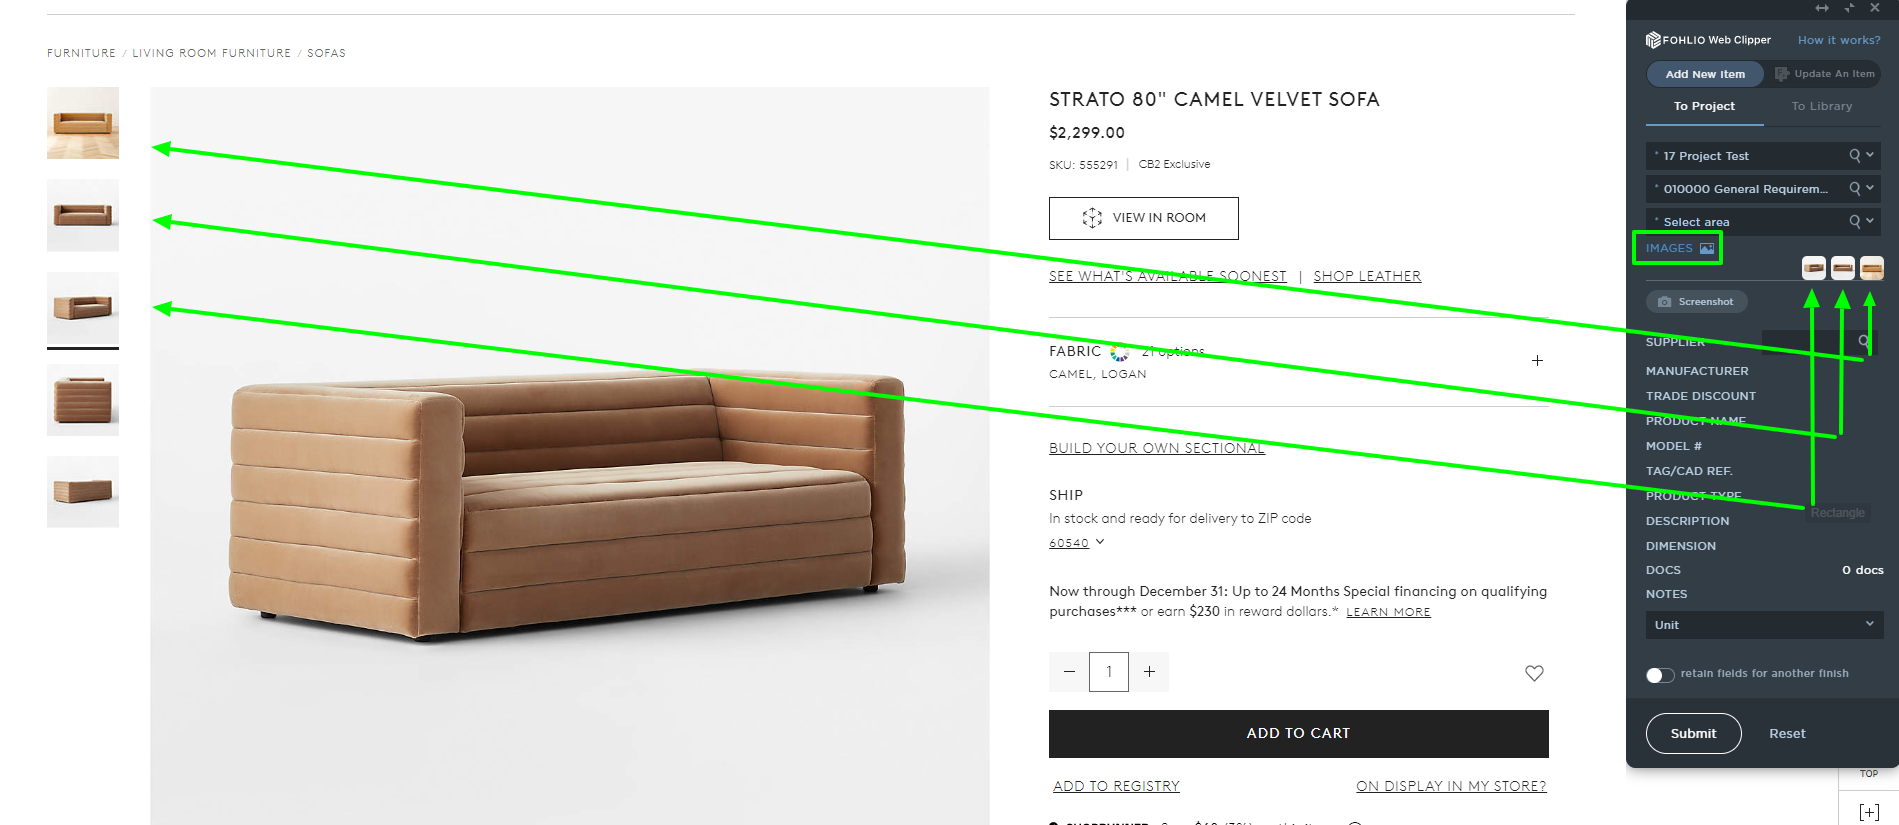
Once all the desired Columns have been filled with the data needed. Hit Submit at the bottom. A message that says "Woohoo, item has been successfully added to project." will appear on your Web Clipper.
A new item with the copied data will now be visible inside your Dashboard.

Being a smart feature, Web Clipper will automatically store the link or URL where the item came from. If you find yourself needing to update an item, all you have to do is click on the arrow shown in the image below, then hover Update via Clipper > Click on the link.
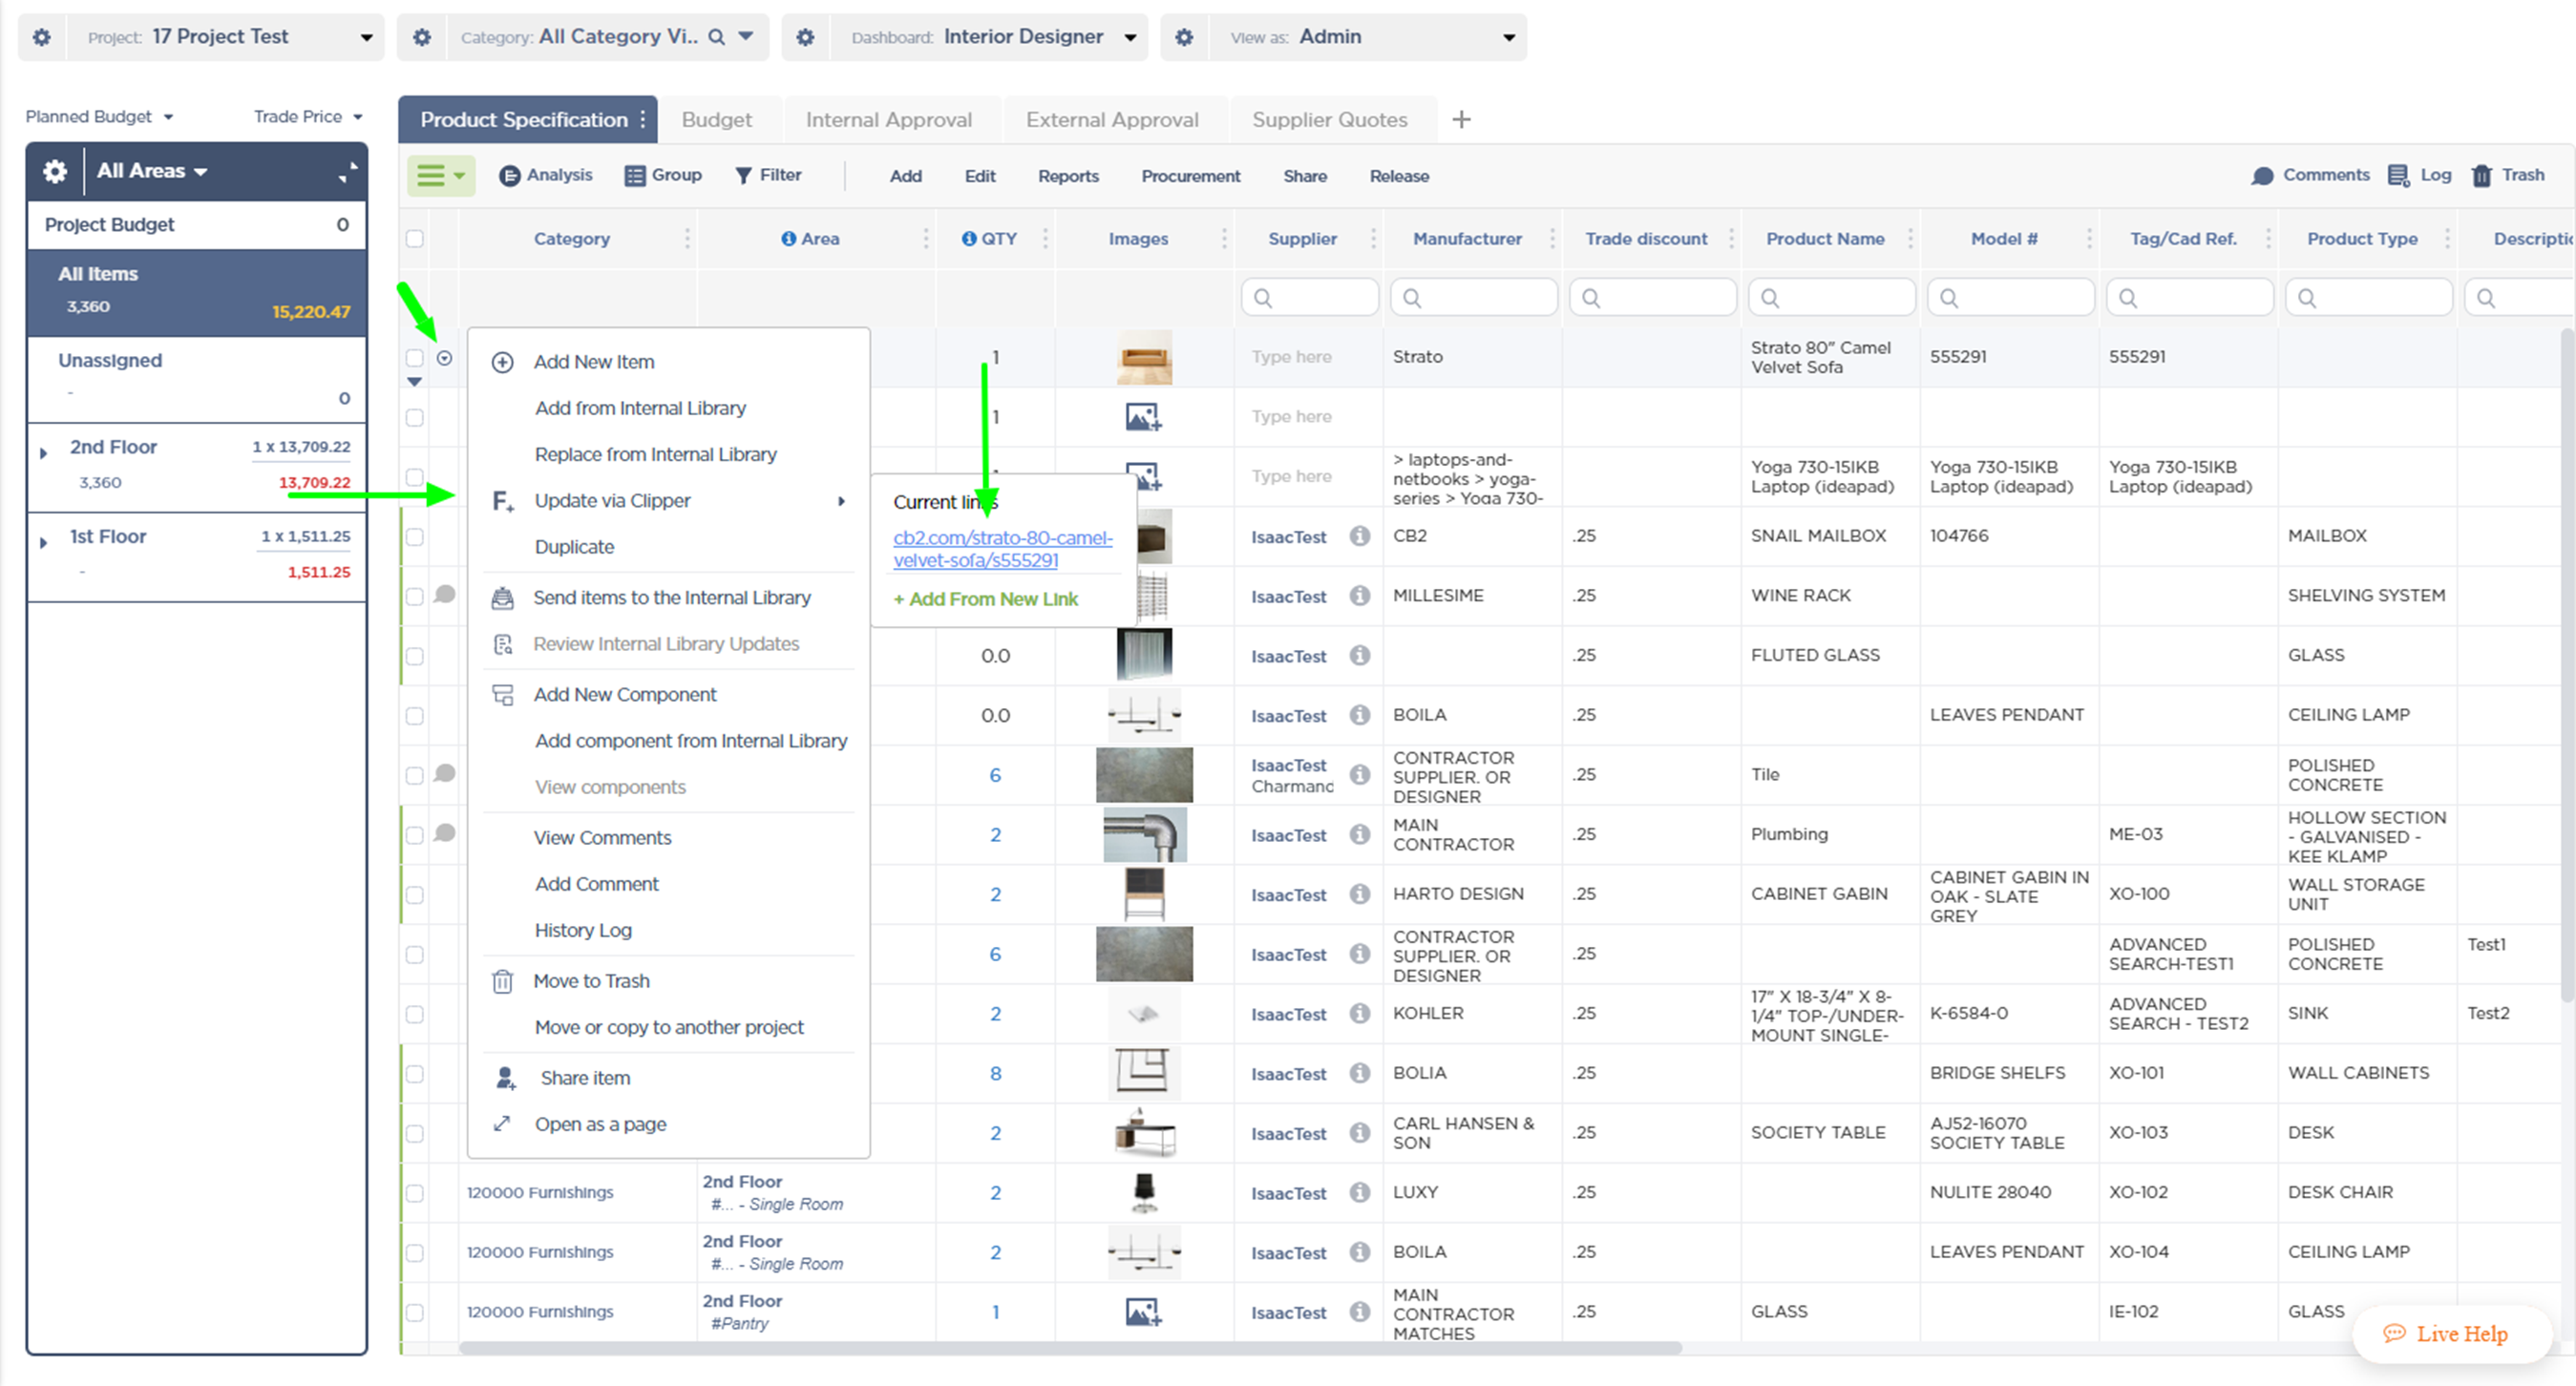
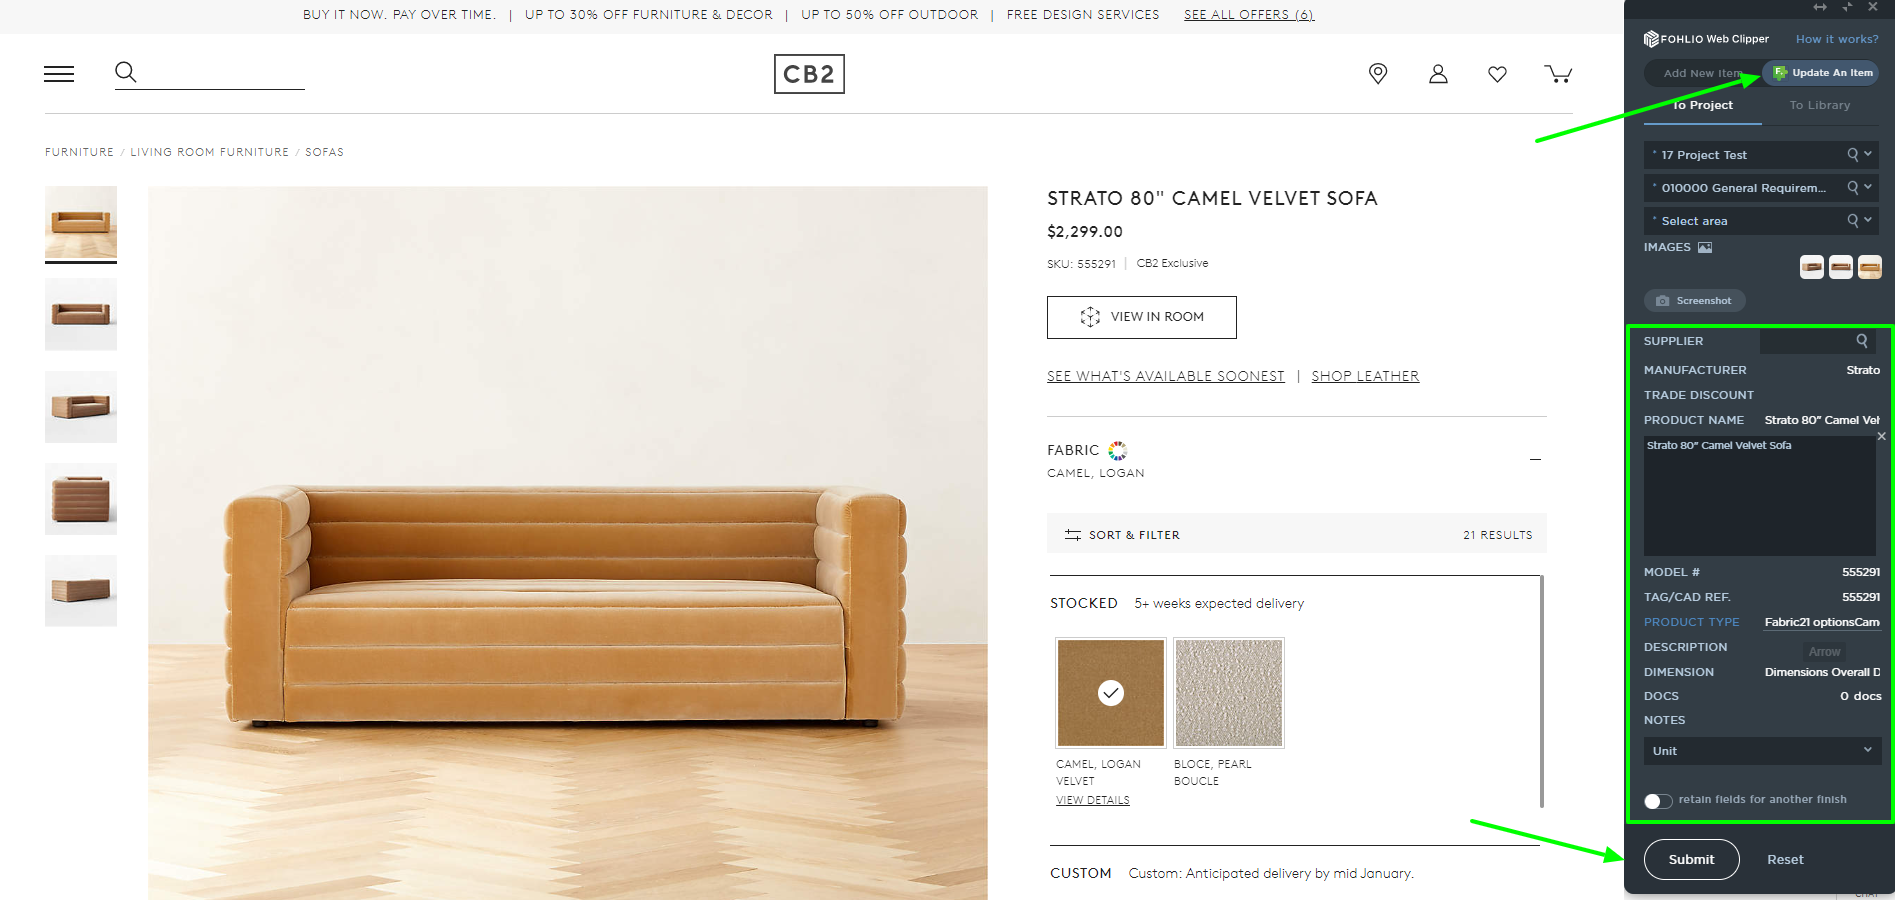
A new tab inside your browser will pop up and redirect you to the site where the item was grabbed from. Here you can select a Column and click on the data from the website, in case it needs to be updated.
Any changes done while updating the item will be saved and shown in the Dashboard after clicking Submit.
We hope this article was helpful, please rate the article, and reach us via Live Help if you still need assistance.
