
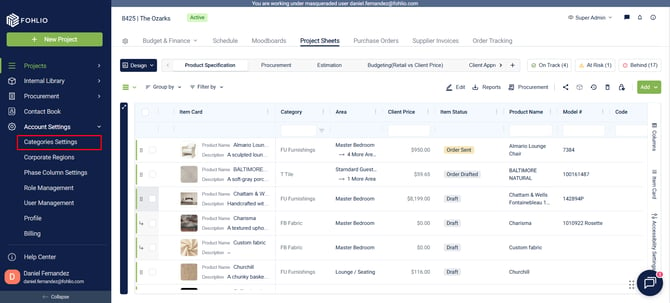
In Fohlio, you can assign items to different Categories to help you better organize your specs and even your budget!
Categories help you organize your product data, specifications, and procurement workflows. Whether you're managing finishes, lighting, or FF&E packages, categories make your data easier to structure, sort, and filter — across all project phases.
To start setting up your Categories follow these steps:
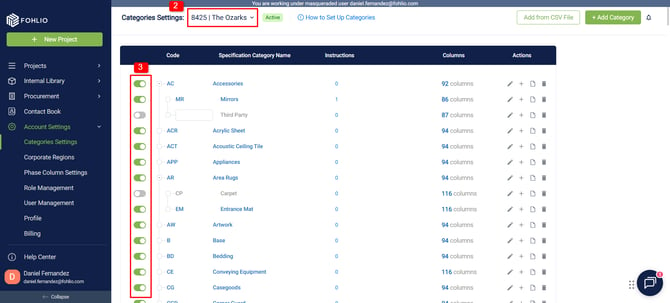
1. Go to the Main Menu - Account Settings > Category Settings
2. In the Category Settings screen you will find all Categories, and on the upper part, you can select which project you are managing categories for.
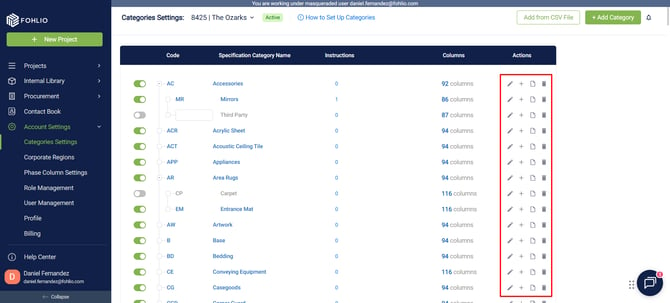
3. Grey categories indicate they are inactive for the selected project; use the toggle on the left to turn them on or off.
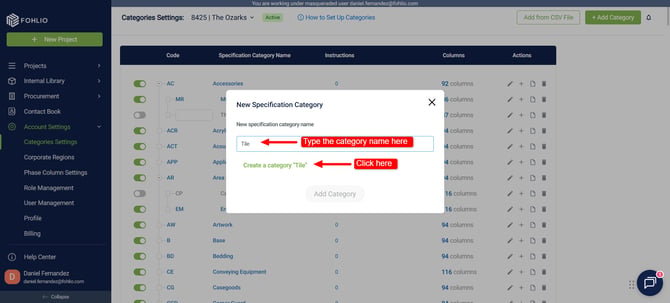
5. You can add a new Category in multiple ways:
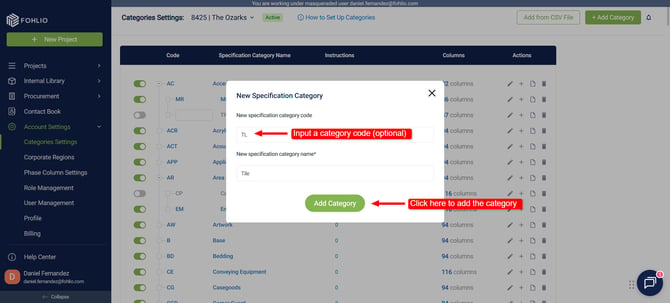
A) Press the +Add Category green button, search for the category you want to add, or type any name and create a new category.
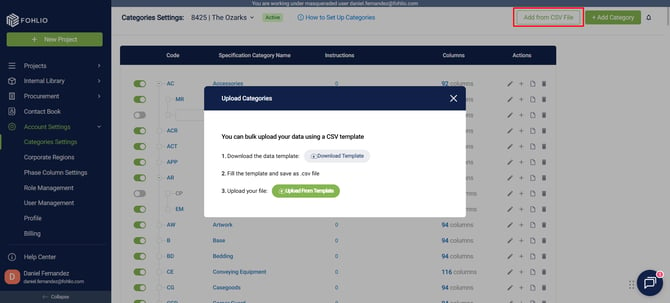
B) Alternatively, you can add categories by importing them from a CSV file. Simply download the provided template, fill in the necessary information, and upload it back into the system.
6.You can view how many columns are active for a specific category and choose which columns should be enabled.
If a column is inactive for a category, it won’t be available for data entry in the project sheet. This ensures that when you filter by category in the project sheet, only the relevant (active) columns are displayed—helping streamline the view and reduce clutter.
7. You can perform several actions on your categories using the four buttons located at the far right of each category row:
- Rename Category – Edit the category’s name or number to keep things consistent.
- Add Subcategory – Create one or more sub-categories nested under the selected category for better structure.
- Open Instructions – Add helpful instructions related to the category, such as installation, painting, or quality checks. These instructions appear on items assigned to that sub-category.
- Remove Category – Delete the category (see important note below).
💡 You can add multiple sub-categories to a single category to support more detailed classification.
Note: When removing a category that contains items assigned to it in at least one project. You'll be prompted to select a category you want to move the items to.
Categories are very important in Fohlio, most of the settings rely on them such as Procurement settings, Reports Settings, Formulas, and more.
How to use categories in Fohlio?
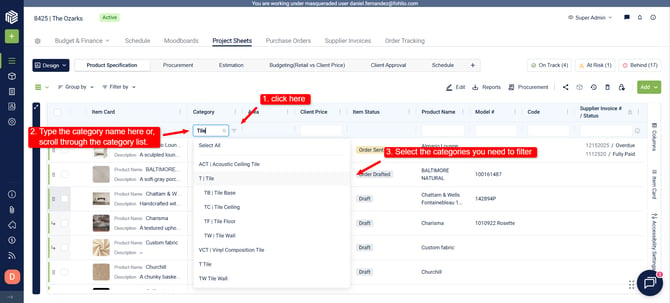
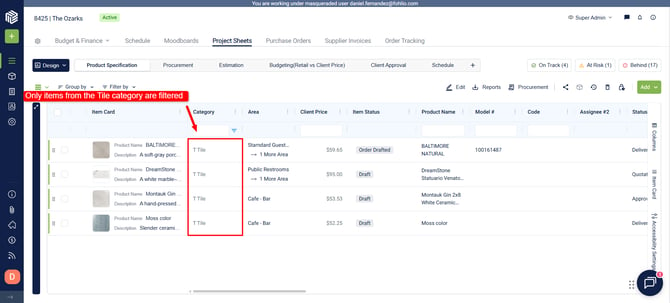
Filter Items
In the Project Sheets, you can filter items by categories, e.g., Tile.
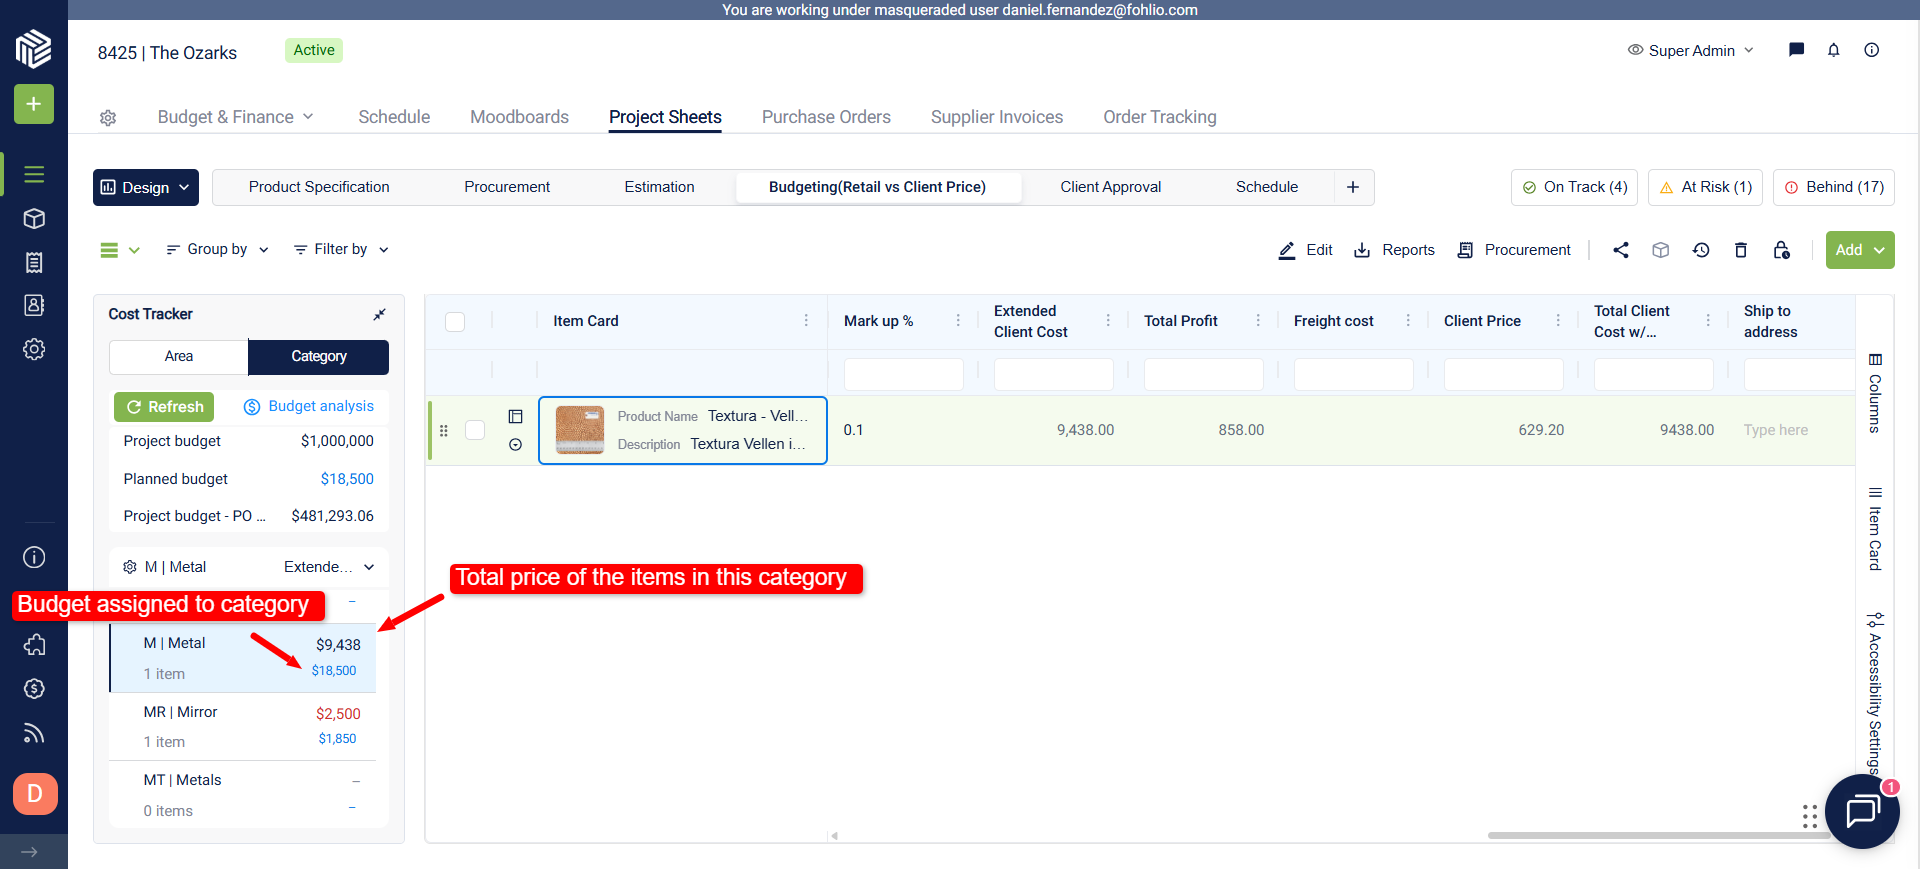
Manage Budget per category.
You can assign a budget to a category.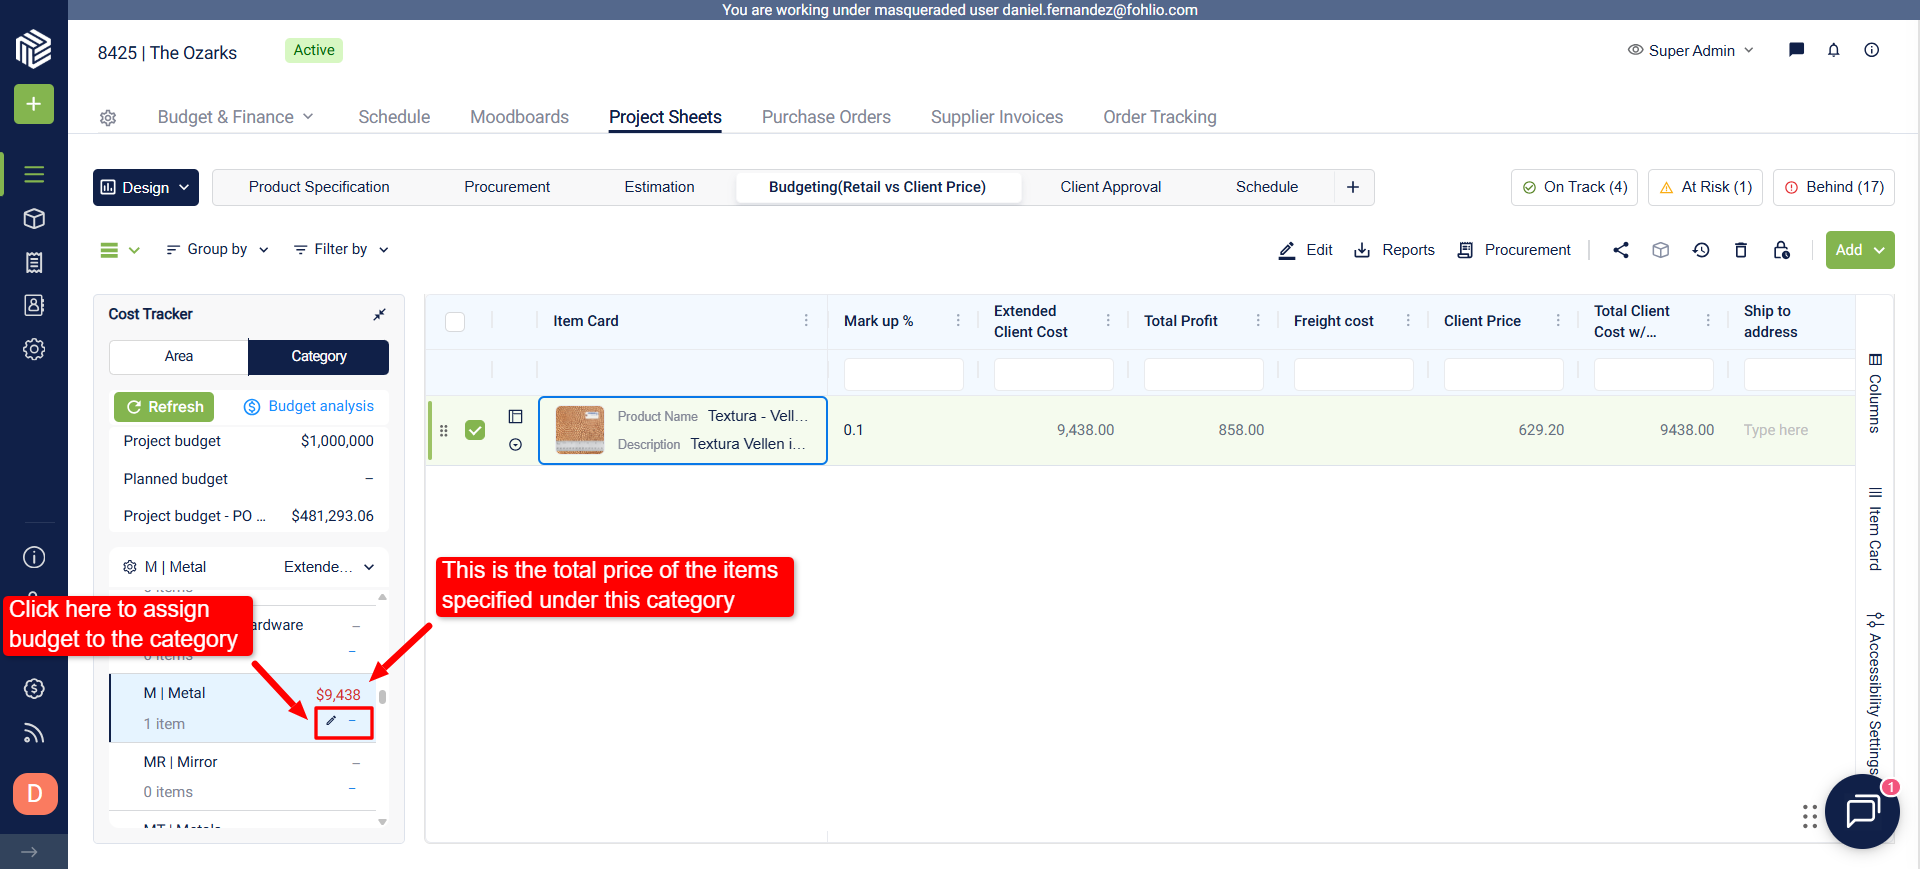
Once the budget is assigned you can compare it to the price of what you have specified under the same category.
💡If the price of the items is less than the budget assigned to the category, numbers will show in black, otherwise they'll show in red.
We hope this article was helpful, please rate the article, and reach us via Live Help if you still need assistance.