
Why Group By Is Useful
Use Group By when you want to organize items based on shared values.
For example, you can group items by:
- Category
- Area
- Purchase Order Status
- Supplier
- Product Status
- Client Approval
- Any other available column
This is helpful when you want to review items by workflow stage, identify what still needs action, or prepare related items for the next step.
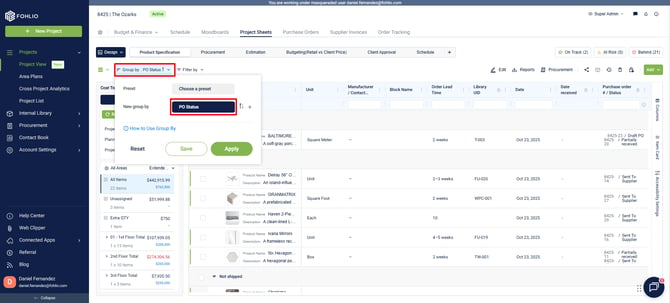
1. Apply a Group By
- Click Group By.
- Select the column you want to group items by.
- Apply the grouping.
For example, if you group by Purchase Order Status, Fohlio will organize your items based on their PO status.
You may see groups such as:
- Sent to Supplier — items included in a Purchase Order that has already been sent to the supplier.
- Not Shipped — items included in a Purchase Order but not shipped yet.
- Fully Received — items that have already been received.
- Unassigned Iems— items that have not been included in a Purchase Order yet.
Note: This is just an example, groups will depend on the column you're using to group by.
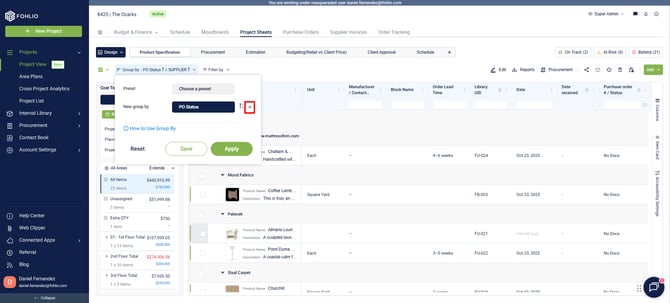
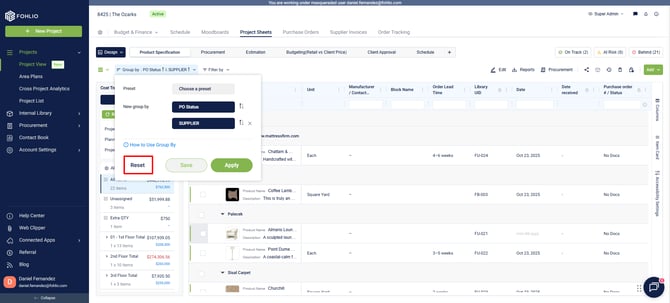
2. Add a Secondary Group By
You can group items by more than one column.
For example, you can first group by Purchase Order Status, then add a second group by Supplier.
This allows you to see:
- Items grouped by PO status first
- Then grouped by supplier inside each PO status group
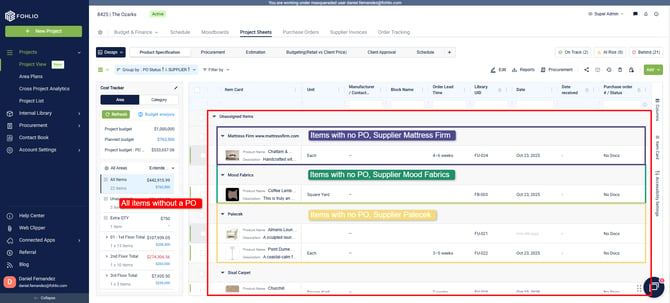
In this case, it is useful if you want to identify items that are not yet in a Purchase Order and then review them by supplier.
Pro tip 💡: Grouping by Purchase Order Status and then Supplier can help you quickly find items that still need a PO and create purchase orders for items from the same supplier.
Group By can help you understand what action needs to happen next.
For example:
- Group by Purchase Order Status.
- Add Supplier as a secondary group.
- Look for the group of items without a Purchase Order.
- Review items under the same supplier.
- Start creating Purchase Orders from that organized view.
This makes it easier to manage procurement because you can quickly see which items are ready to be grouped together.
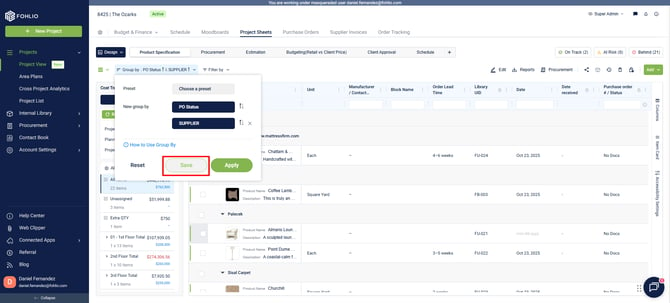
3. Save a Group By Preset
If you use the same grouping often, you can save it as a preset.
- Set up the Group By criteria.
- Click Save.
- Name the preset.
- Save it.
The preset will be available the next time you want to use the same grouping.
For example, you could save a preset that groups items by:
- Purchase Order Status
- Supplier
4. How Group By Presets Work
Group By presets are saved per phase.
This means:
- If you save a preset in the Product Specification phase, it will be available to users who have access to that phase.
- The preset will not automatically appear in a different phase, such as Procurement.
- If you open the same phase in a different project, the preset will still be available.
5. Reset Group By
To remove grouping from your project sheet:
- Open Group By.
- Click Reset.
This removes the active grouping and returns the project sheet to the regular item view.
We hope this article was helpful for you. If you have follow up questions, reach out via Live Help.