
📑 Method 1: From the Project Sheets > Column Selector
- Access the Project Sheets.
- Access the Column Selector by clicking on Columns.
From here you can:
- Select or deselect the columns you want to display in the phase by clicking on the check boxes.
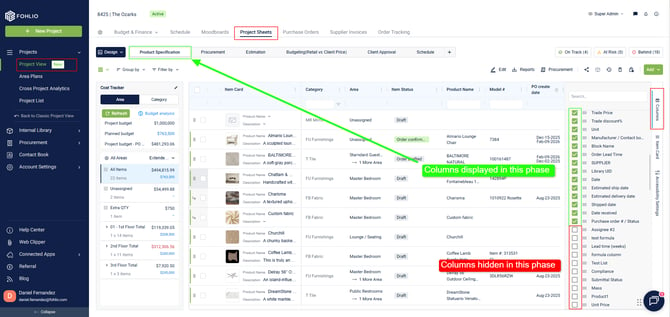
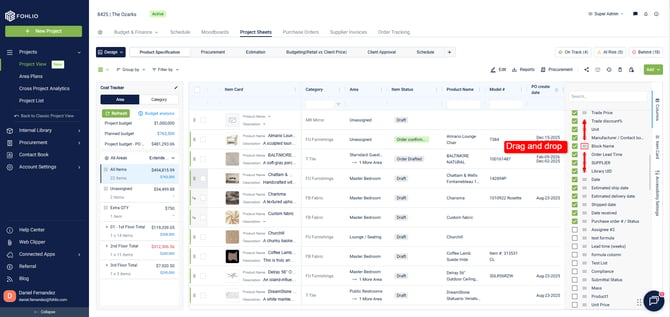
- Rearrange the order of the columns in the phase by dragging and dropping.
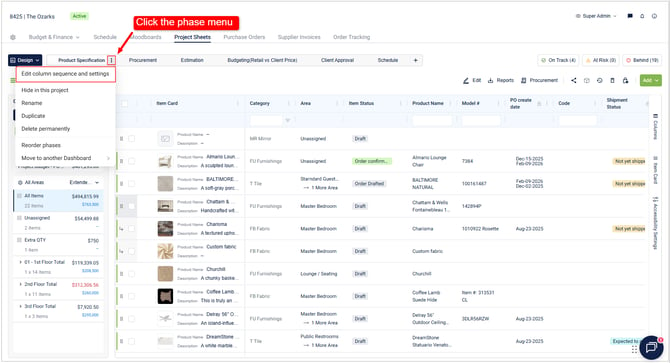
📑 Method 2: From the Project Sheets > Edit column sequence and settings.
-
Access the Column Settings Panel
On your Project Sheet, you can open the Column Settings & Sequence side panel in two ways:-
Hover over the three dots next to any column header and select Column Settings & Sequence.
-
Or, hover over the three dots next to the phase name and select Column Settings & Sequence.
A side panel will appear on the right.
-
-
Choose a Phase to Edit
Use the dropdown at the top of the side panel to choose the phase you want to edit. You’ll now see all columns active for that phase.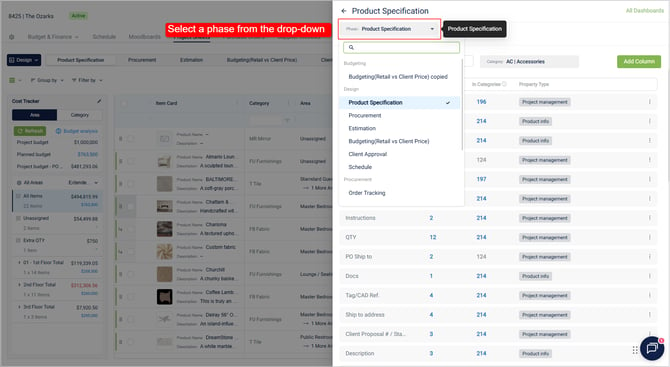
Tip: Use the search bar at the top of the panel to quickly locate a specific column that’s already active in the selected phase.
-
Manage Column Visibility and Order
-
Drag and drop columns to rearrange them.
-
Click the pencil icon to rename a column.
-
Use the pin icon to pin a column (it will always stay in view).
-
Use the eye icon to hide a column from this specific phase.
⚠️ Note: These visibility settings are global across the organization, unless a team member has individually pinned a column to their view—which overrides the shared setup (only visible for them).
-
-
Control Column Visibility by Phase
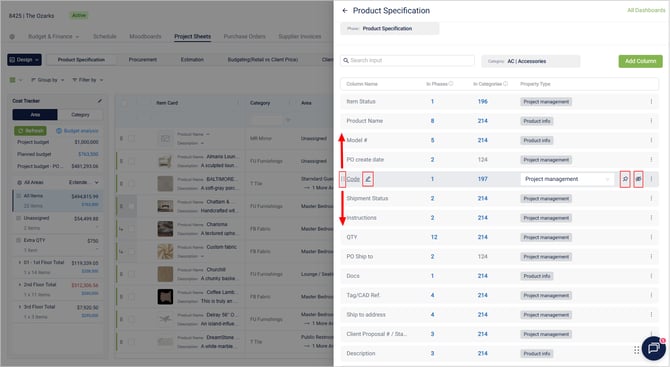
Click the Phases button next to a column to see a list of phases. Use the checkboxes to enable or disable the column’s visibility in each phase.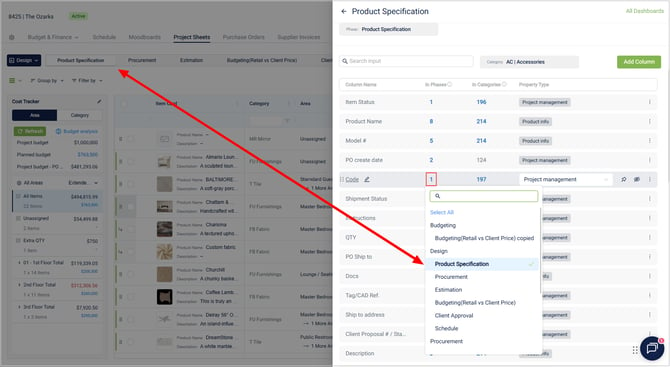
⚠️ Note: Unchecking a phase here will hide it from that phase for everyone on your team.
-
Control Column Visibility by Category
Click the Categories button next to a column to open a dropdown list of available categories. Use the checkboxes to determine in which categories this column will be active.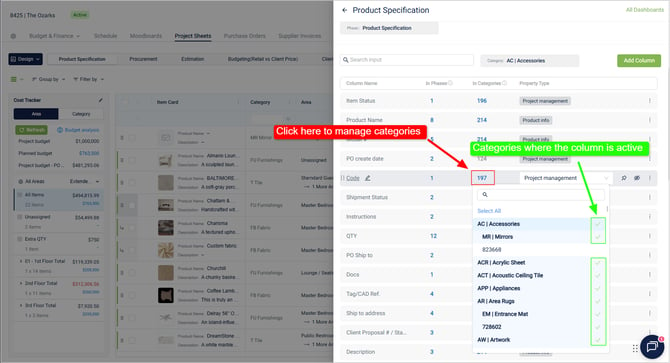
Note: You can look for a specific column already added to your current phase you want to manage using the search bar. - Add New Columns to Your Project Sheet
-
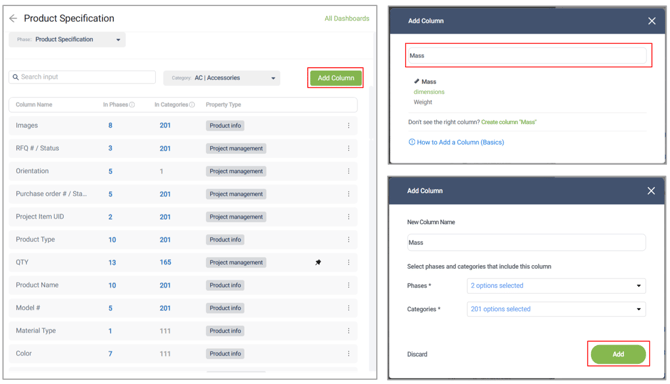
Click Add Column at the bottom of the panel.
-
Search for and select the column you want to add.
-
Choose the phases and categories where it should be enabled.
-
Click Add to insert it.
-
💡 Pro Tip: You can also add a column directly from the project sheet by hovering over the column header’s three-dot icon.
-
Choose Insert One Column Left or Insert One Column Right
-
A list of available columns will appear—search for the one you want
-
Confirm to add it to your current view
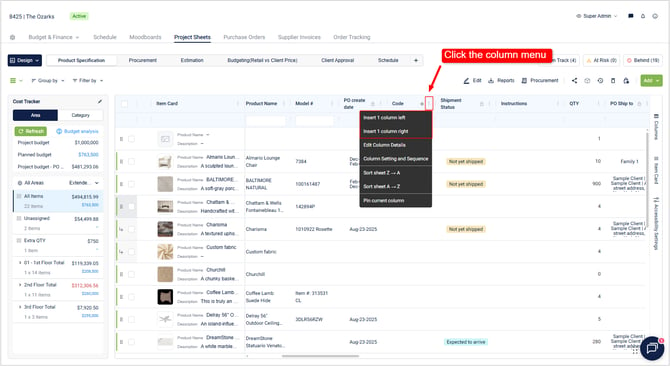
This is a quick way to insert a column without opening the full column settings panel.
This method is ideal for more extensive setup across multiple phases and categories.
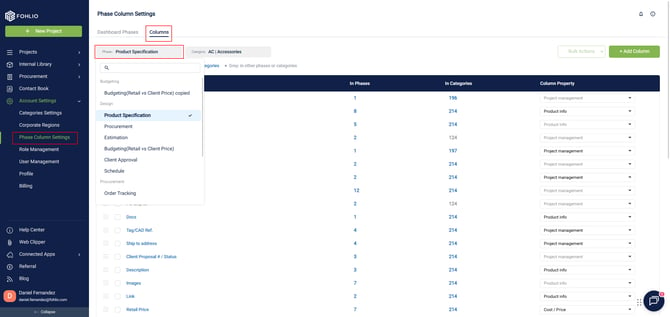
▶️ Step 1: Go to Phase Column Settings
Navigate to the Main Menu > Settings > Phase Column Settings, and select the “Columns” tab.
▶️ Step 2: Choose a Phase
Use the Phase dropdown to select the phase you want to configure. The list of columns will update accordingly.
▶️ Step 3: Reorder, Hide, or Add Columns
-
Drag and drop columns to rearrange their sequence.
-
Click “Add Column” to bring in new ones.
Use the “In Phases” column to manage visibility—just check/uncheck which phases the column should appear in.
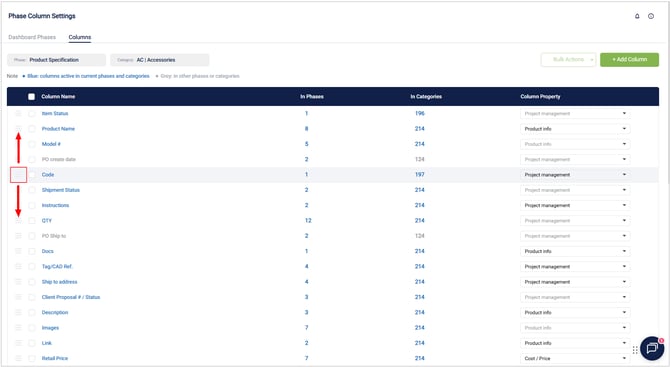
✅ Columns in blue are active in the selected phase and category. Columns in grey are not active in the current phase.
▶️ Step 4: Set Column Categories
Click the “Categories” button to define where this column should be active, just like in Method 1.
▶️ Step 5: Configure Column Properties
In this section, you can also define Column Properties, which affect how columns behave:
-
Cost/Price – For pricing fields like Unit Price or Retail Price
-
Project Management – For data that changes per project (e.g., Assigned Supplier or Markup %)
-
Product Info – For product data stored in the Internal Library
🧠 Note: If you change a column’s property to Product Info after it has already been used in a project, it may unlink items from the Internal Library.
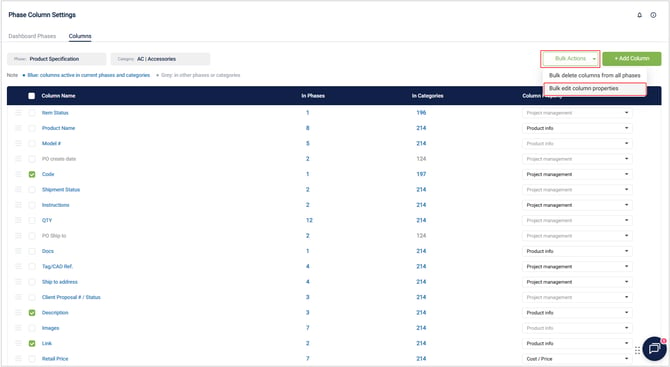
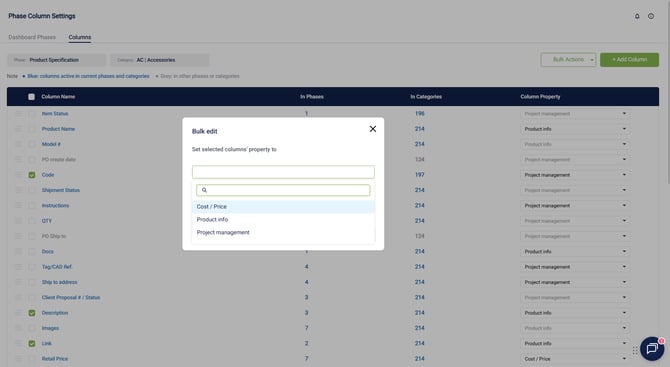
💡 Pro Tip
Check multiple columns and click the Bulk Actions button for quick management:
-
Bulk Delete from All Phases
-
Bulk Edit Column Properties (e.g., switch multiple columns to “Product Info”)
❓ Common Q&A
Q: I hid a column—can I restore it?
A: Yes. Simply re-add the column to the Phase or Dashboard you’re working on. The data will still be there—hiding a column does not erase the information.
Q: Will I lose information if I hide a column?
A: No. Hiding a column from a phase does not delete the data within it. You can make it visible again by re-adding the column to that phase at any time.
Was this helpful?
We hope this article was helpful, please rate the article, and reach us via Live Help if you still need assistance.